Generate Video
Generate a moving clip from an image on the canvas. First choose a still with the framing, character, and style you want. Fix visible problems in the still before animating it.
Before you generate
Choose one clear action: a character turns, a car passes, or smoke drifts. Simple actions are easier to judge and edit.
Say what should stay consistent, such as the character's face, framing, or lighting, as well as what should move.
Video cost depends on the model, duration, and resolution. Check the exact cost on Run before generating; see Model Credit Costs.
Generate a video from an image
- Select the image node on the canvas.
- Choose Video, then Generate Video. From the + menu the same action is Generate Video › Frame to Video. A placeholder node titled Image to Video appears, connected to your image, with a settings panel under it.
- Pick a model in the Model dropdown, or leave Auto to let Flick choose for the task. Models your plan does not include show a lock.
- Set Resolution and Duration. The gear menu next to them holds any further settings the model supports.
- Write a short prompt describing the motion. Type @ to reference another asset on the canvas.
- Check the credit cost shown on the Run button, then click it. The clip appears as a new node connected to the source image. The 1x next to the button is how many clips to make at once.
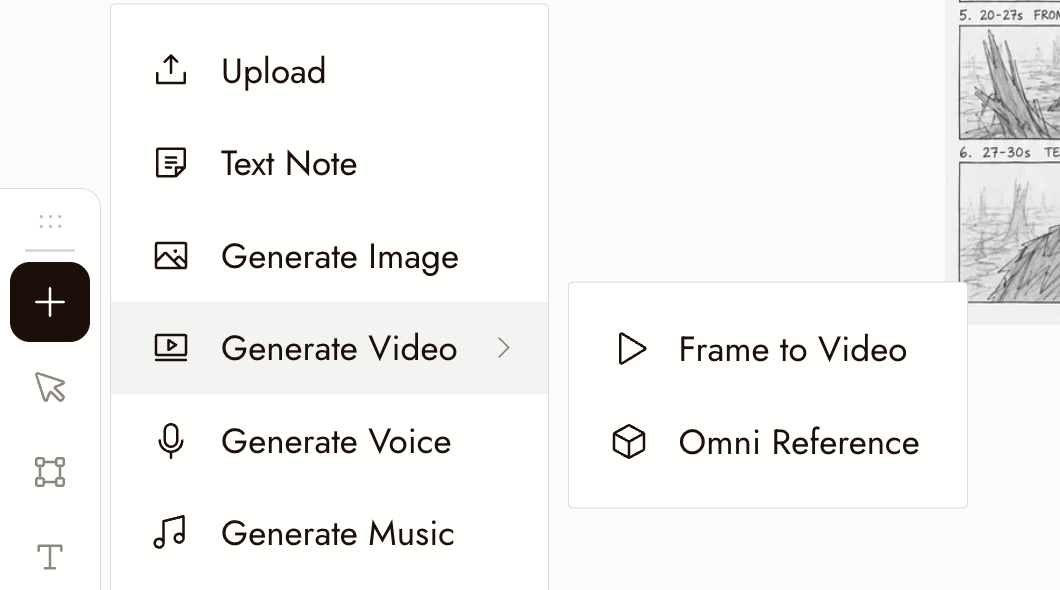
The + menu on the canvas: Generate Video, then Frame to Video or Omni Reference.
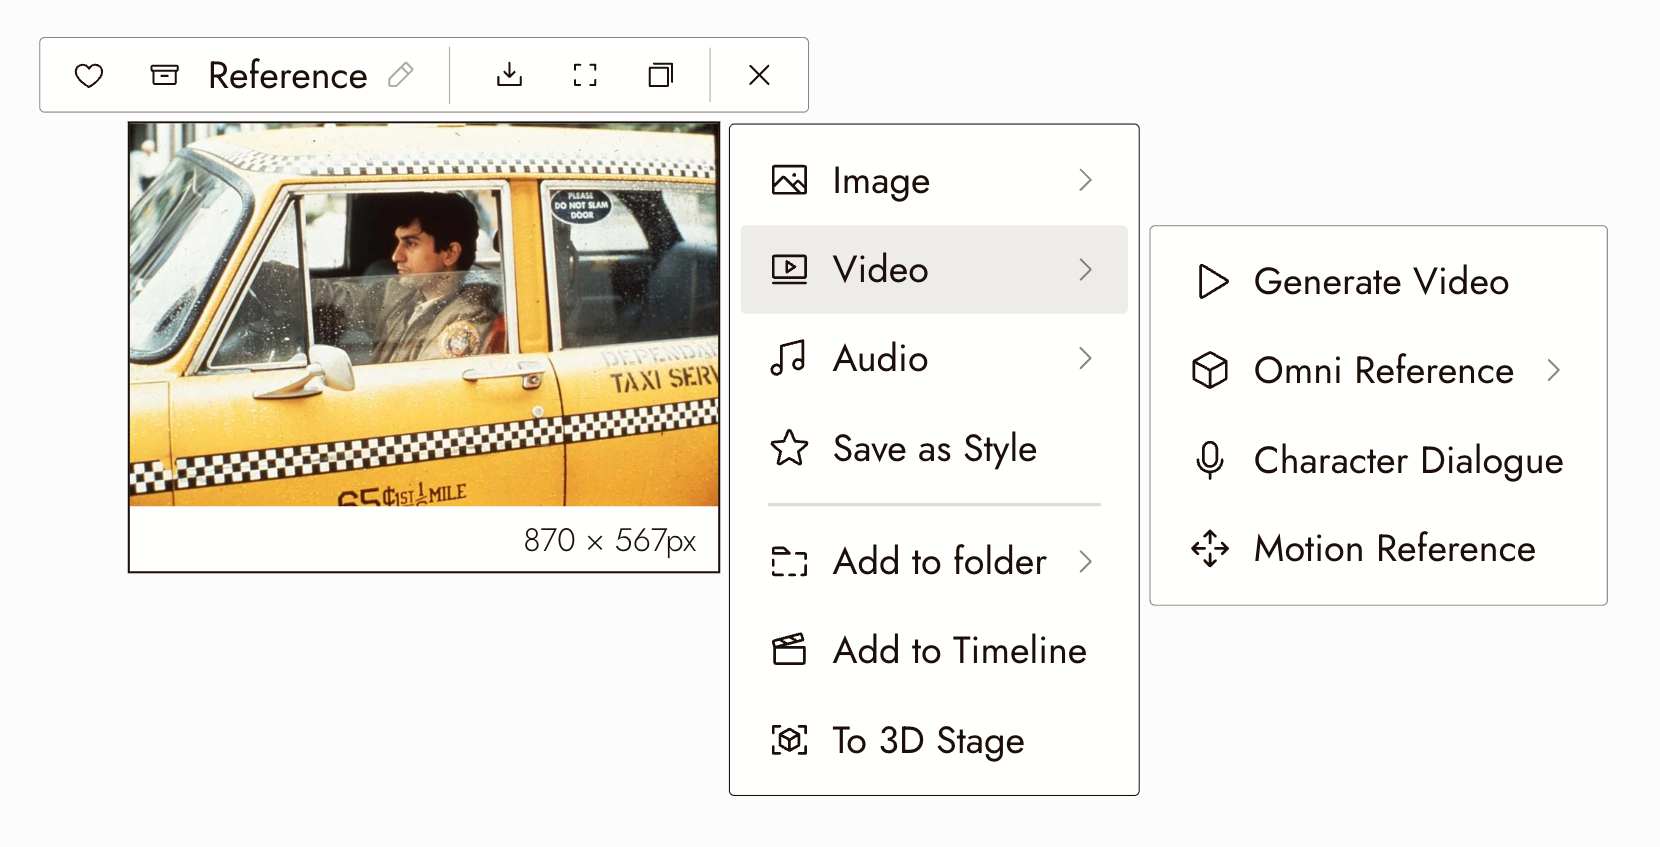
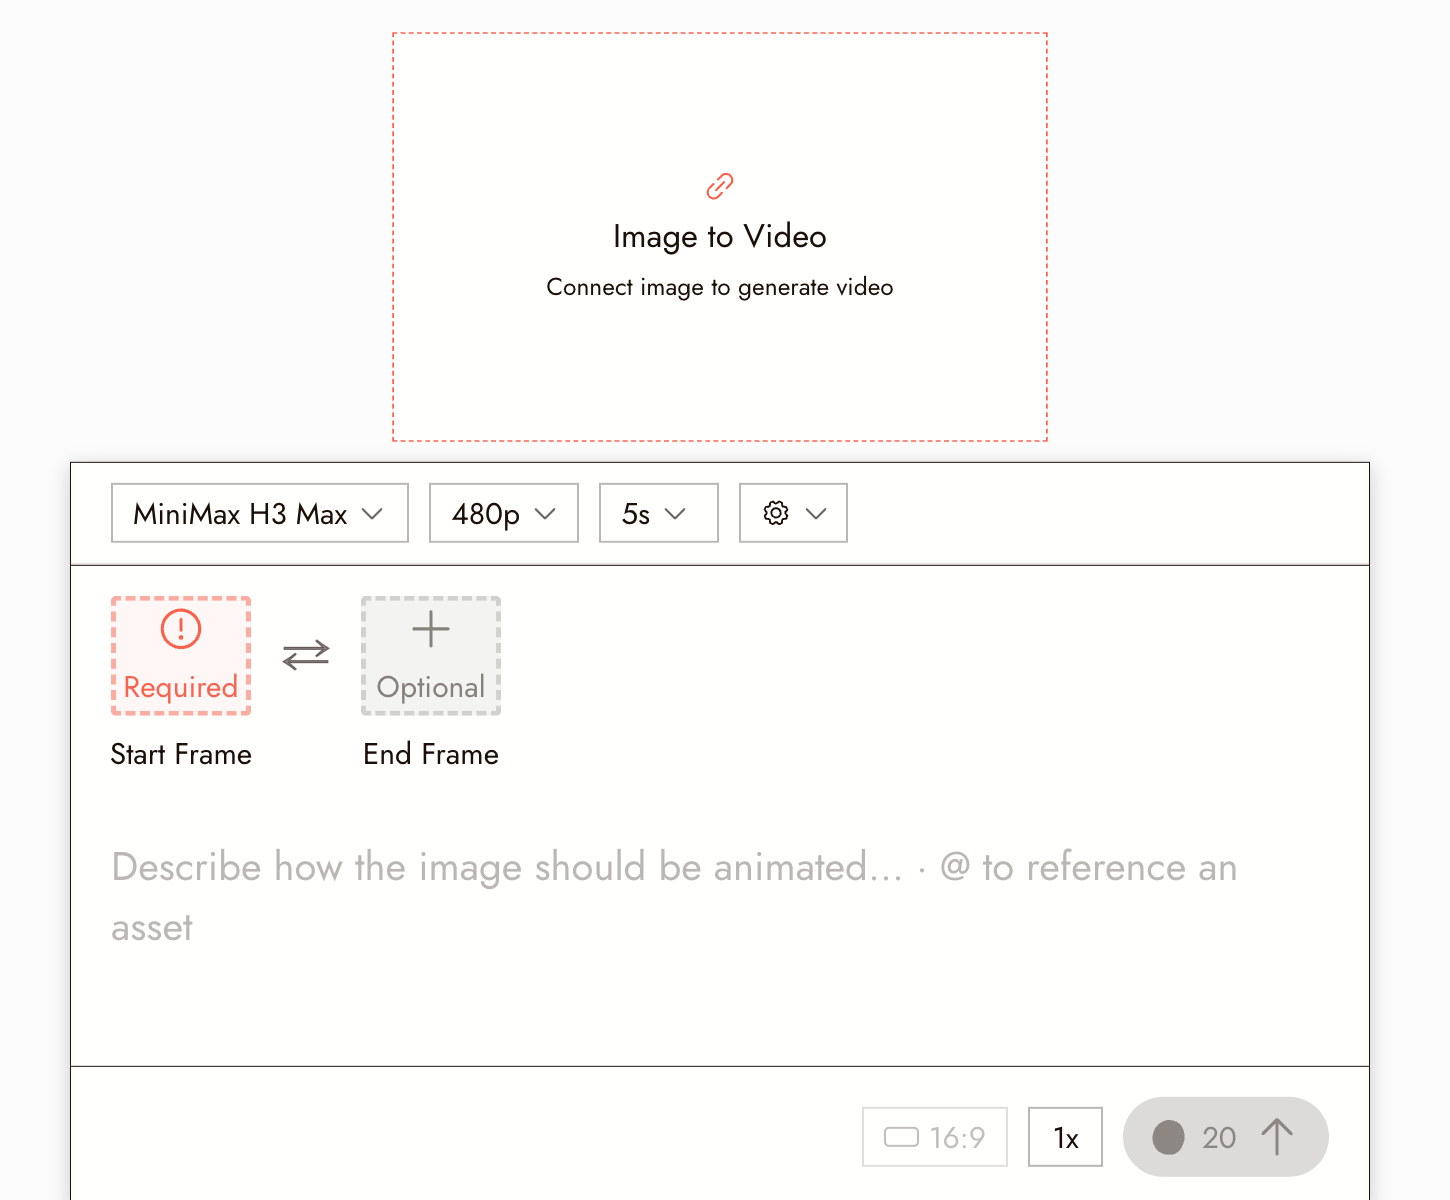
The settings panel under a new Image to Video node, before a start frame is connected. The Run button at the bottom right shows the credit cost for the current settings.
Your image appears as Start Frame. Some models also offer an optional End Frame: an image to guide how the clip finishes, such as the character at a doorway.
Choose a model
Flick offers several video model families, including MiniMax H3 Fast and MiniMax H3 Max, Seedance, Kling, Wan, and Veo. The Model dropdown shows each model's credit range, and a lock on models your plan does not include.
No model suits every shot. Compare the same image, prompt, and duration where supported. Check character identity, readable action, and natural movement.
Record which model and settings worked for each type of shot.
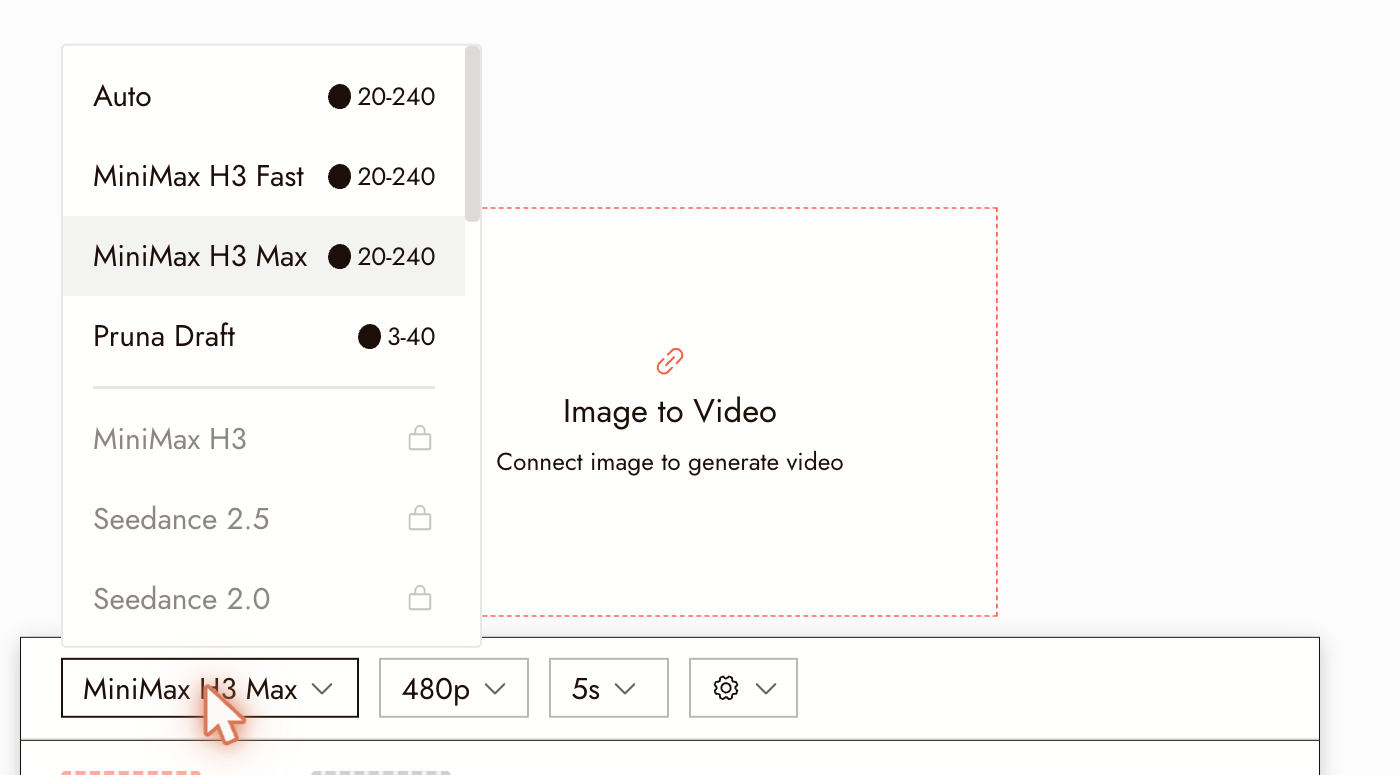
The Model dropdown on a Free account. Models the plan does not include show a lock.
On paid plans the locks disappear and the same list is fully available. The list changes often, so check the picker rather than a doc for what your plan includes today.
Set duration, resolution, and aspect ratio
- Duration. Shorter clips are cheaper and usually more stable. For a first test, use the shortest option that still shows the whole action.
- Resolution. Higher resolution costs more and does not fix a soft or noisy source. Test at a modest resolution first. If you regenerate at a higher resolution, review the new take; it may differ.
- Aspect ratio. Some models follow the project's aspect ratio; others follow the source image, and the panel says so in orange with the exact size it will generate. If the still is not the shape your film needs, fix the still first.
The options offered vary by model. If a setting you expect is missing, the selected model does not support it.
Write a motion prompt
Describe the motion, not the whole scene. The starting image already shows the scene.
Say what moves and how: "she turns her head slowly toward the window." Say what the camera does, if anything: "slow push in," "static camera." Say what must not change: "keep the lighting and the framing."
Avoid long action lists and vague mood words. "Slow handheld drift, focus on her face" gives clearer direction than "cinematic."
If you are working from a character reference, see Keep a character consistent across three shots for how to describe a person without contradicting the reference.
Other ways to make a video
Choose a different video action when the shot needs more than a start frame:
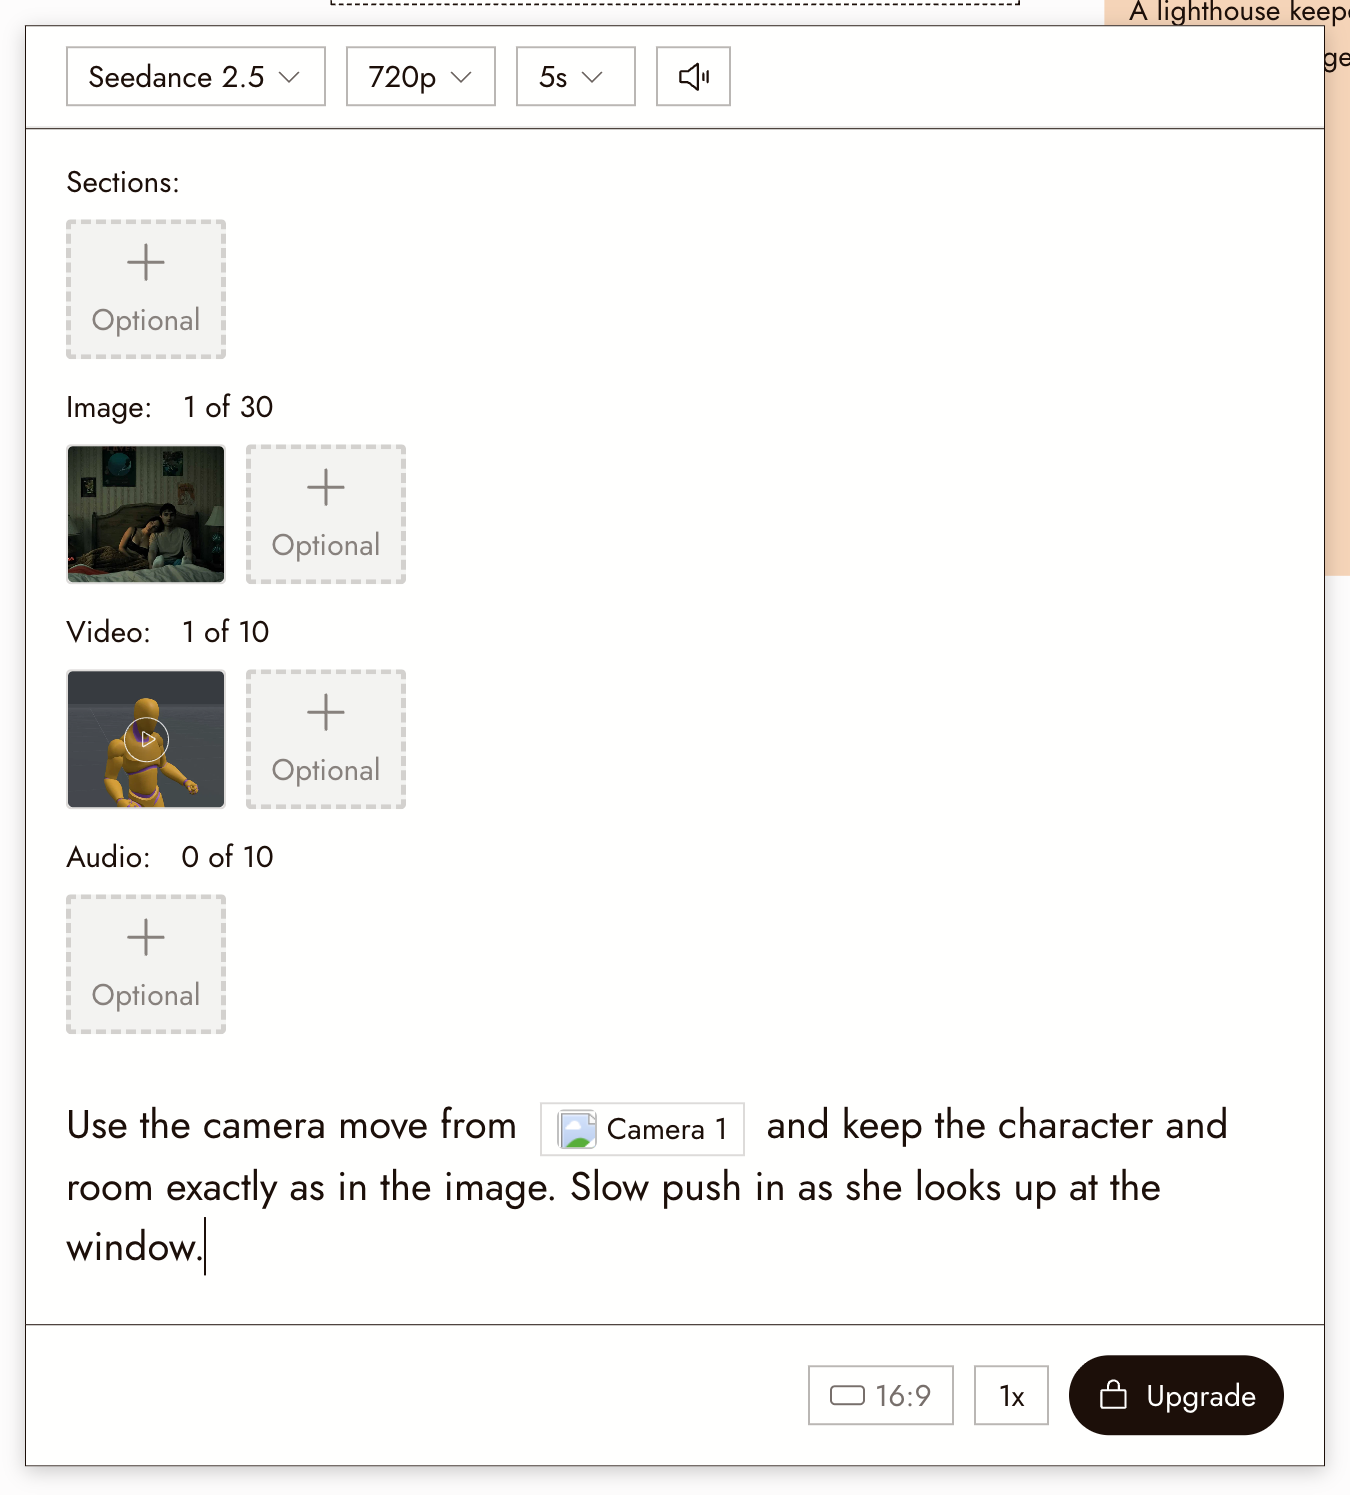
- Omni Reference. Attach reference images, videos, and audio to guide identity, camera movement, or motion. The panel has slots for Sections, Image, Video, and Audio; mention an attached asset in the prompt with @. Useful when a prompt alone will not give you the camera move you want. A recorded 3D Stage take can serve as the video reference; see 3D stage export.
- Motion Reference. Use an image and a motion video to guide a new clip.
- Character Dialogue. Generate a talking clip from an image and an audio track. See Voice Consistency for creating the voice.
- Edit Video transforms an existing clip with AI. Video Upscale is a separate resolution action.
Motion Reference
Use Motion Reference to guide your character with a performance video, such as a simple wave. Attach both a Reference Image and a Motion Reference video.
- Select an image or video node, then choose Video › Motion Reference. Check the attached input and add the missing image or motion video.
- Use a clear character image with the head and upper body visible, and a reference video whose movement is easy to follow.
- Choose Model, then check the available Duration and Resolution. Input limits and output duration depend on the model and Character Orientation; a longer duration option does not mean every model accepts a reference video that long.
- In the model settings, choose Character Orientation to follow the image or video, and decide whether to enable Keep Original Sound. Add an optional prompt for extra guidance.
- Check the cost on Run, run the action, and watch the result beside the reference. Check that the gesture reads clearly and the character remains recognizable.
If the reference is rejected, check that model's input requirements before retrying. Try one readable gesture before a complex dance. For a mixture of image, video, and audio guidance, see Omni Reference.
Edit Video
Use Edit Video to change an existing clip with AI, such as replacing a room's appearance. It generates a new video. Use the timeline Video Editor for trimming, speed, volume, and transitions.
- Select a video node and choose Video › Edit Video.
- Attach the clip as Source Video and choose a Model. Check its input format, size, and length limits.
- Write a Prompt naming one change and what should stay, such as “replace the wall with blue tiles; keep the person and camera movement.”
- Review the settings the model offers. Kling O3 Pro has Keep Original Audio; Gemini Omni Flash offers Temperature and describes regenerated audio, so do not assume the source sound will survive every edit.
- Check the cost on Run, run the action, and compare the whole result with the original, including its sound.
Look for the requested change, unwanted changes to faces or motion, and audio differences. If too much changes, narrow the prompt. For timing-only changes, use Speed. Upscale Video is a separate action for increasing resolution.
Review the result
Watch the whole clip before deciding to use it, including the last second. Then check:
- The character still looks like the same person, especially the face.
- The action you asked for is the action that happened.
- Nothing warps, melts, or appears from nowhere.
- The camera movement is what you described, or is still, if you asked for still.
- The clip is usable at the point where you intend to cut.
Keep a take only if it shows the action your scene needs, even if another take looks better.
If something looks wrong
The character's face changes. Shorten the clip, reduce the amount of head movement in the prompt, and check that the source still has a clear, well-lit face.
The motion is wrong or too fast. Describe a single action and add a pace word: "slowly," "gently." If the model ignores it, try a different model with the same prompt.
The image warps or objects drift. Ask for less camera movement, or none. Large camera moves ask the model to invent parts of the scene it cannot see.
Nothing much happens. Name the moving subject explicitly and describe a visible change rather than an intention.
The clip is rejected or fails. Note the message shown in Flick. If the source image or prompt was blocked, adjust it rather than resubmitting the same request.
Next step
Make three clips for three related shots, then arrange them in the timeline. Tell a small story in three shots walks through that process, and Export and download your film covers turning the edit into a file.