Extract Frame
Extract Frame saves a video frame as an image node. Use it to continue a clip, render a 3D Stage frame, or make a reference from footage you own.
Before you start
Choose the last frame to continue a clip, the first frame to render a 3D Stage take, or the clearest frame for a reference.
Steps
- Select the video node on the canvas. Its menu opens beside it.
- If you want a frame from the middle, drag the slider under the picture to it first.
- Choose Image, then Extract Frame, then one of the three buttons: First frame, This frame (the slider position), or Last frame. Flick shows an extracting state, then adds the frame as a new image node connected to the video.
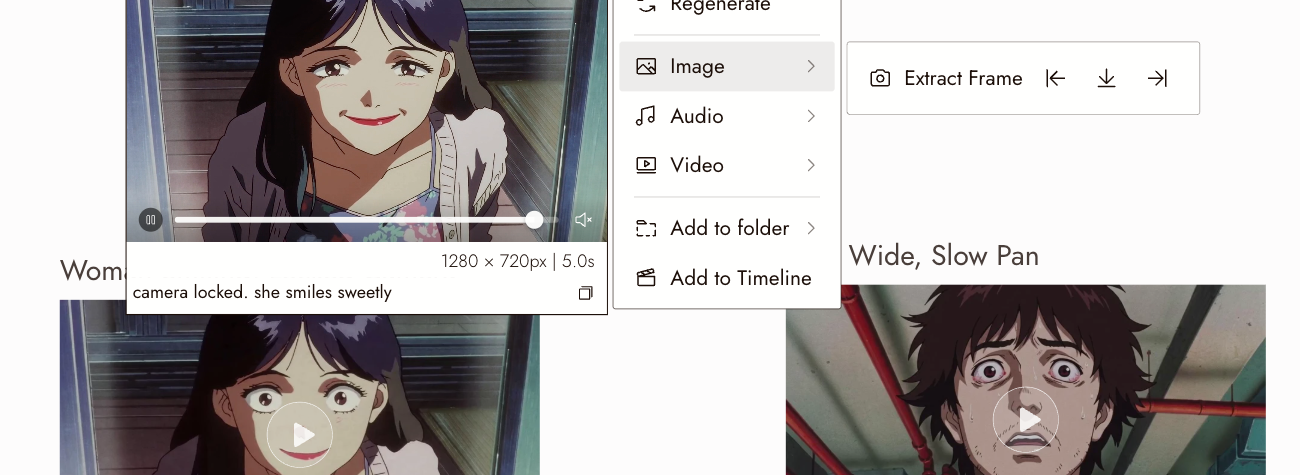
The Extract Frame row in a video node's Image menu, with its First frame, This frame, and Last frame buttons.
What to do with the frame
- Continue a clip. Use the last frame as the next clip's start frame. Check the join; a shared frame does not guarantee a seamless cut.
- Render a 3D Stage take. Extract the first frame, render it with an image model, then use the render as the start frame and the recording as the reference video; see Omni Reference and 3D stage export.
- Make a reference. Use the frame as a character or scene reference for later shots.
Review the result
- The frame is sharp, not a motion-blurred one.
- It is the frame you meant, not the one just before.
If something looks wrong
The extracted frame is blurry. Choose a frame where the subject is still. Motion blur in the source stays in the still.
It is the wrong frame. Move to the exact frame and extract again. Each extraction makes a new node; delete the one you do not want.
I cannot find the control. Select the video node and open Image in the menu beside it. Extract Frame is there, not in the header bar with the download button.
Next
- Omni Reference to use the frame as a start frame with the video as reference.
- 3D stage export for the recording this is most often used with.
- Generate Video to continue a clip from the extracted frame.