3D Stage animation
Animate a character with preset actions, a walking path, live controls, or custom poses. Place the character and camera before you start.
Before you start
Place the character and a camera first; see 3D stage basic and 3D stage camera. Click Rehearse at the top at any time to play the scene and check the movement.
Give the character a track
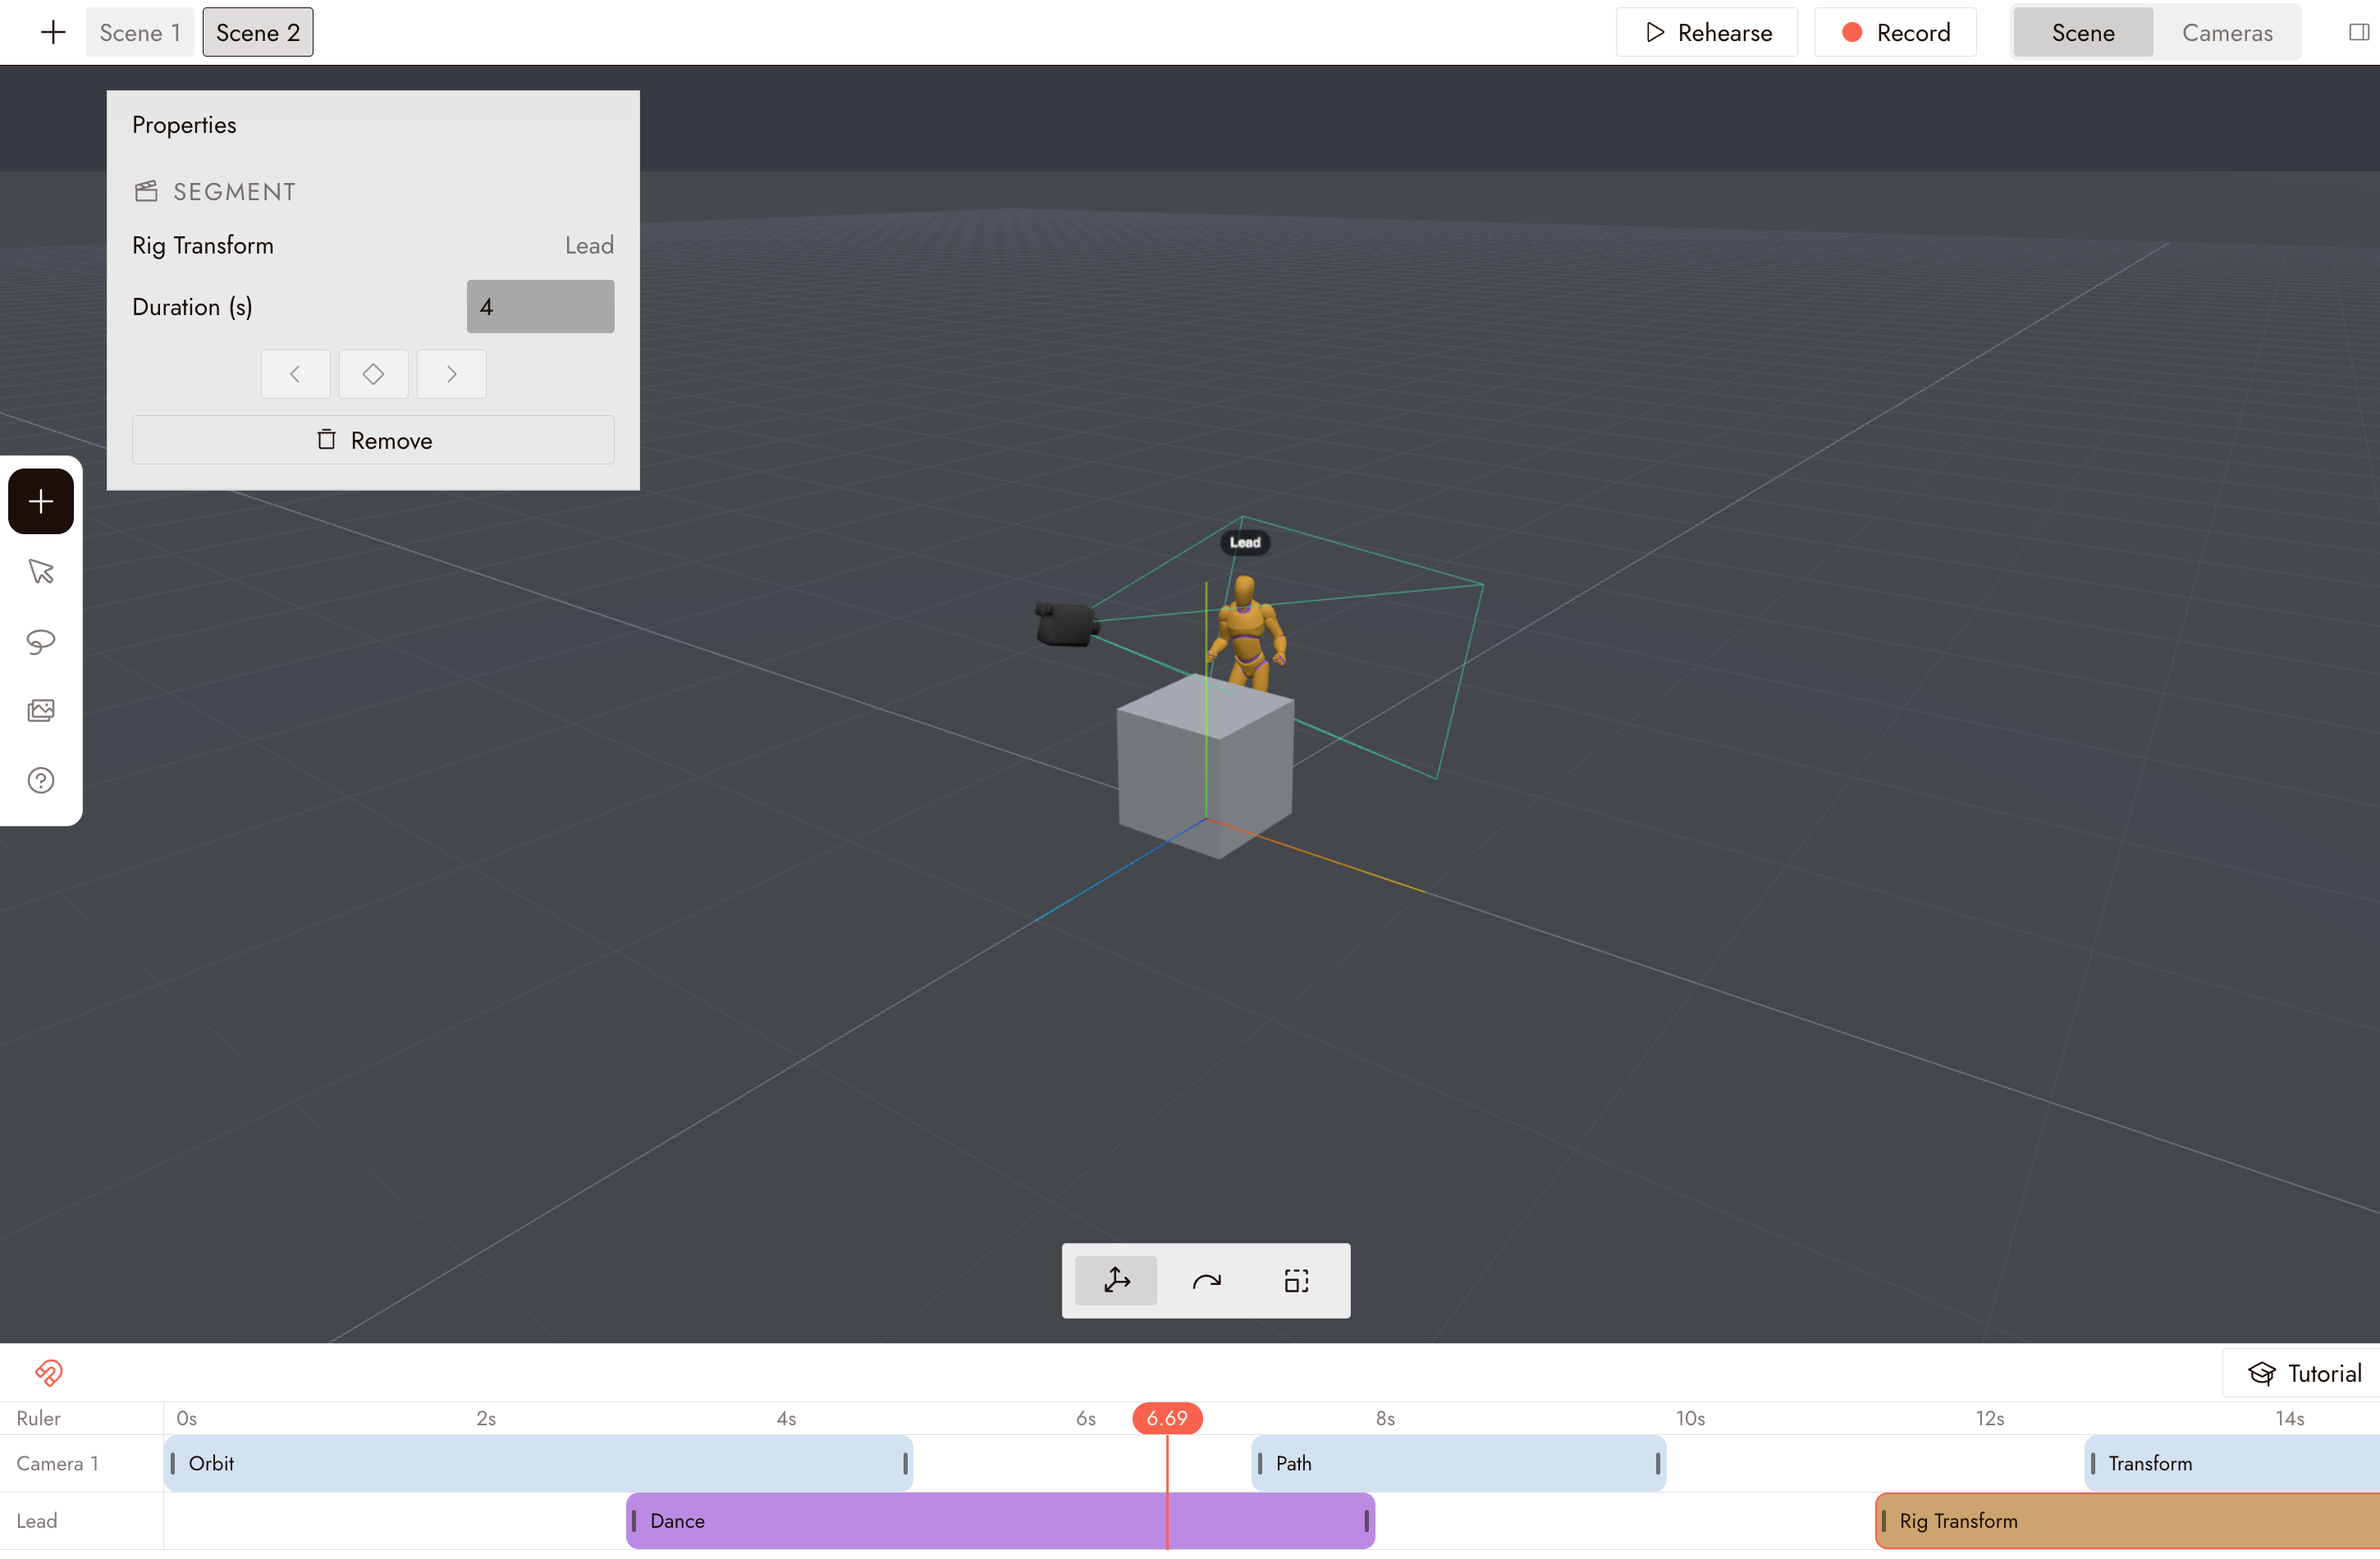
Character actions live on the timeline at the bottom of the stage. Click + under the tracks, choose the character from the list, and a track with its name appears. Click Add action on that track to open the Actions panel on its Human tab.
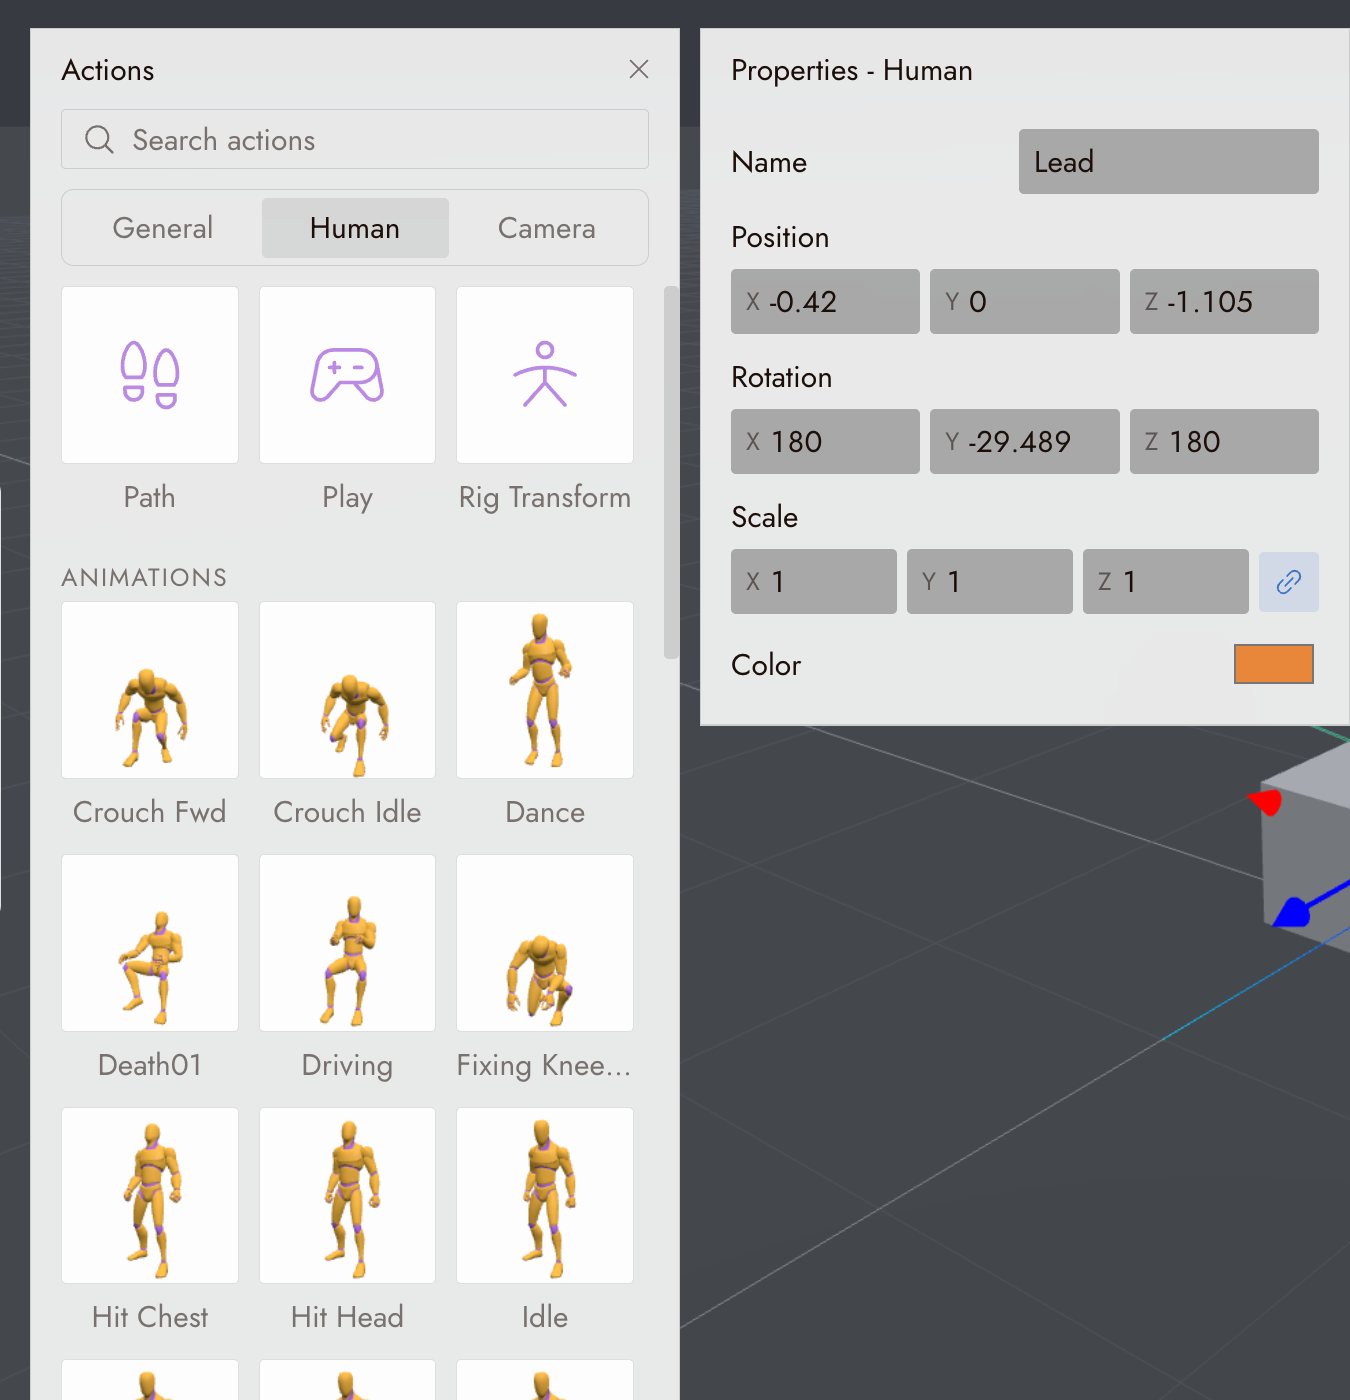
The tab holds Path, Play, and Rig Transform at the top, and a library of preset Animations below them, such as Idle, Dance, Crouch, and Driving.
Animate the character
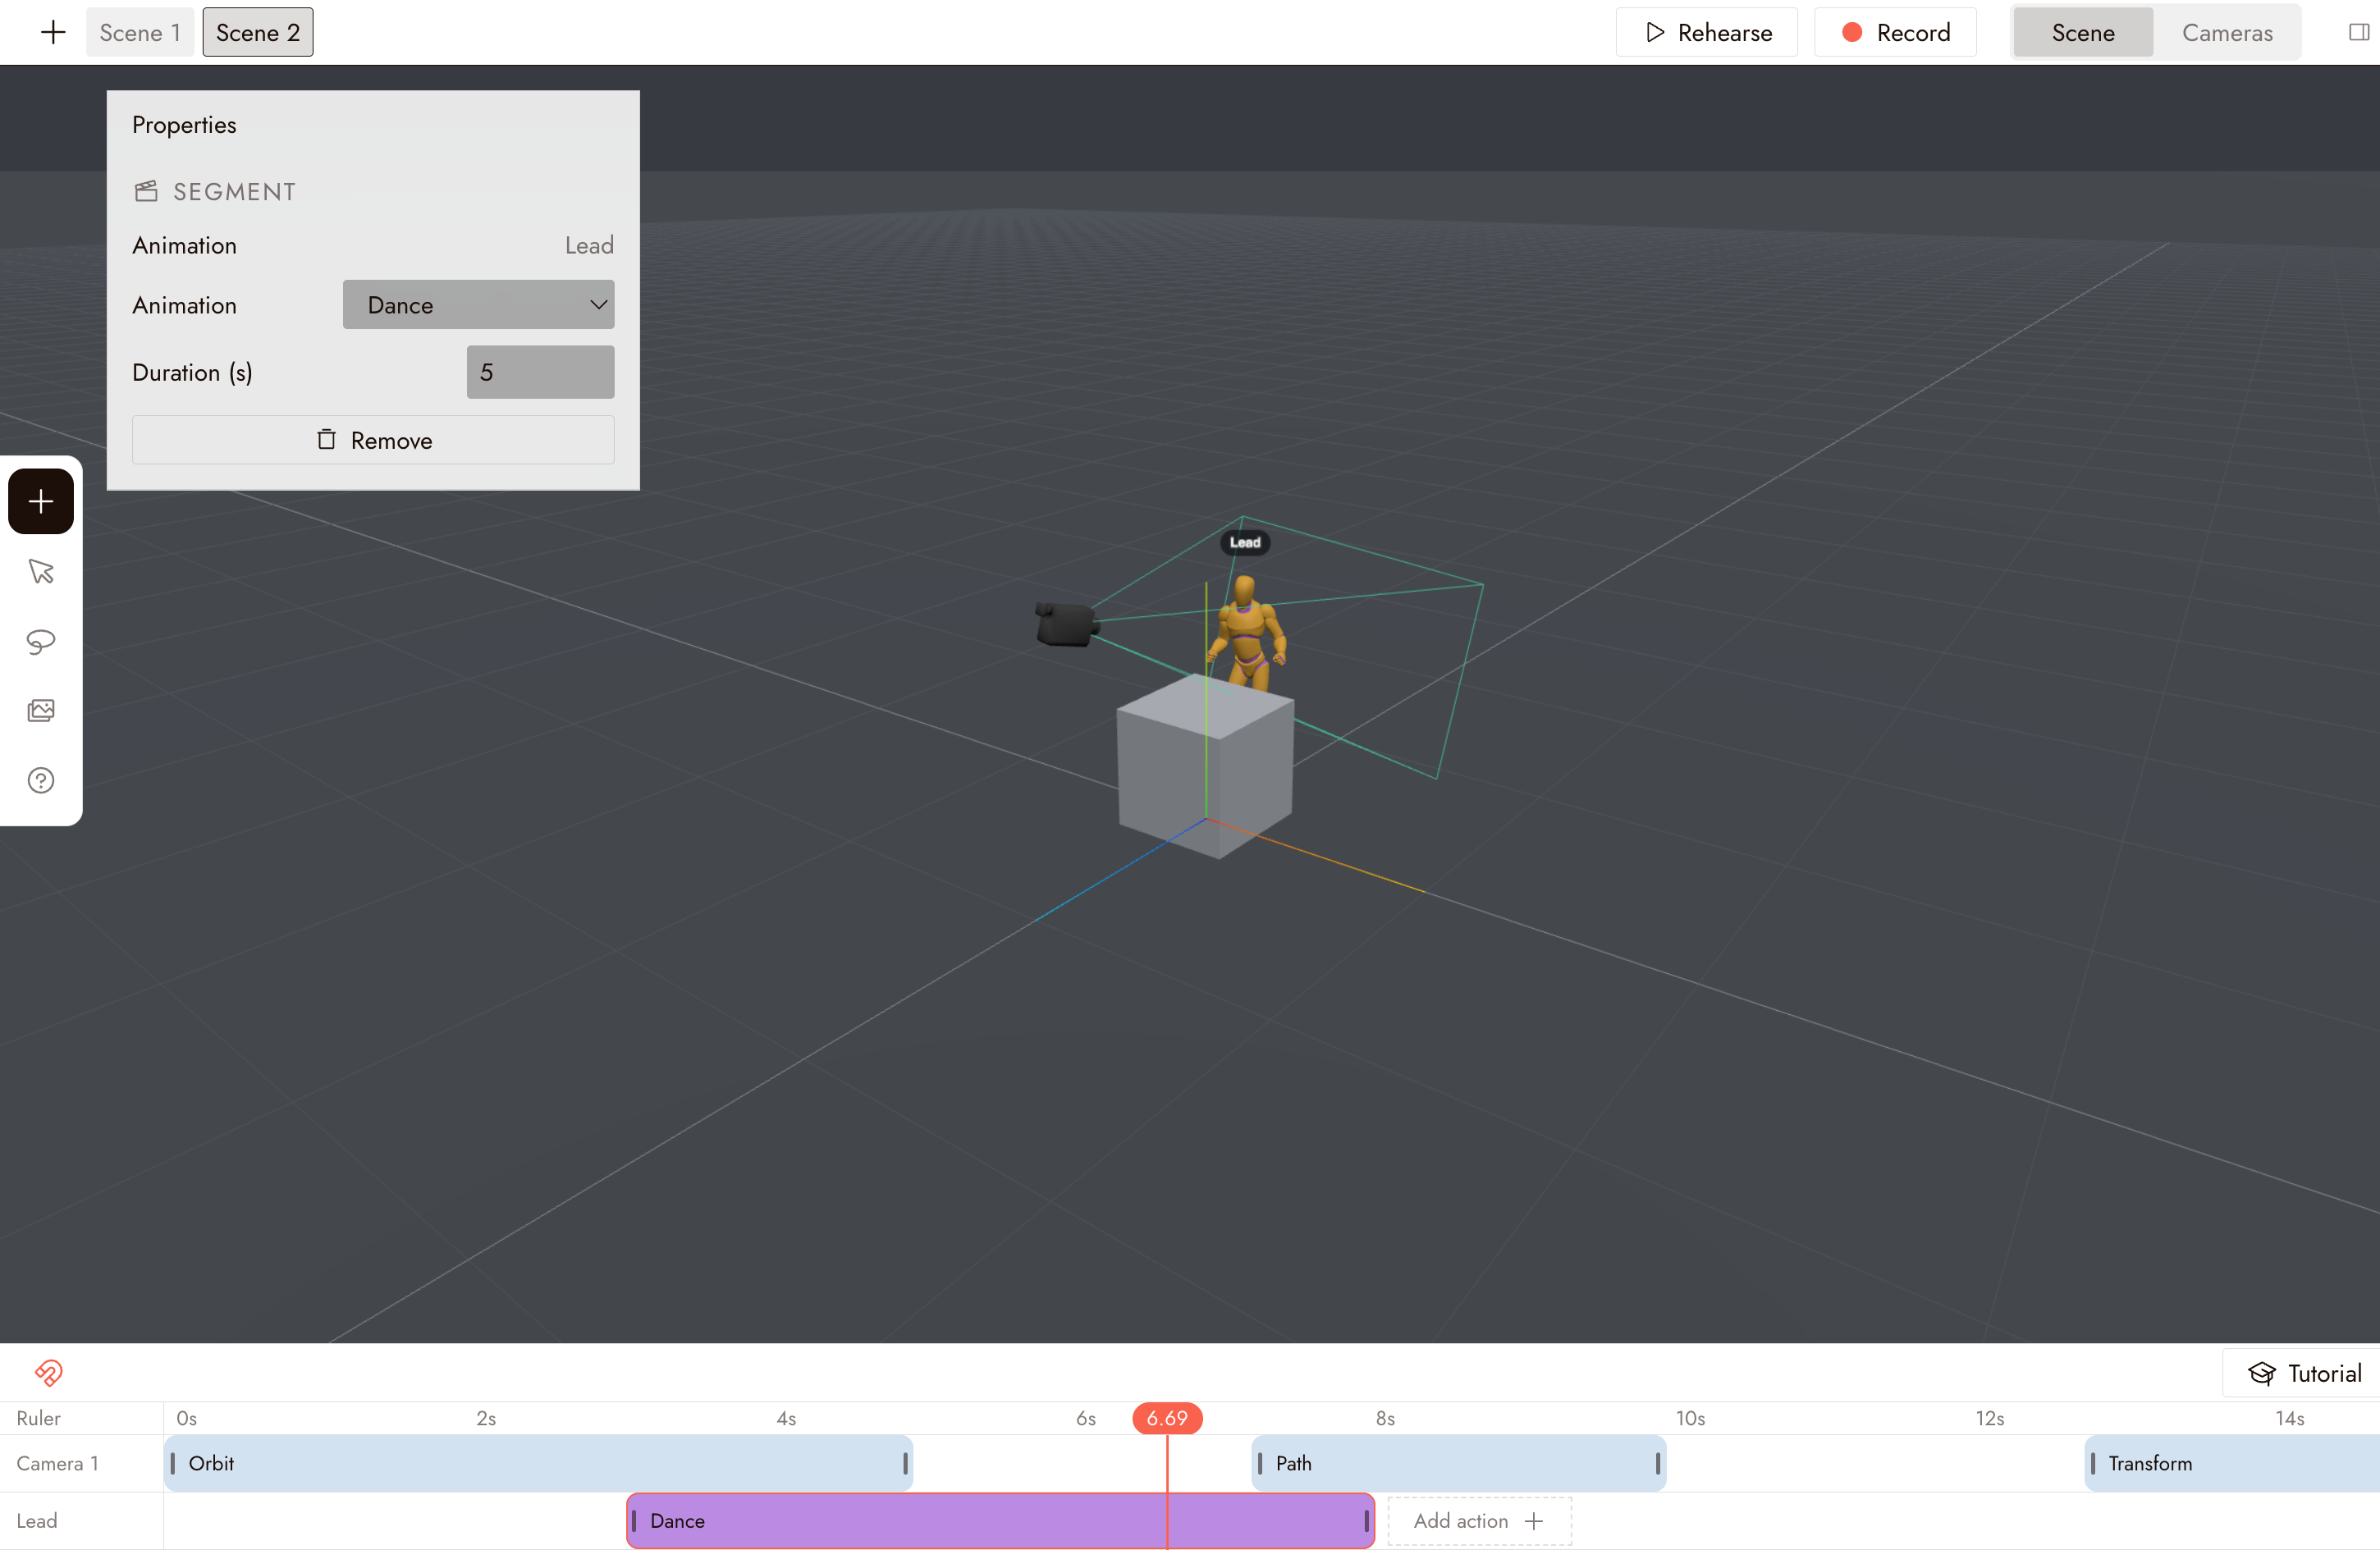
Drag a preset animation onto the character's track. It becomes a segment.
Select the segment. In Properties, change its Duration or switch to another Animation.
Click Rehearse to play the scene and preview how the character moves.
Create a walking path
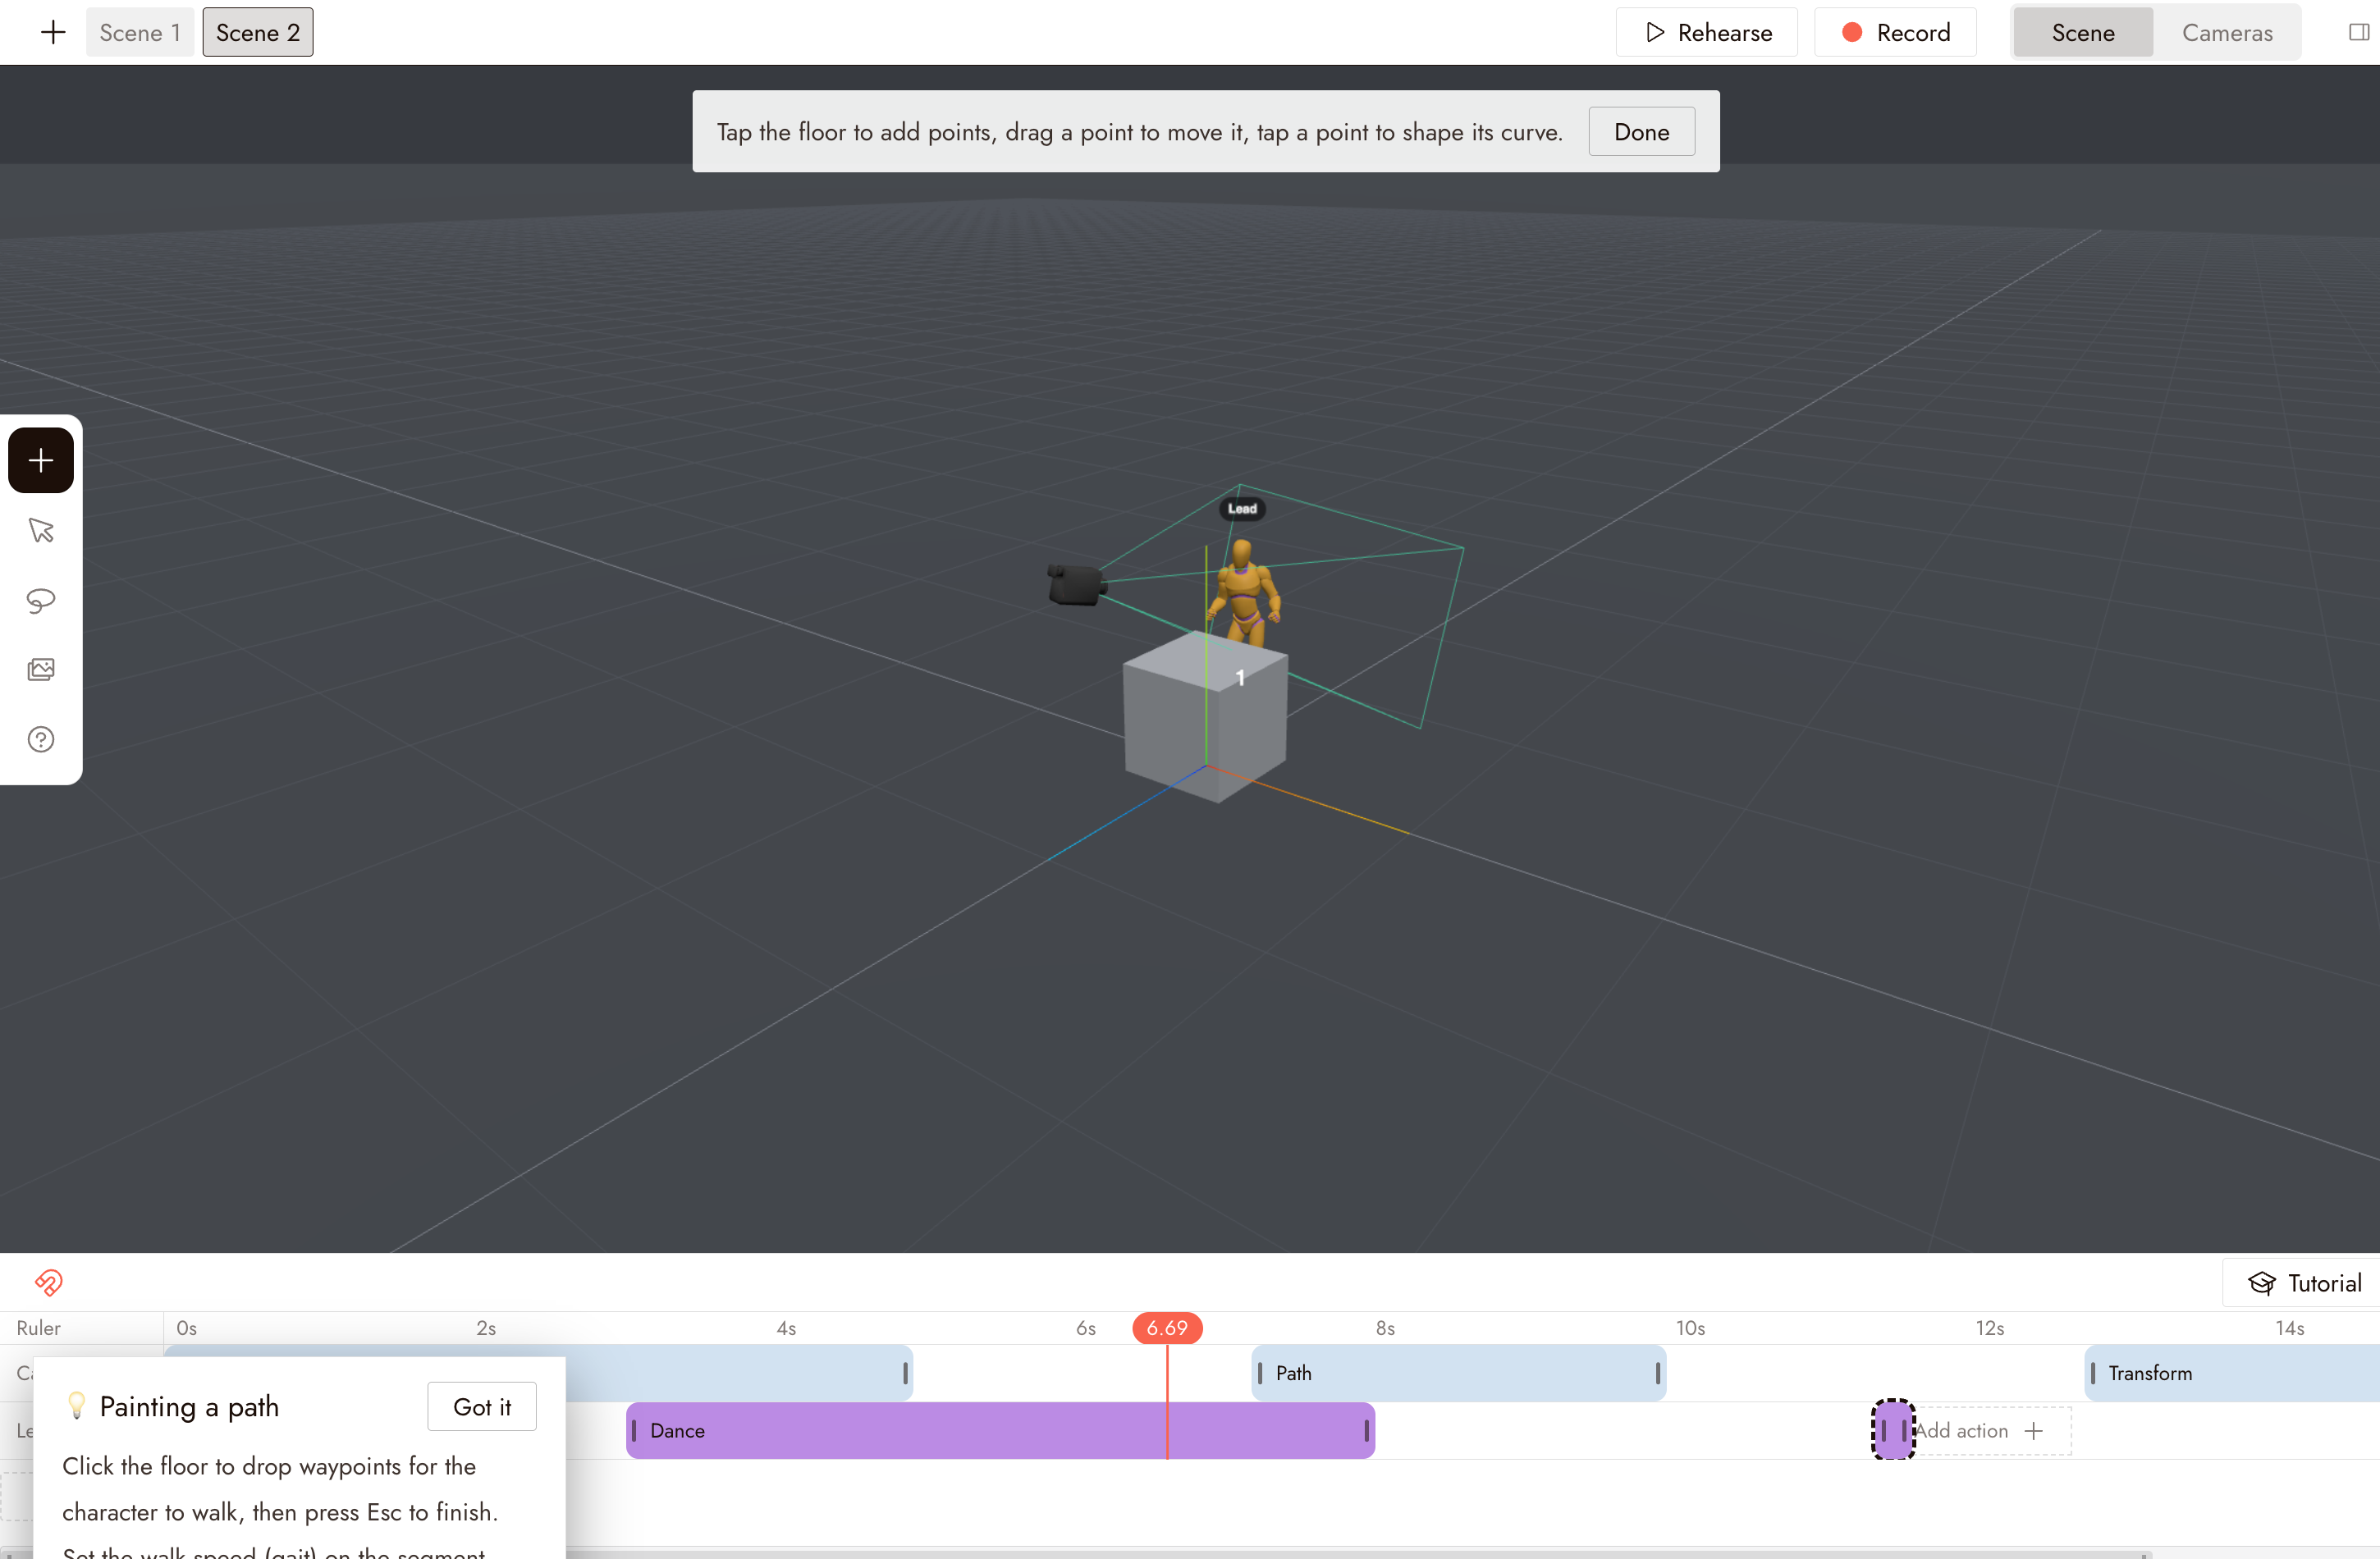
Use Path to set the character's walking route.
Drag Path from the top of the Human tab onto the character's track. The stage switches to path painting: click the floor to drop waypoints for the character to walk, then press Esc to finish.
Edit the walking path
Select the path segment on the track to open its Properties.
Set the gait, such as walk, jog, or sprint, and adjust the speed. Use Edit path to add or move points and shape the route.
Control the character with Play Mode
You can also control the character directly, like a game.
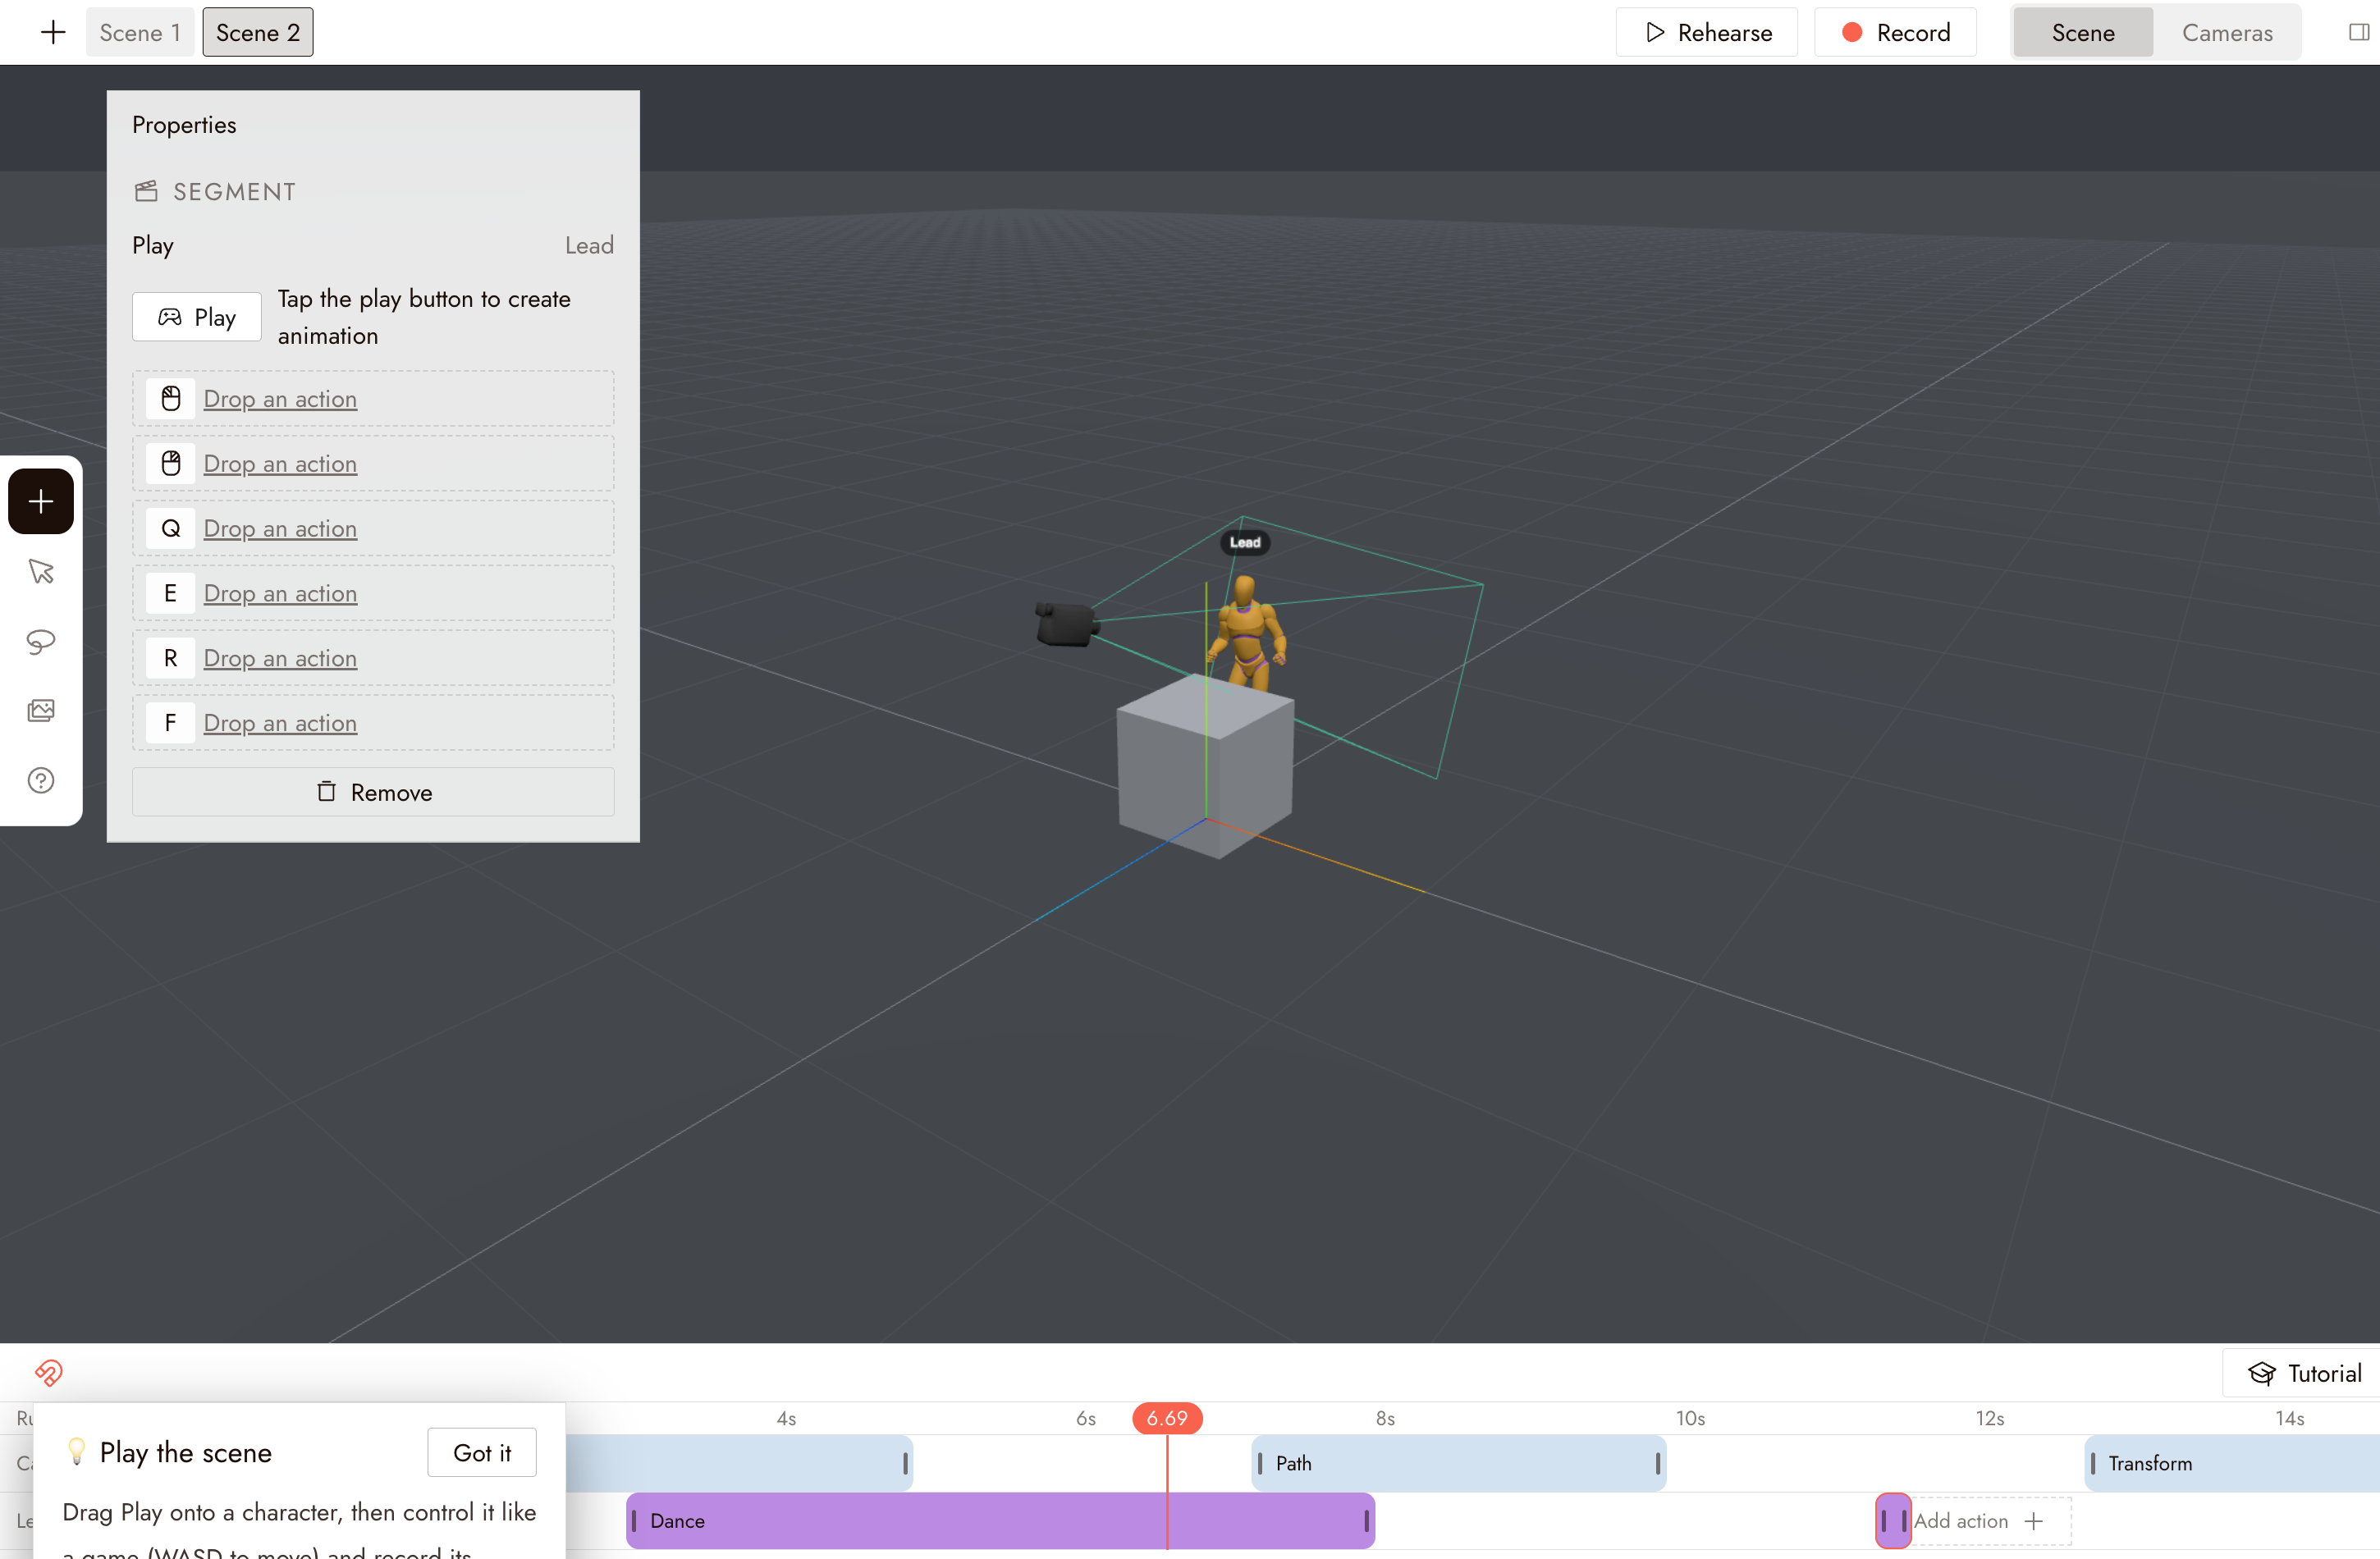
Drag Play onto the character's track. In its Properties, each key slot (Q, E, R, F, and the two mouse buttons) says Drop an action: drag an action from the panel onto a slot to assign it.
Click the Play button in Properties to enter game mode. Move with WASD and press the assigned keys to trigger actions.
Record your movement in Play Mode
In Play Mode, press Enter to start recording.
Control the character and perform the movement or actions you want. When you are finished, press Enter again to stop recording.
Exit Play Mode. The recorded performance appears as one continuous animation on the timeline.
Create custom poses with Rig Transform
Use Rig Transform to create poses manually.
Drag Rig Transform onto the character's track. Select and move rig points to adjust the pose, then add a keyframe in Properties. Add keyframes at other times to animate between poses.
Use this for gestures or poses that are not in the preset library.
Record the final video from the camera
Record the scene from the camera, not the editor view.
Click Rehearse to check the movement and framing, then select the camera and click Record this camera in its preview window, or click Record at the top to record every camera. The video returns to the canvas for editing or use as a reference. See 3D stage export.
Best practices
One action per beat. Make the character walk, stop, then turn. Clear timing makes the reference easier to follow.
Match the walk to the path length. A sprint on a short path ends before the camera arrives; a slow walk on a long path runs out of shot.
Use Play Mode for timing, Rig Transform for precision. Live control gets natural pacing; keyframes get exact poses.
If something looks wrong
The character slides instead of walking. Check that the gait in the path segment's Properties matches the speed.
The recorded Play Mode take is one long block. That is expected. Trim it on the timeline or re-record the section.
The preset action does not fit the character. Adjust the duration in the Properties panel, or switch to a different animation from the same panel.
Nothing happens when I click the floor while painting a path. Click on empty floor, away from other objects and path points, and make sure the painting bar at the bottom is still showing.
Next
- 3D stage export to record one camera or all of them and send the takes to the canvas.
- Omni Reference to turn a recorded take into a generated clip.