Before you generate
Before generating, choose a small goal, gather references, and decide how you will judge the result.
Start with what you have
You do not need a finished screenplay. Start with one scene.
If you have a story: choose one moment that shows a change. A proof of concept only needs to show the core idea, not the whole story.
If you have a drawing, a look, or a feeling: identify what interests you, such as the space, colors, or sound. Then choose a small event that expresses it.
In the residency interviews, the creator of Drop of Water described reducing a longer script into a proof of concept. The creator of Xenogenesis described developing the story alongside music and visuals. These are two useful starting routes, not competing rules.
Ask one question: what should the audience understand or feel after this scene?
Write one clear goal
Describe the scene in one sentence. Include a person or subject, a place, and one event.
For example:
A traveler notices a forgotten red umbrella at a quiet station after rain.
Decide where the traveler stands and which shot reveals the umbrella.
For a first project, avoid asking one generated clip to introduce several locations, perform a complex action, and resolve an entire story. Divide the idea into separate shots instead.
Make a small scene brief
Write four short lines before your first test. For our station scene:
| Decision | Example |
|---|---|
| What happens? | A traveler notices an umbrella and leaves it where its owner can find it. |
| What changes? | An overlooked object becomes easy to see. |
| What should the audience feel? | A small sense of care, without a dramatic rescue. |
| What do I want to avoid? | A threatening storm or a complicated pickup action that distracts from the gesture. |
This is a teaching example, not a tested generation prompt. You can revise the brief, but keep it visible so you can tell whether a result serves the scene. If you need help exploring an idea, use the feedback exercise in Talking to the agent.
Choose the shape of your film
Choose an aspect ratio on the projects home page, beside the style control: 16:9, 9:16, 1:1, 21:9, 4:3, 3:4, or 5:4. It stays pinned at the top of the canvas as the default framing choice.
Some models use a different output shape or follow the source image. Before clicking Run, check the action's aspect ratio and any output-aspect notice.
Changing aspect ratio later can crop important details. Leave space around the subject if you need several formats, and review each version.
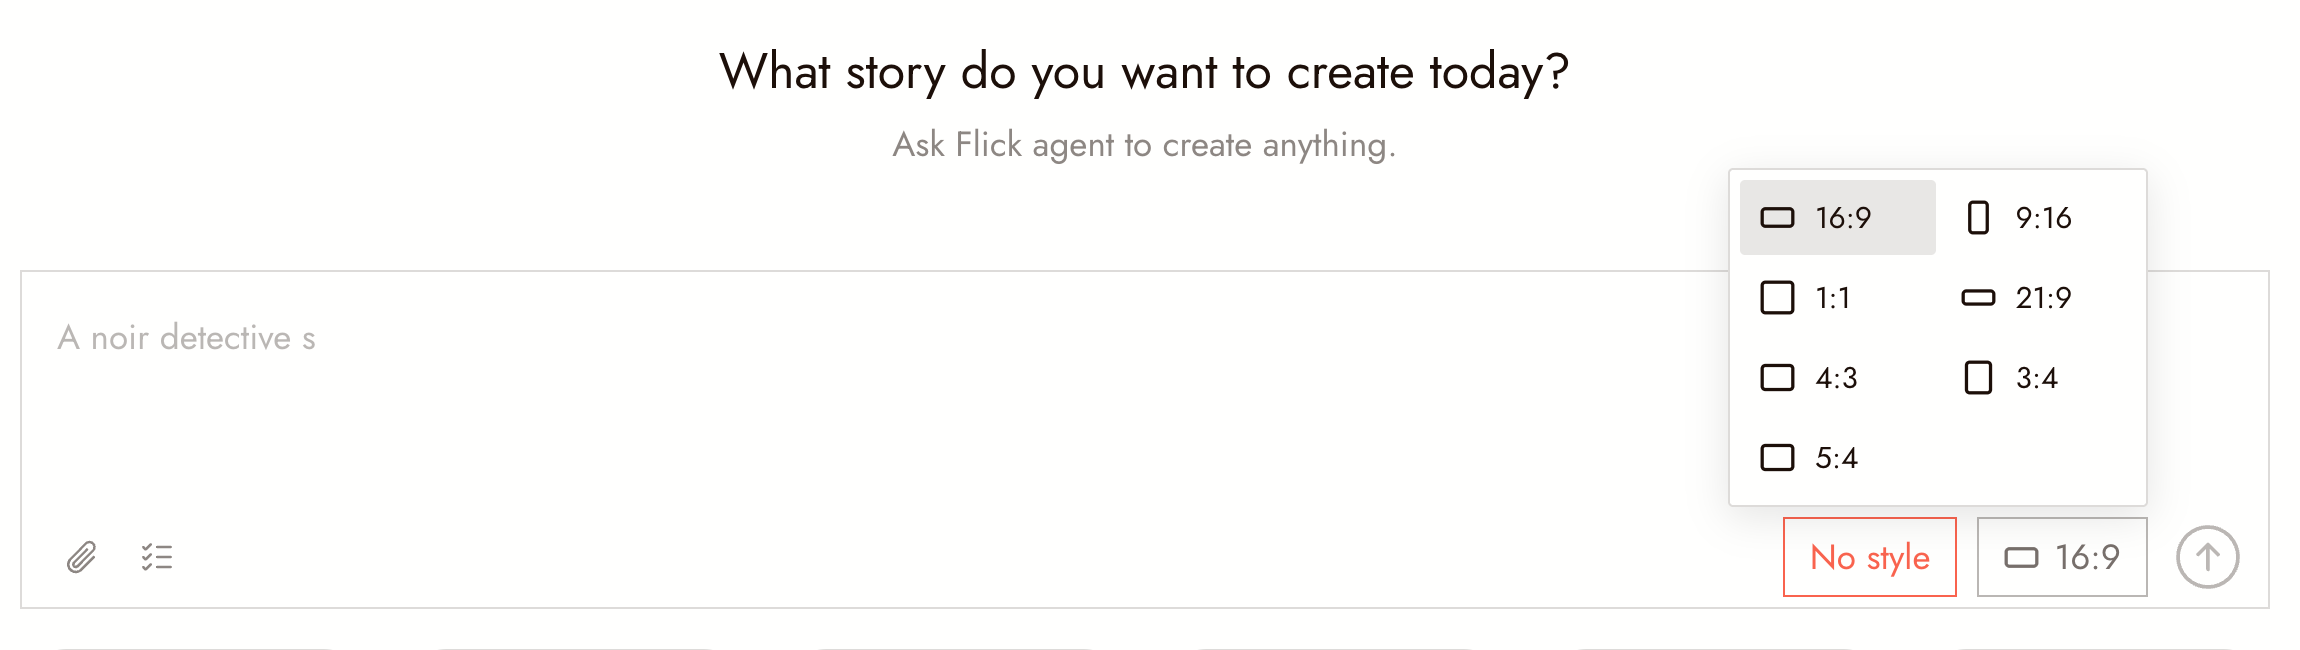
The aspect ratio picker in the prompt box on the projects home page, with its seven options.
Gather references with a purpose
Use references to communicate something specific: the identity of a character, the appearance of a place, or a visual direction.
Ask what each reference contributes. If two references imply different costumes or lighting, decide which should guide the shot before generating.
Build a visual world you can reuse shows how to turn those references into a small set of decisions about the location, lighting and recurring objects.
Use material you own or have permission to use. Keep its source and any usage conditions with your project materials.
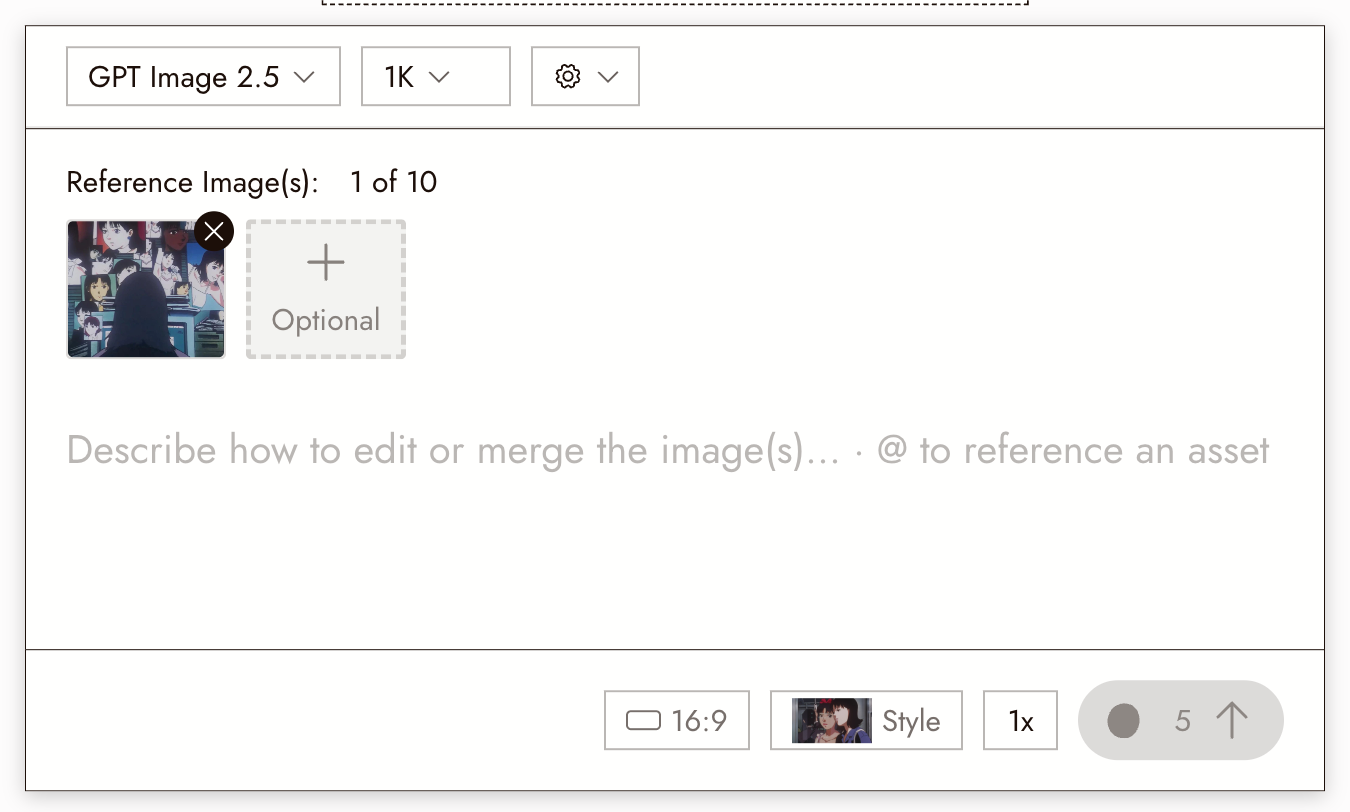
Different actions treat references differently. The plain Generate Image panel takes up to ten Reference Image(s) and reads them all the same way; to lock a person's identity or a scene, use the dedicated Character Reference action instead. Do not assume that a style reference also preserves a person's identity.
Choose a model for the task
Begin with the task you need to complete: create a still image, edit an existing image, or generate motion. Then check the inputs and settings available for that model in Flick.
Compare models against the same goal. Check character identity, readable action, and whether the result fits your edit.
No model is the best choice for every shot. Keep a short record of which setup produced a useful result for your task.
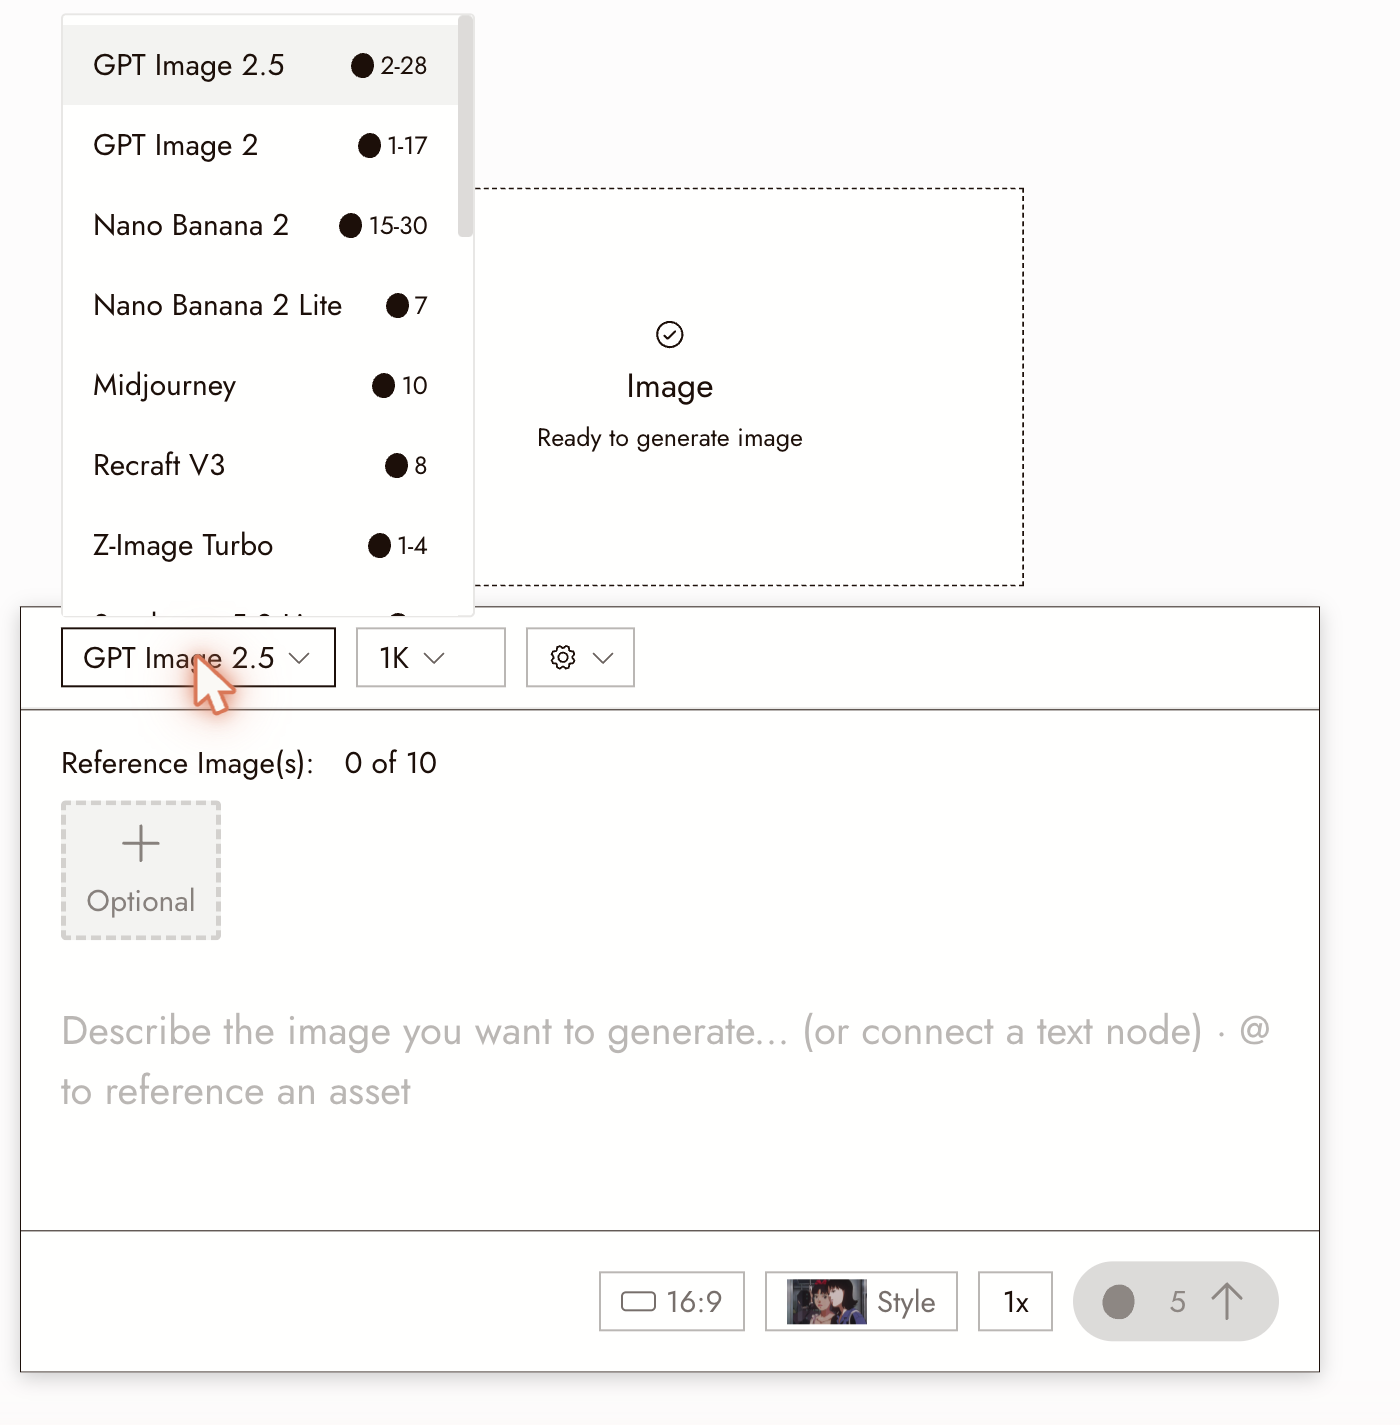
The Model dropdown on a Generate Image panel as it appears on a Free account. Other plans list a different set of models; check yours in the panel.
Check the cost before starting
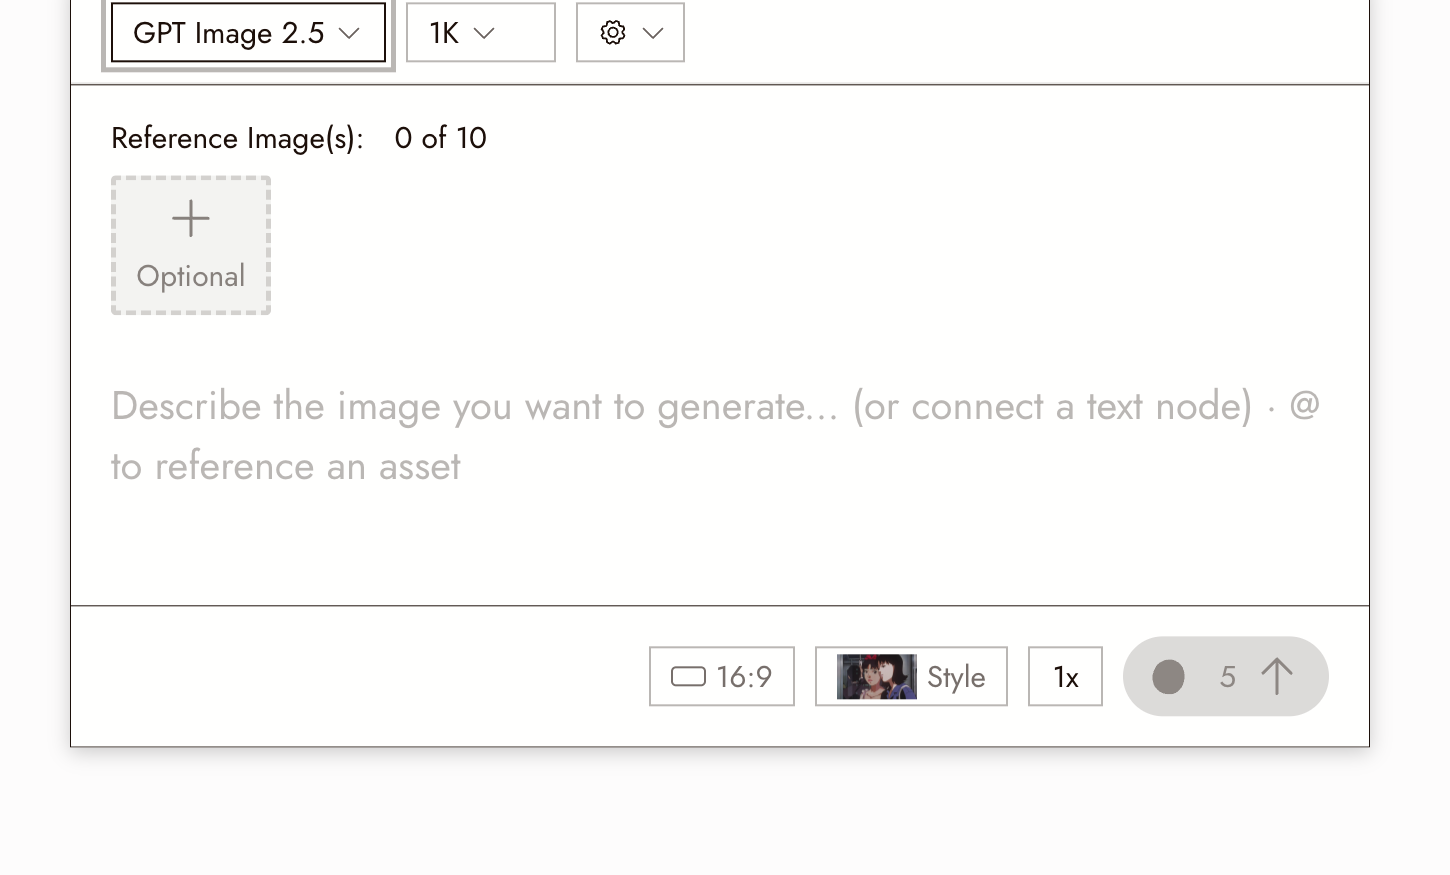
The Run button shows the credit cost for your selected settings. Check it again after changing the batch size or video settings.
If you are unsure what a choice costs, check Model Credit Costs before running it. Do not assume an example in a tutorial has the same cost as your current selection.
Start with the smallest useful test. Fix the still's framing and character identity before testing motion.
Decide what success looks like
Before the first test, choose two or three checks. For the station scene, you might use:
- The traveler and the umbrella are easy to distinguish.
- The station feels like the same place across the shots.
- The audience can understand what the traveler notices.
Name the problem before changing the prompt. Change one main input, then compare the results.
Make the canvas comfortable
Open the gear icon labeled Canvas settings in the canvas toolbar to choose light or dark appearance and which connection lines to show. Canvas settings and appearance explains the choices and a quick reference-board exercise. These viewing choices do not change the generated pixels or your project's aspect ratio.
Ready to begin
Follow Tell a small story in three shots to turn your preparation into a complete first edit.