Script basics
Write, upload, or develop a screenplay with the agent in Script view. Plan your scenes, action, and dialogue before generating shots.
Before you start
Start with who the character is, what they want, and what changes in each scene. The editor handles the screenplay format.
If you already have a script, have the file ready. Flick accepts .fountain, .txt, .fdx (Final Draft), .pdf, and .docx.
Every new project opens with an example screenplay so you can see the format, with a banner above it linking to the finished film. It is a placeholder: write over it or upload your own.
Open the Script view
Click Script, the first of the four tabs at the top of the canvas (Script, Canvas, 3D Stage, Video Editor). The view has three parts:
- The scene rail on the left: every scene, numbered, with its heading and the characters who speak in it. Act labels sit above the scenes they contain. Hide scenes collapses the rail; Show scenes brings it back.
- The page in the middle, where you write.
- The chat on the right, the same agent as everywhere else in the project.
Above the page, on the right: the script font picker, Upload, and Download.
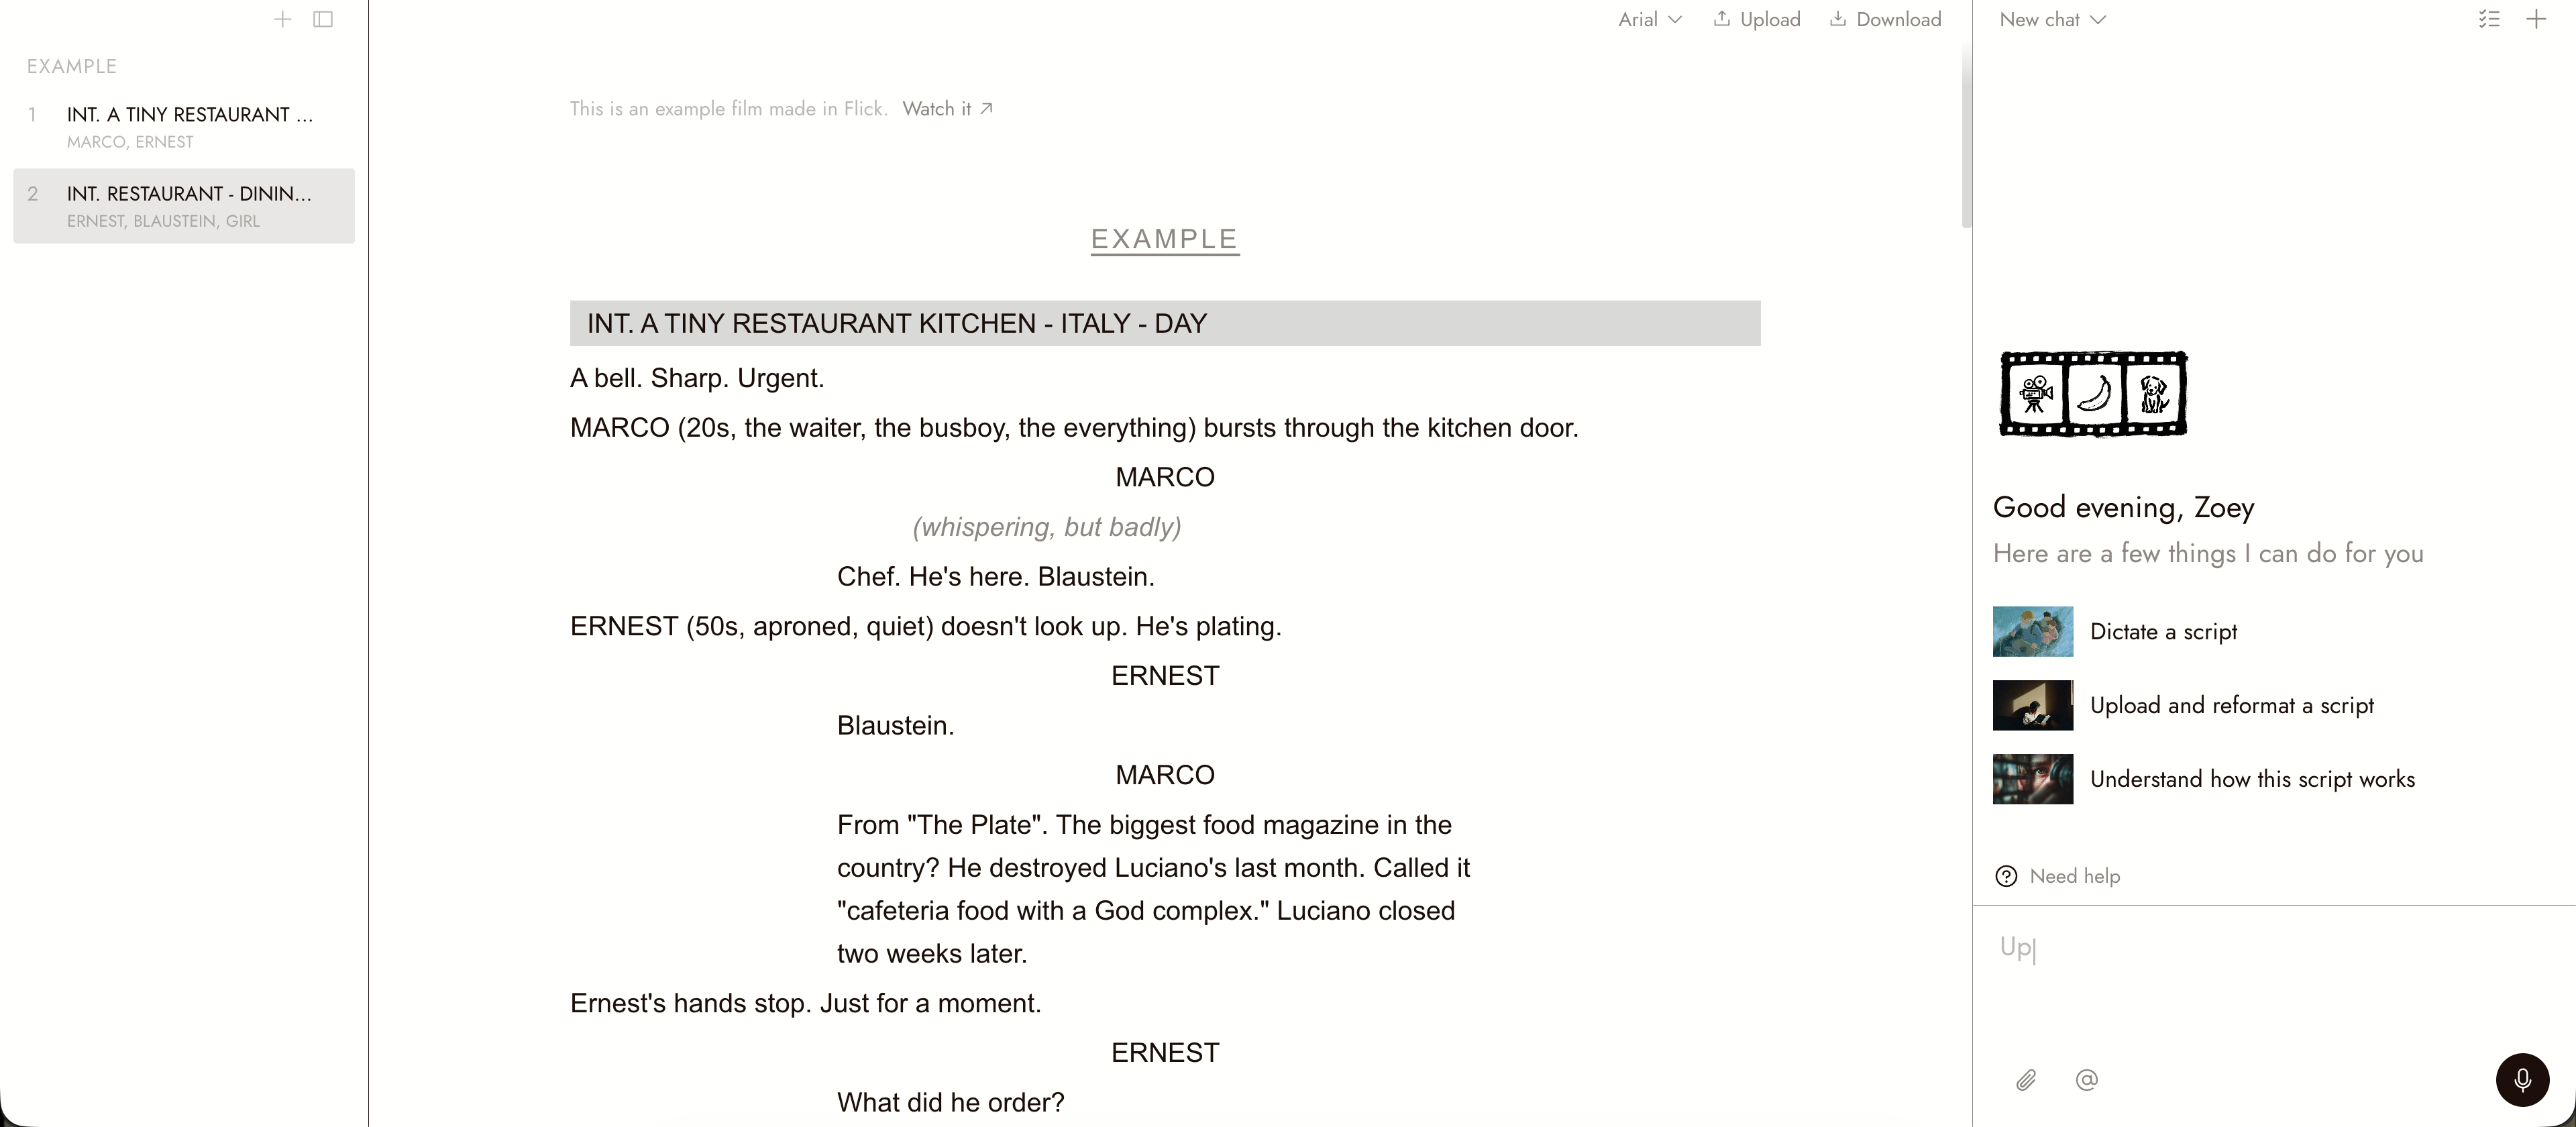
The Script view with the example screenplay: scene rail on the left, the page in the middle, chat on the right.
Write a scene
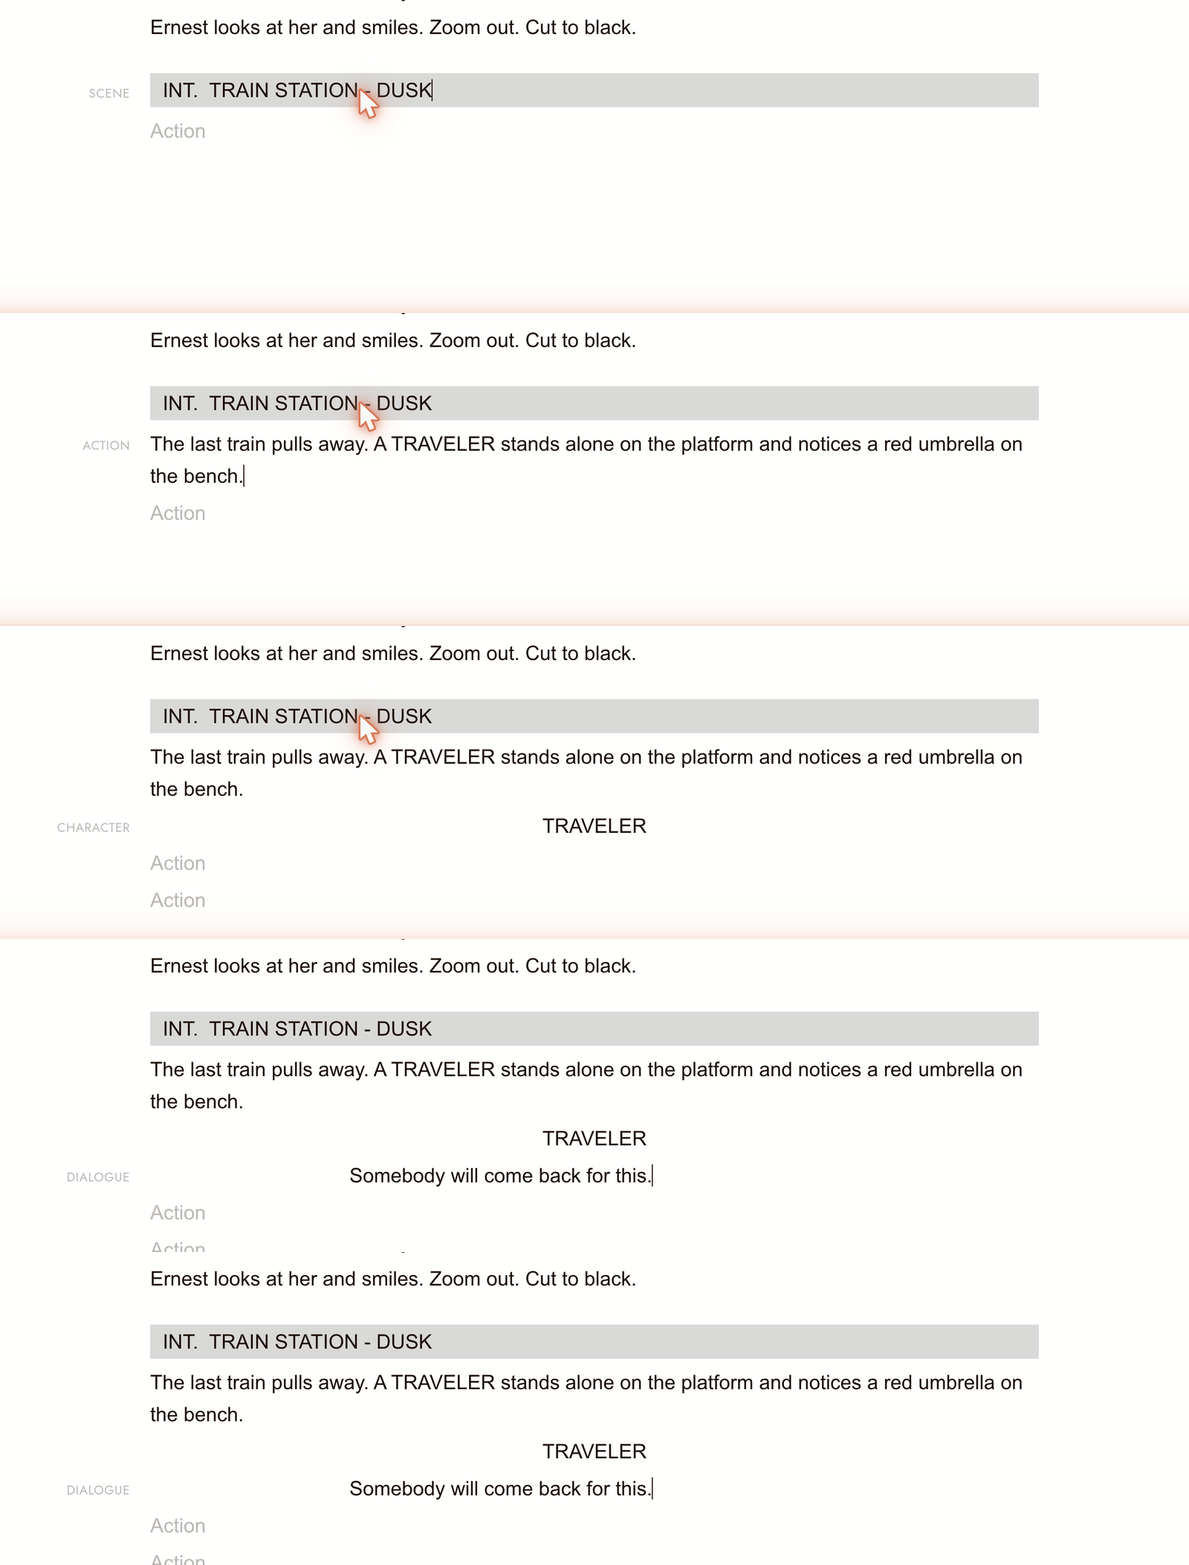
- Click on the page and type. Every line has a type, shown as a small chip in the left gutter of the line you are on: Scene, Action, Character, Dialogue, or Shot, plus Parenthetical, Transition, and Act in the chip's menu.
- Press Enter to start the next line. The editor picks the likely type: a scene heading opens into action, a character cue into dialogue, dialogue drops back to action, and a transition opens the next scene heading.
- Press Tab or Shift+Tab to change the current line's type, or click the chip and choose from its menu.
- A scene heading is a line such as INT. KITCHEN - DAY. Typing INT. or EXT. at the start of a line in the middle of a scene splits the scene there; Backspace at the start of a heading merges it into the scene before.
- To add a scene or an act from the rail, click + (Add a scene or act) and choose New scene or New act. Right-click a scene in the rail, or use its Scene actions button, for New scene below, New act below, Duplicate, and Delete.
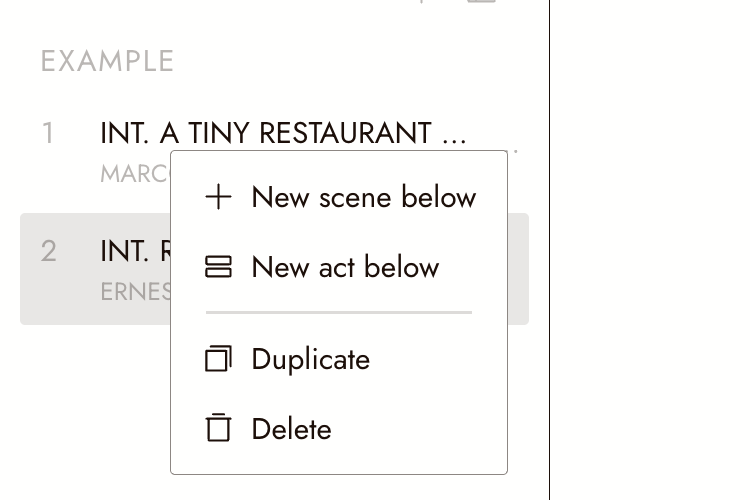
Right-click a scene in the rail for New scene below, New act below, Duplicate, and Delete.
Everything here is undoable with Command+Z on Mac or Control+Z on Windows, including the agent's edits.
Upload a script you already have
- Click Upload above the page and choose the file.
- Flick identifies scenes and characters and reports any lines with an uncertain type. Find those lines and use the gutter chip to choose the correct type.
- For a nonstandard screenplay, choose Import as-is or Let AI read it. The AI option is slower but can organize loosely formatted text into scenes. For a scanned PDF, choose Open chat to send it to the agent.
Build it with the agent
Ask the agent to draft scenes, tighten dialogue, add a scene after scene 2, or rename a character throughout the script. Changes appear on the page. Each reply is one undo step.
The agent writes in the language you talk to it in, even though the example script is in English.
Download the script
Click Download and choose PDF or Word (.docx). If the page is empty, Flick says "Nothing to download yet. Write a scene first." Choose the screenplay font from the picker above the page first; Courier Prime is the classic.
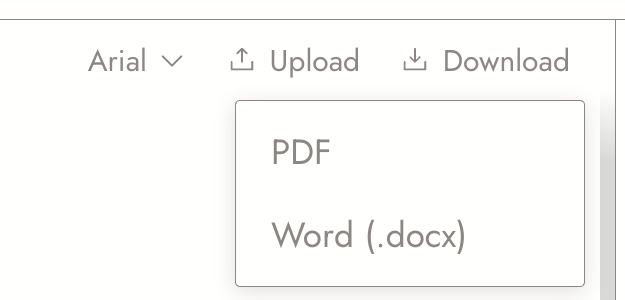
The Download menu above the page: PDF or Word (.docx).
Review the result
- Every scene has a heading with a place and a time of day, so the rail reads as a list of locations.
- Check what changes in each scene. Remove scenes that add nothing to the story.
- The names under each scene in the rail are the names you meant. A misspelled cue shows up there as a second character.
If something looks wrong
A character appears twice in the rail with two spellings. A character is whatever you typed in the cue line. Fix the spelling in the cues, or ask the agent to rename it everywhere.
My upload has the wrong line types. Use the gutter chip to change them, or upload again and choose Let AI read it.
My changes are not saved. Only the project owner's edits are saved. If you were invited to the project, ask the owner to make the change.
The example script is still there. It is a placeholder. Write over it or upload your own; it is not part of your film.
I want the scenes on the canvas as shots. The script does not build shots by itself yet. Ask the agent in chat to build a scene's shots on the canvas, or start a project with Script to Film on the projects home page.
Next
- Before you generate for choosing what to make first from a scene.
- Create Your First Project for the first images.
- Talking to the agent for how to point the agent at a scene.
- Sections and folders to keep one scene's shots together on the canvas.