Blender to AI clip
What you'll make
Turn a Blender animation into a styled AI clip in Flick. Use Blender to plan the action and camera movement, then use Flick to create the look.
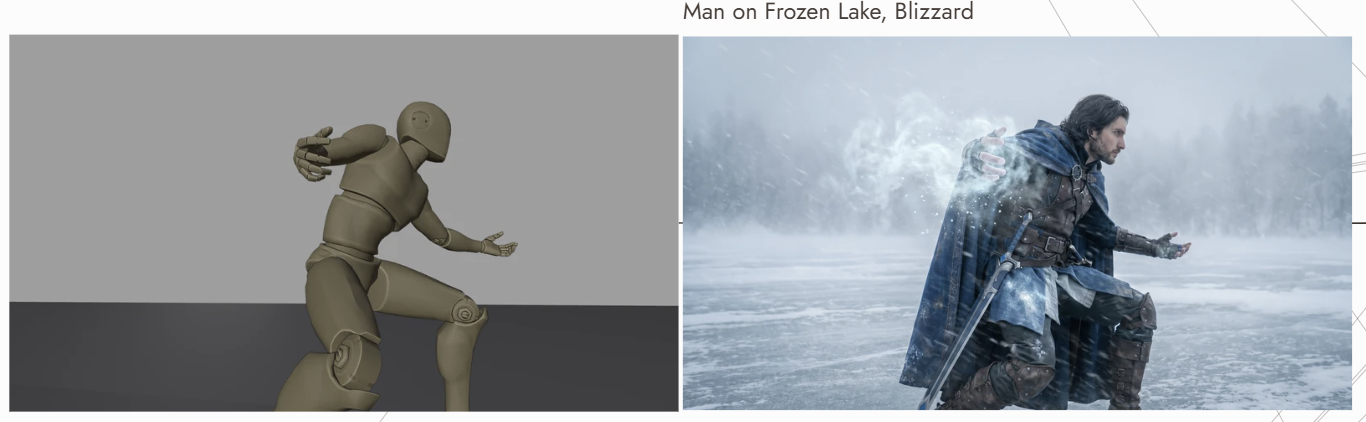
The Blender video guides movement. An AI-edited version of its first frame guides appearance. References guide the result; they do not guarantee an exact match.
1. Prepare your Blender reference
You'll need a Blender animation and a Flick project. This guide starts with an existing scene, not Blender setup.
- Set up the character action and camera movement in Blender. For a first test, keep the shot to one clear action.
- Export the animation as a video, then export the first frame of that same video as an image.
- Upload both files to your Flick canvas.
Before moving on: Check that the still matches the video's opening frame, including the crop and character pose.
2. Create the look of your first frame
- Select the uploaded first-frame image and edit it with Nano Banana.
- Describe the materials, lighting, and style you want. Ask to keep the framing and character pose.
Example prompt:
Give this frame realistic materials and soft daylight. Keep the camera angle, framing, subject positions, and poses unchanged.
Replace the materials and lighting with your own choices.
Before moving on: Compare the edited frame with the original. If the layout or pose changed, revise the image before generating video.
3. Generate your clip in Flick
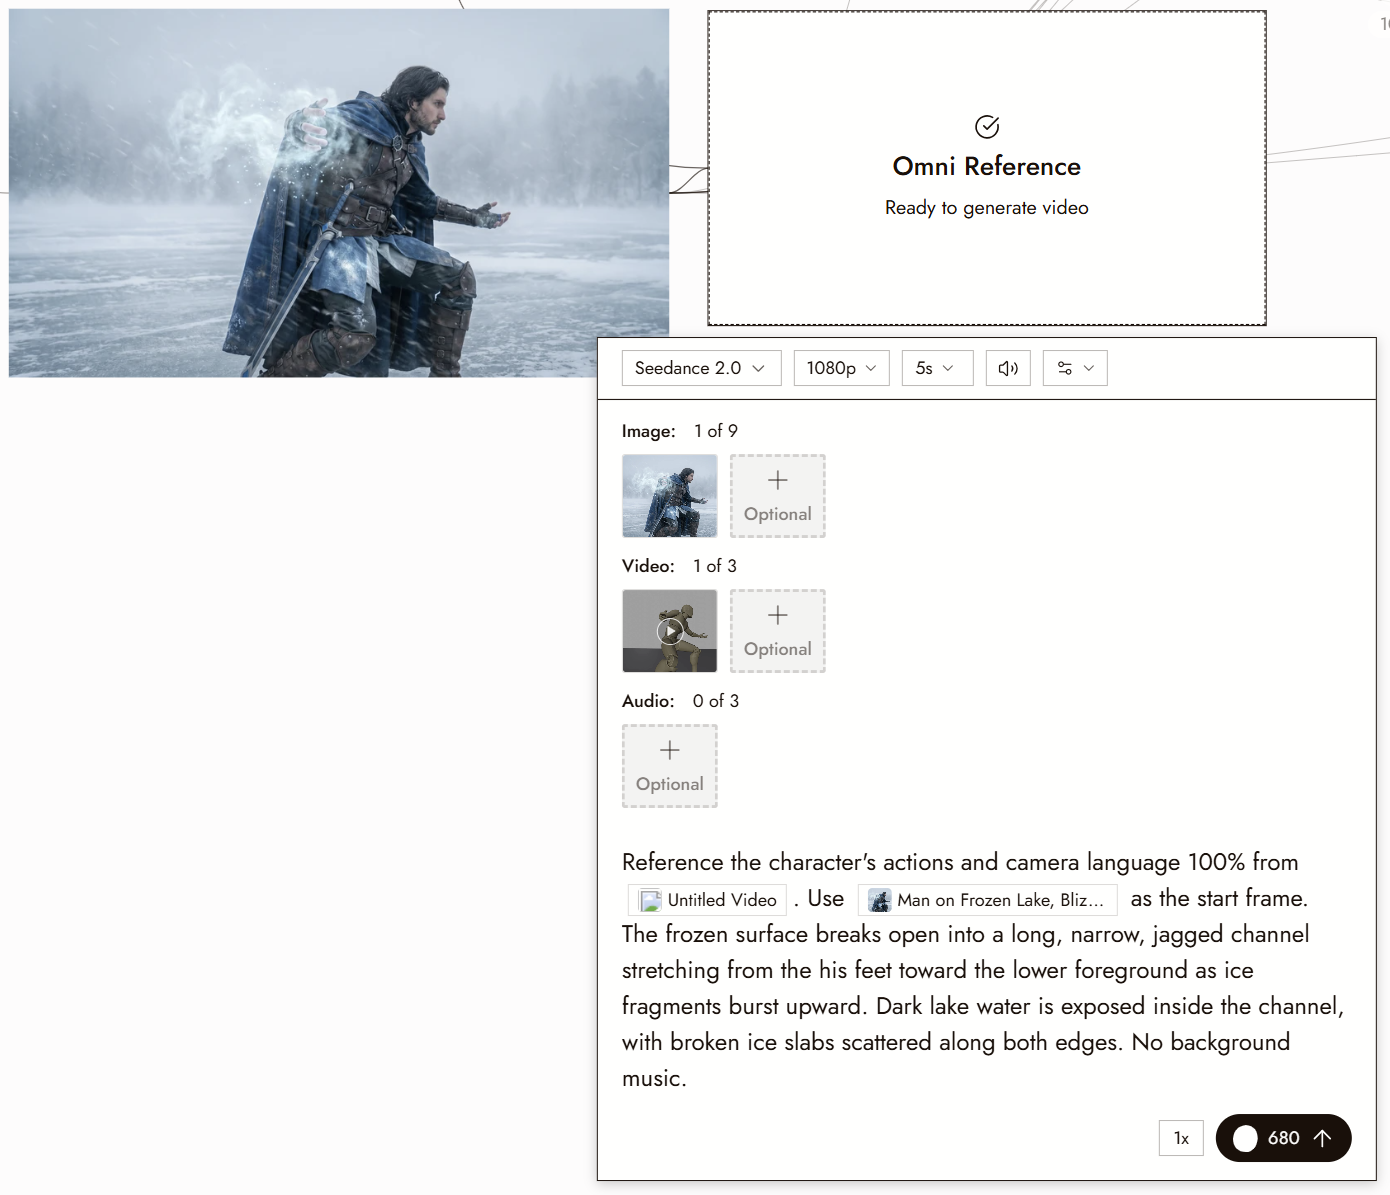
- Select the edited frame and choose Video, then Omni Reference, then Seedance.
- Choose a model that accepts both image and video references.
- Connect the two files:
| File | Attach as | Use it for |
|---|---|---|
| Edited first frame | Image reference | Character appearance and visual style |
| Blender video | Video reference | Character action and camera movement |
Seedance reference models use image references, not a dedicated Start Frame input. The image guides the opening look rather than locking the first frame. For other models and their inputs, see Omni Reference.
In the prompt, name both references and say what each should guide. Use the reference names shown in your panel. For example, if they are @Image1 and @Video1:
Use @Image1 for the character's appearance, materials, and lighting. Follow the character action and camera movement in @Video1.
Set the duration and available output options, check the cost on Run, then generate a test clip.
4. Check your result
Compare the clip with both references:
- Does the camera move as intended?
- Is the character's action clear, without distracting distortions?
- Does the clip keep the edited frame's character appearance and visual style?
If something looks wrong
The camera move is wrong. Check that the Blender video is attached and named correctly in the prompt. Remove any prompt instructions that conflict with its movement.
The opening pose or framing is wrong. Compare the edited still with the Blender first frame. Fix mismatches in the still before generating again.
The look drifts during the clip. Check that the edited image is attached and referenced in the prompt. Try a shorter shot, then compare again.
Change one thing at a time so you can see what helped.