Timeline basics
Use the timeline to arrange clips, set their timing, and add sound. Start here when you are ready to edit your canvas media into a film.
Before you start
Choose the clips you want to use and the film's aspect ratio. Two clips are enough to practice a cut.
Open the timeline
You can open the timeline in two layouts:
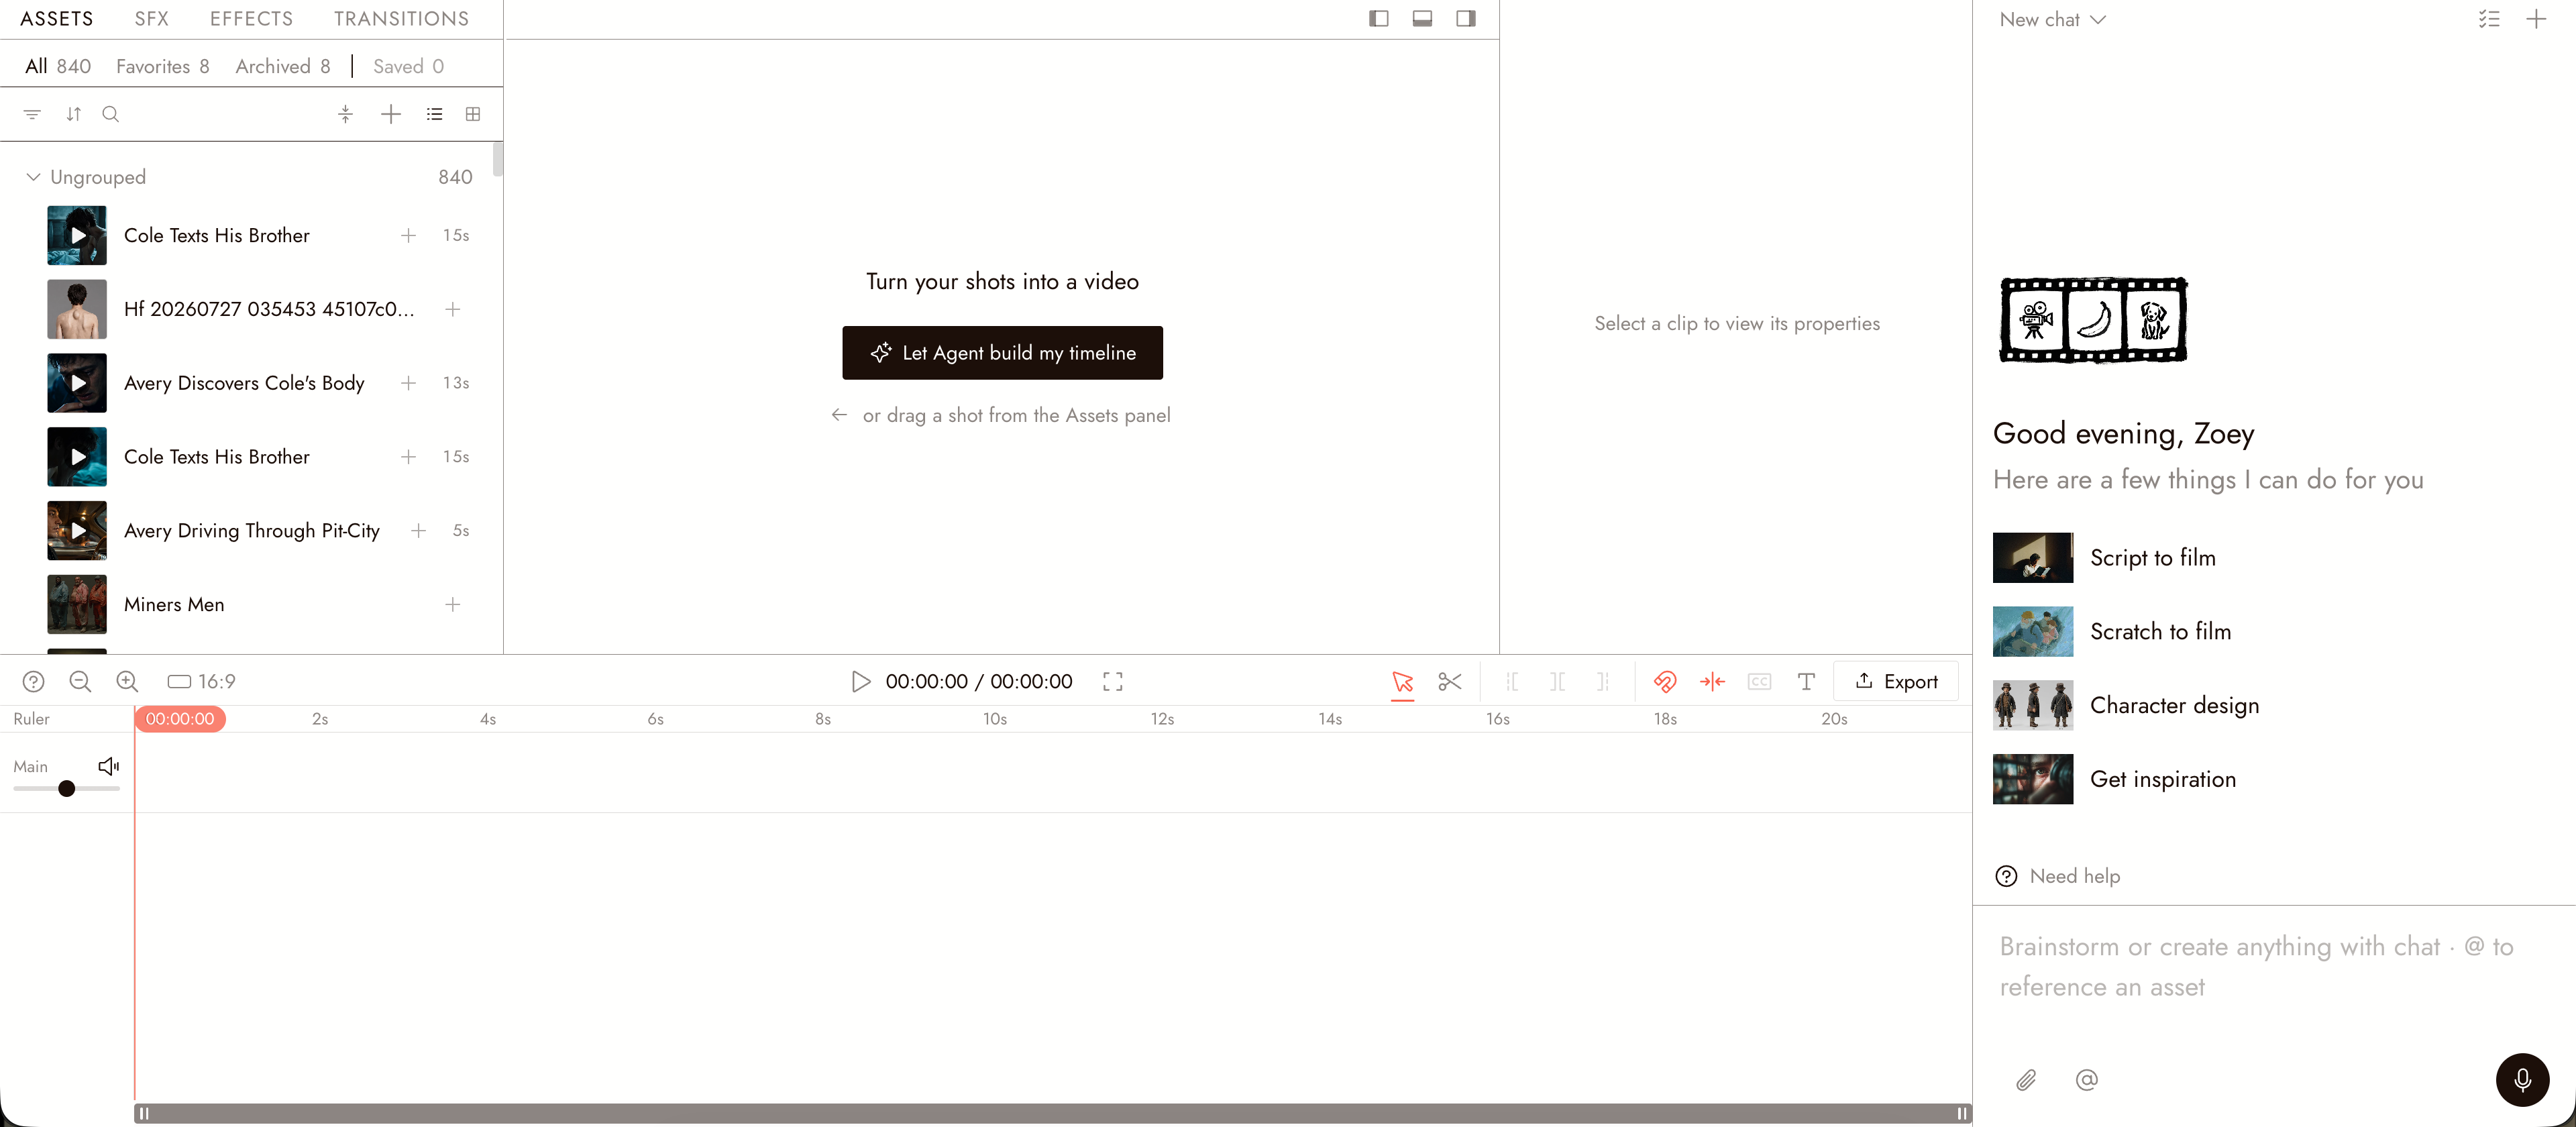
- The Video Editor tab at the top of the canvas, next to Script, Canvas, and 3D Stage. This is the full editor: Assets on the left, the preview in the middle, Properties on the right. An empty timeline says "Turn your shots into a video" and offers Let Agent build my timeline, or you drag a shot in from the Assets panel.
- The Video Editor button on the left toolbar of the canvas. This keeps you on the canvas: it opens a floating Player panel and the same timeline as a strip along the bottom of the canvas, with the same toolbar.
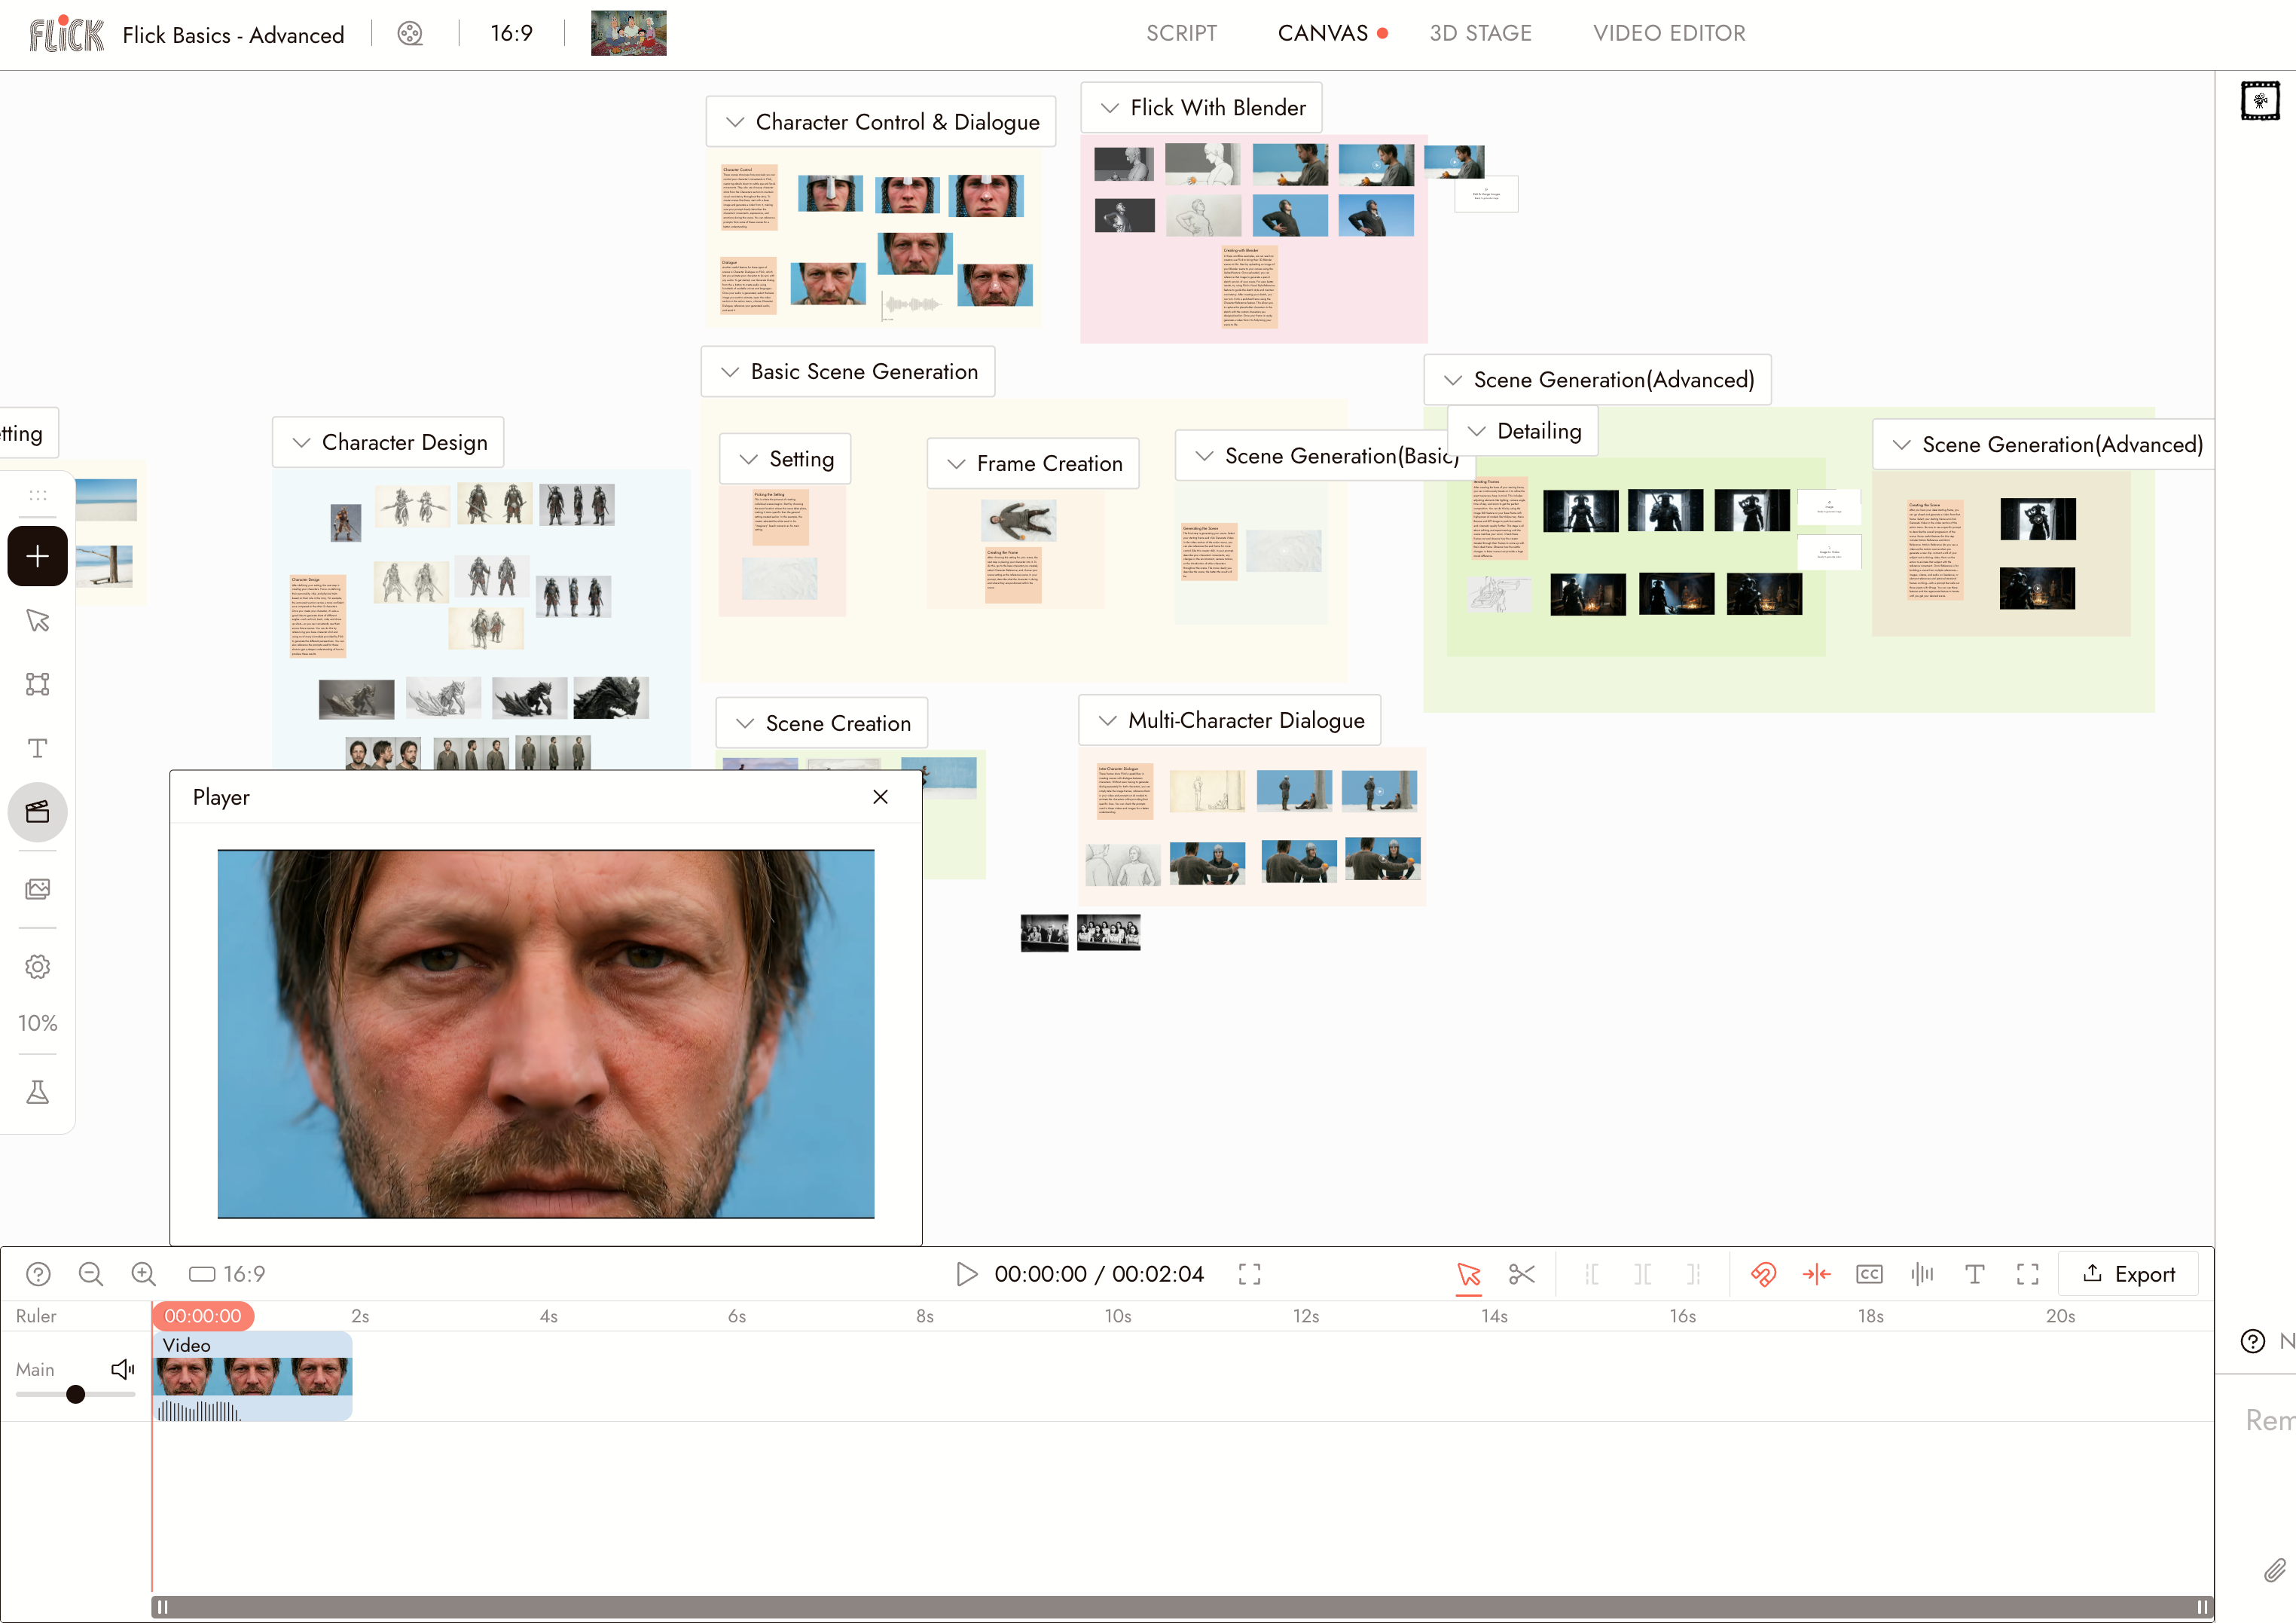
The canvas with the Player panel and the timeline strip open. Below, the Video Editor tab.
What is on the timeline
- Panels. Assets on the left, with tabs ASSETS, SFX, EFFECTS, and TRANSITIONS; the preview in the middle; Properties on the right for the selected clip. Each panel can be hidden or resized.
- Tracks. Video and image clips on the Main track, where the main-track magnet helps close gaps when you reorder clips; audio on the Music track; text clips on their own track.
- Playhead. The vertical line that marks the current frame. Drag it to scrub; hold Shift while scrubbing to snap to clip edges.
- Toolbar. Left to right: keyboard shortcuts (?), zoom, the timeline aspect ratio, play with the timecode, fullscreen, Select tool (V), Razor tool (C), Delete left of playhead (Q), Split (S), Delete right of playhead (W), the main-track magnet, snapping (N), Generate captions, Add text (T), and Export.
- Magnet and snapping. The main-track magnet closes gaps when you reorder clips on that track. Other tracks can keep gaps, and adding a clip at a chosen time can leave one. Check the sequence starts at zero. Snapping aligns clips with nearby edges; it does not close gaps. Press N to toggle snapping or hold Alt to pause it while dragging.
- Properties. With a clip selected, the right panel opens with PROPERTIES, COLOR, and EFFECTS tabs. Properties holds the clip's layout (scale, position, alignment), its sound (volume, fade in and out, Generate captions, Detach Audio), its playback (speed, fade in and out), and its dimensions. Transitions live in the TRANSITIONS tab of the left panel.
Watch the film so far
Press Space or click Play to watch from the playhead. Home returns to the start. Left/Right Arrow moves one frame; hold Shift to move five. Up/Down Arrow jumps to the previous or next cut.
Watch the full sequence before editing. Check the shot order and timing as well as individual clips.
If something looks wrong
I cannot find the timeline. Open the Video Editor tab at the top of the canvas, or the Video Editor button on the left toolbar.
The timeline is empty. Nothing is on it yet. Use Add to timeline on a shot in the Assets panel, drag one in, or click Let Agent build my timeline; see Add and reorder clips.
The tools are greyed out. The timeline locks while captions are generating. Wait for them to finish.
I see the timeline but no picture. Move the playhead over a clip. An empty stretch of timeline shows nothing.
Next
- Speed to retime video or audio, Volume and fades to balance sound, and Transitions to shape a cut.
- Add and reorder clips to build the sequence.
- Trim and split to tighten it.
- Export and download your film when it plays the way you want.