02. Build your visual world
Bring: Your story brief. Make: A small visual board and two views that feel like the same place.
A visual board is a group of references and notes, not a Flick generation mode. Its job is to settle decisions you will reuse across the film.
Give each reference a job
Choose a few references for different questions: where the action happens, how light enters, what colors repeat, and which objects matter. Label the useful feature of each image.
Use Classic Film Scenes to study framing and lighting. Looking at a reference and using it as a generation input are different choices; use inputs cleared for your intended use.
Beside each reference, record its source link or file name, creator, intended use, and permission or license notes. Keep any required credit with the asset from the start.
Do not ask one image to define the setting, character, action, and camera unless it actually shows all four clearly. Remove conflicting references instead of hoping a model will resolve them.
Write a small location handbook
For the station, settle these choices:
| Decision | Course example |
|---|---|
| Layout | A bench stands against the waiting-room wall. A hook is visible beside it, under the shelter |
| Light | Soft daylight comes from the open platform side |
| Palette | Muted gray and faded green, with red reserved for the umbrella |
| Materials | Damp concrete, painted wood, fabric, and a curved wooden umbrella handle |
| Important landmark | The same bench connects the discovery and the final gesture |
Keep the notes short enough to use while comparing a shot. Include only the parts of the location your film needs. For adjoining rooms, sketch how the doorway connects them and choose a landmark that appears across views.
You can ask the agent to organize research notes you supply, then check the summary. The handbook is a working reference, not an automatic consistency setting.
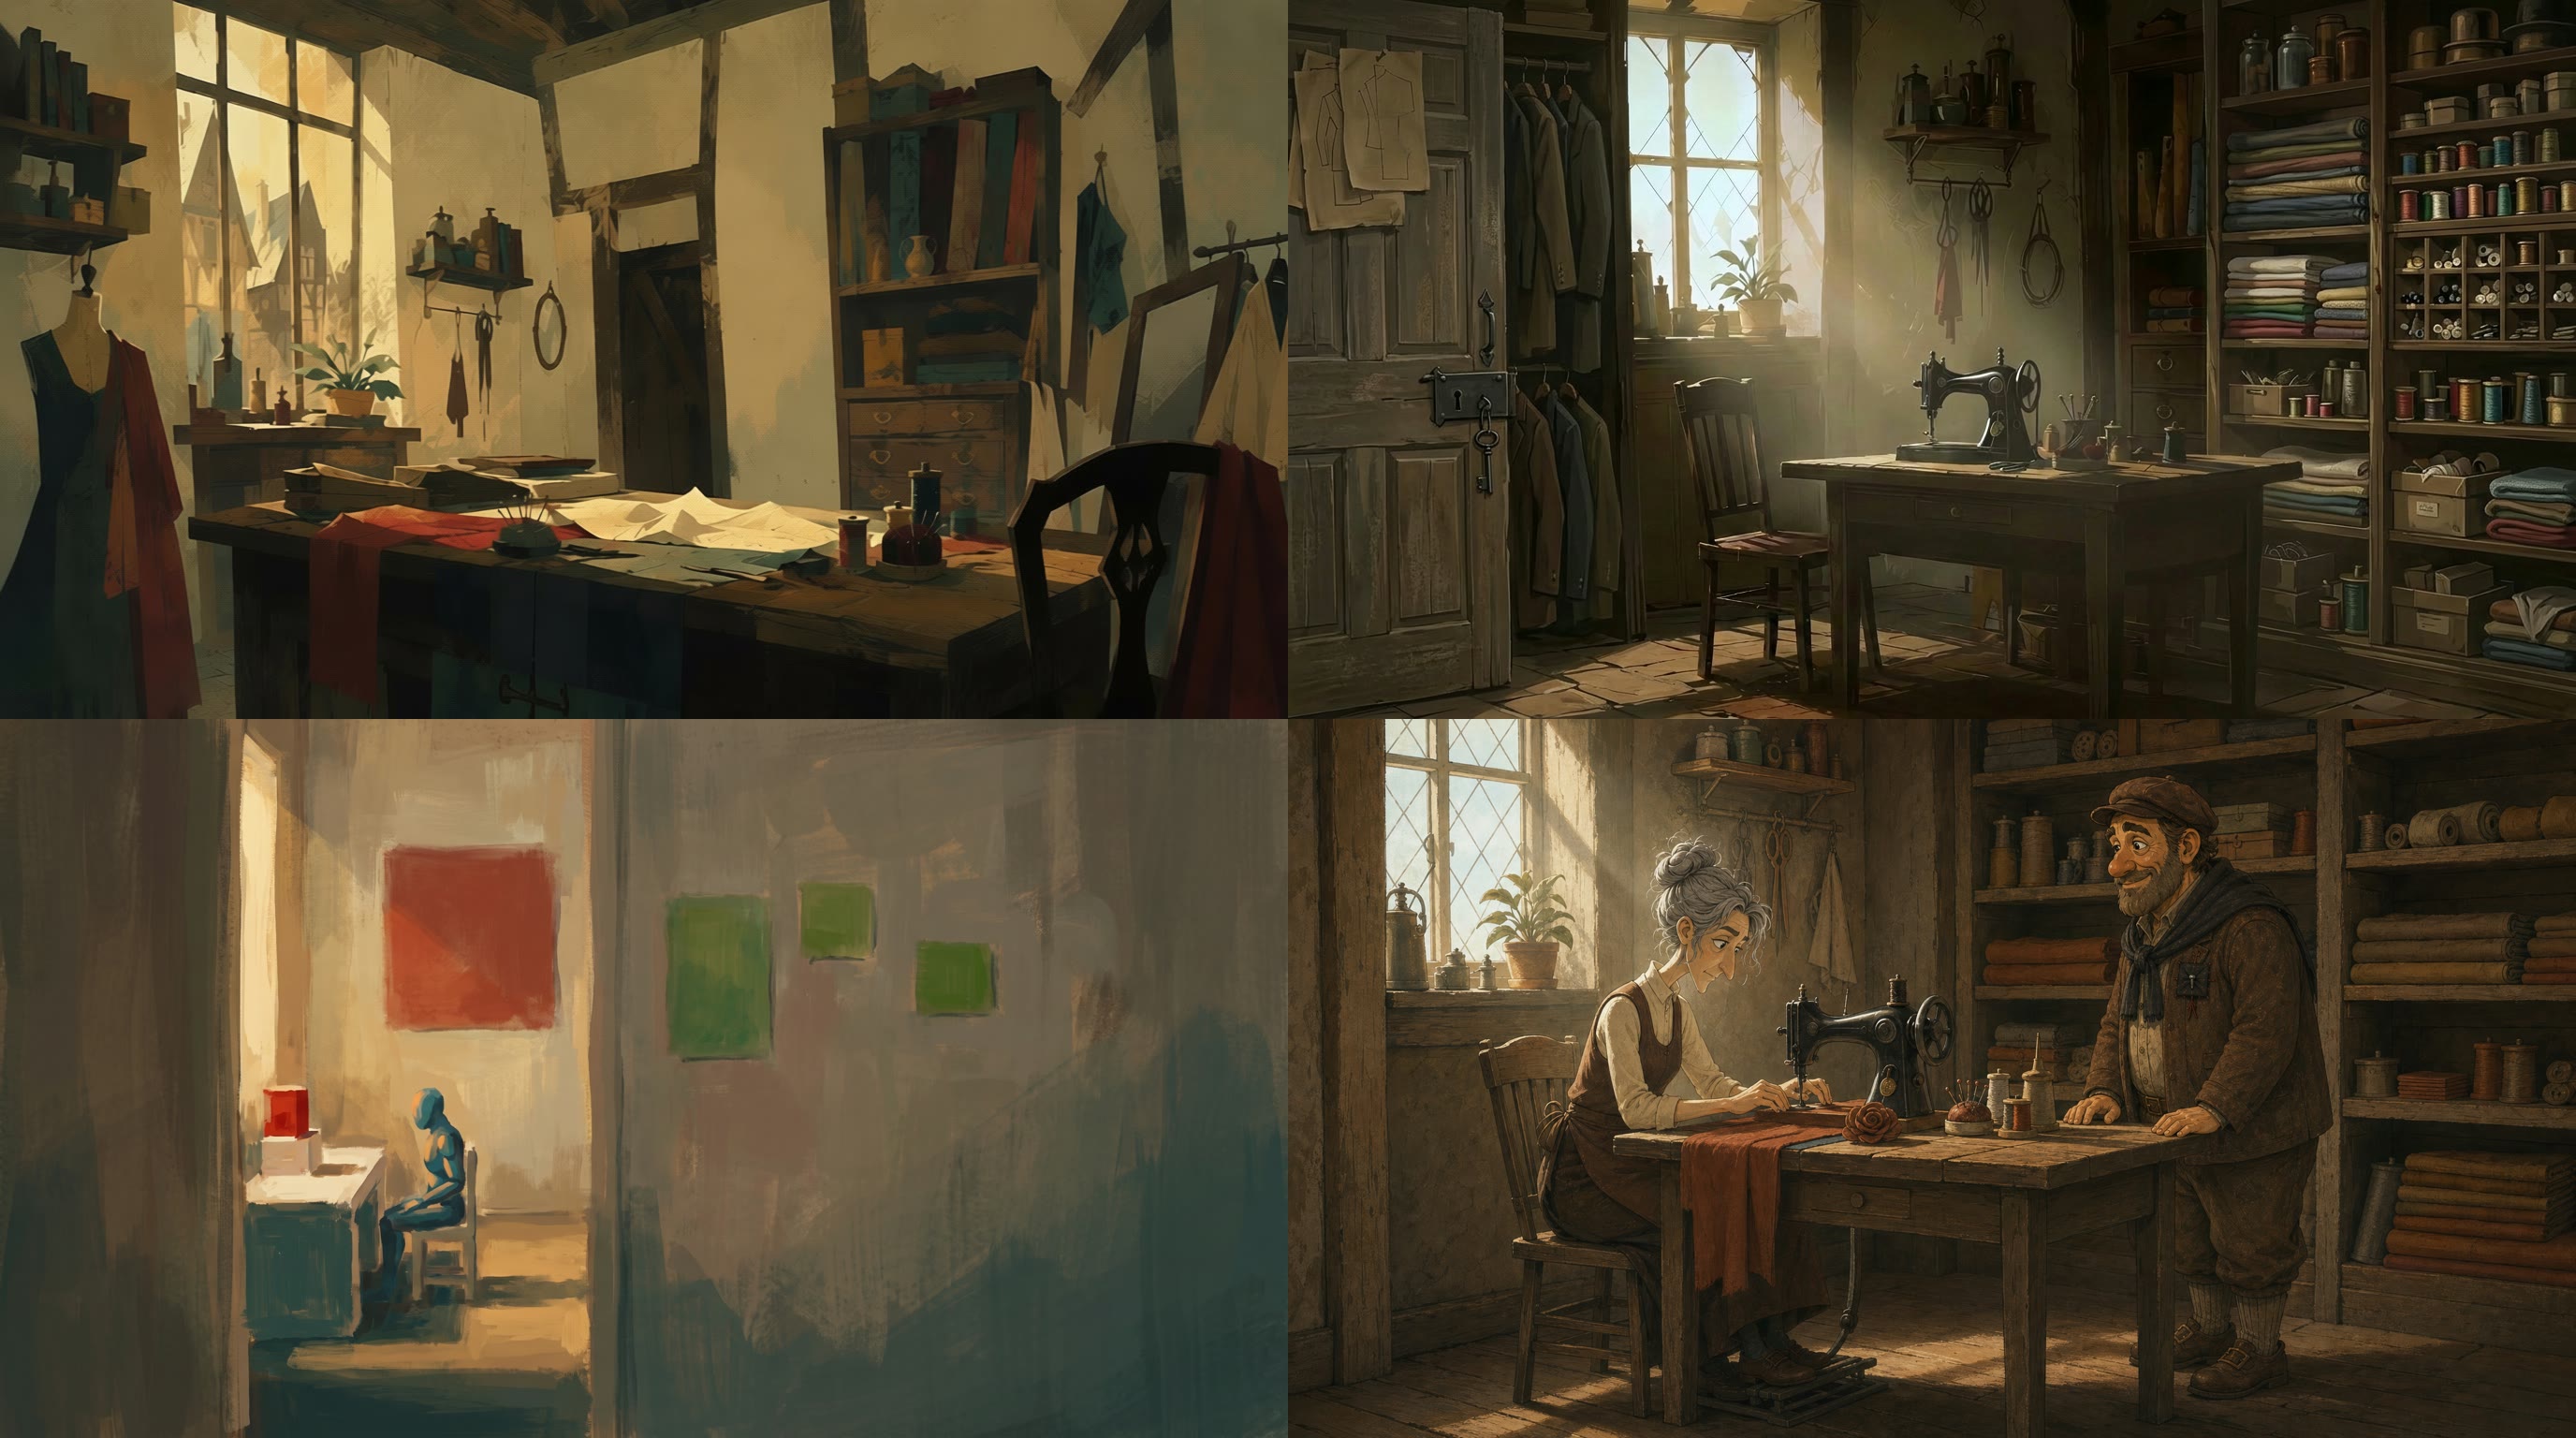
A separate shop example compares broad composition, detailed furnishings, a simplified layout, and a finished scene. These are not identical layouts. Use a board to spot design choices and contradictions before producing more shots.
Optional workshop: Workshop: Turn a real location into a film set. Use it to research a place, choose what to preserve, and test a photo-based setting in motion. If your setting is invented, continue with this chapter; the workshop is not required.
Solve arrangement before surface detail
Sketch where the bench, hook, exit, traveler, and camera sit. A plain drawing is enough. Can the traveler reach the hook? Can the final view show that the umbrella stays behind?
If the arrangement fails, change it before adding texture. More detail will not repair an impossible route or a hidden story object.
For a photographed look, describe visible relationships: light on the platform-facing side, shade under the roof, and reflections on damp ground. "Cinematic" alone does not make those choices. Grain and lens softness are optional finishing decisions, not fixes for weak composition. A stylized film can use the same spatial checks.
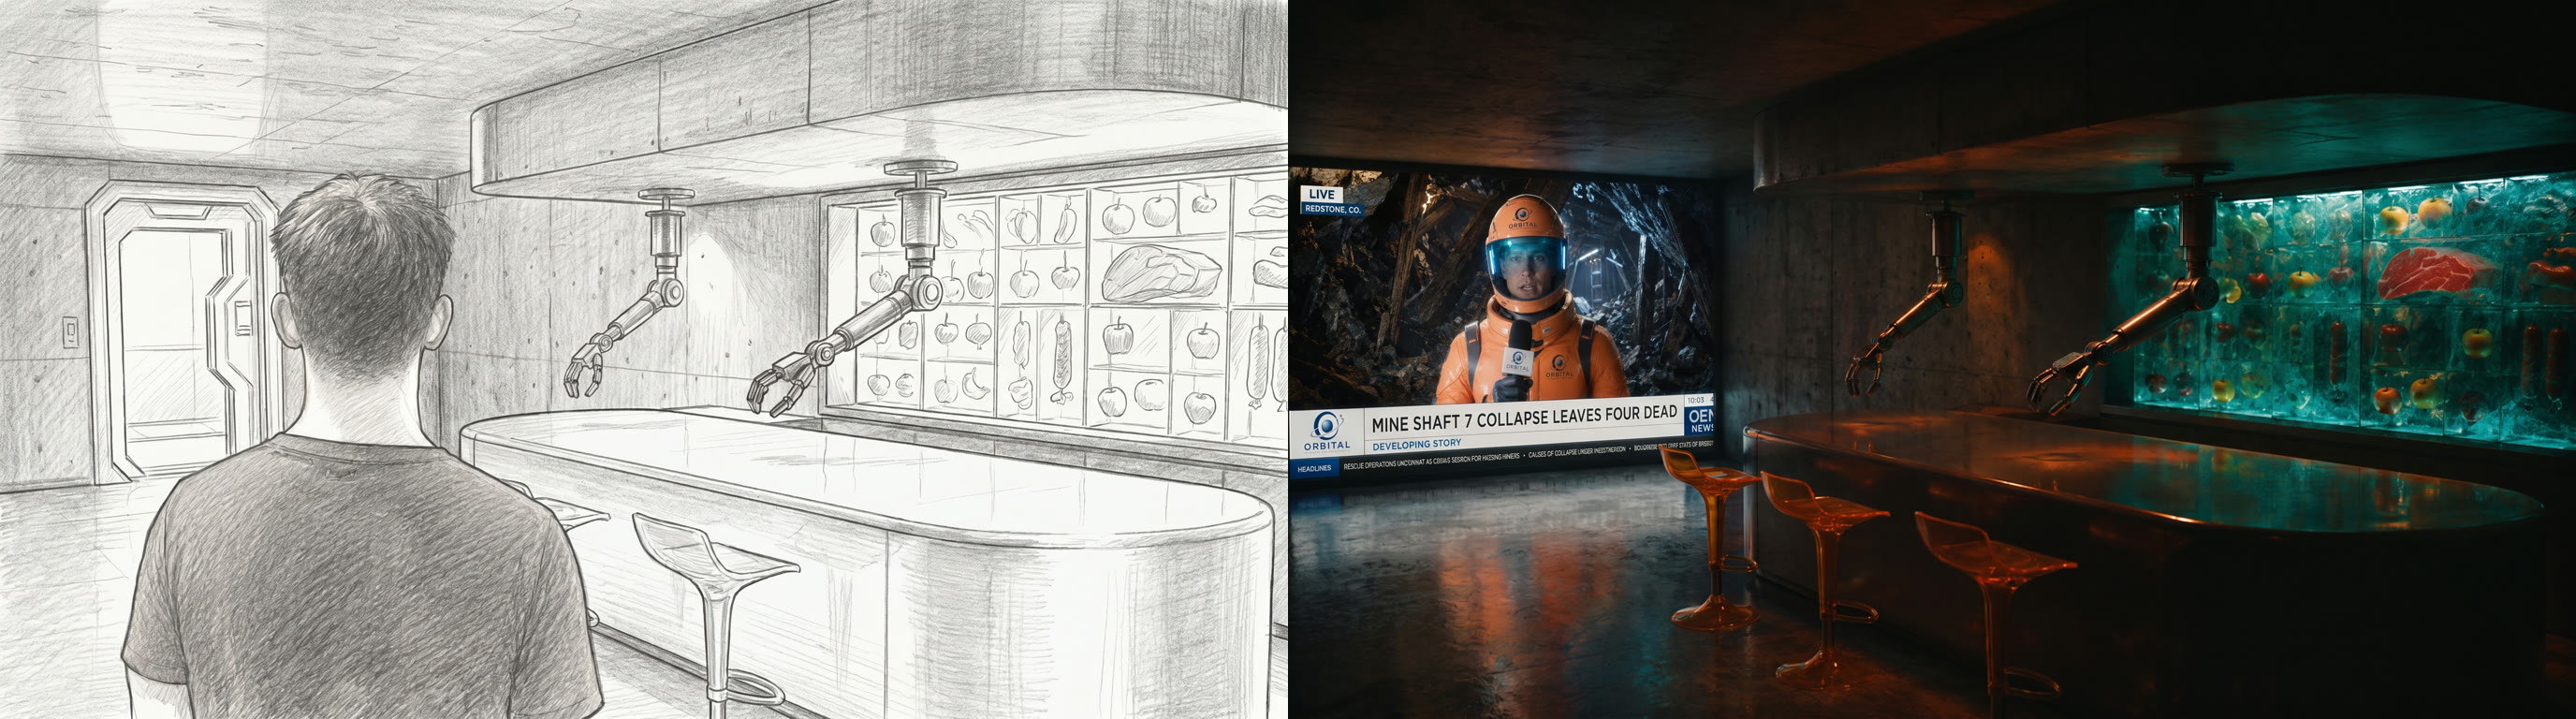
Sketch and rendered kitchen: compare the counter, ceiling-mounted arms, and food display. The left wall also changes. Check what survived the visual treatment instead of assuming all geometry stayed fixed.
Test the place from two views
Import your references and notes with Upload and import. Follow Generate Image for the supported inputs and settings.
Test a wide view that locates the bench and hook. Then test a closer view of the umbrella with the same landmarks. Use existing suitable candidates before paying for more.
Keep a short manual record beside each test: Date / View ID / Prompt / Reference inputs / Model / Settings / Result / Next change. Identify the matching image so you can compare versions without guessing what changed. Write a specific finding, such as "the hook moved; correct its position before another run."
Compare the views side by side. Explain where the camera moved. The light may appear on the opposite side of the picture after a camera change, but it should still come from the same physical side of the station.
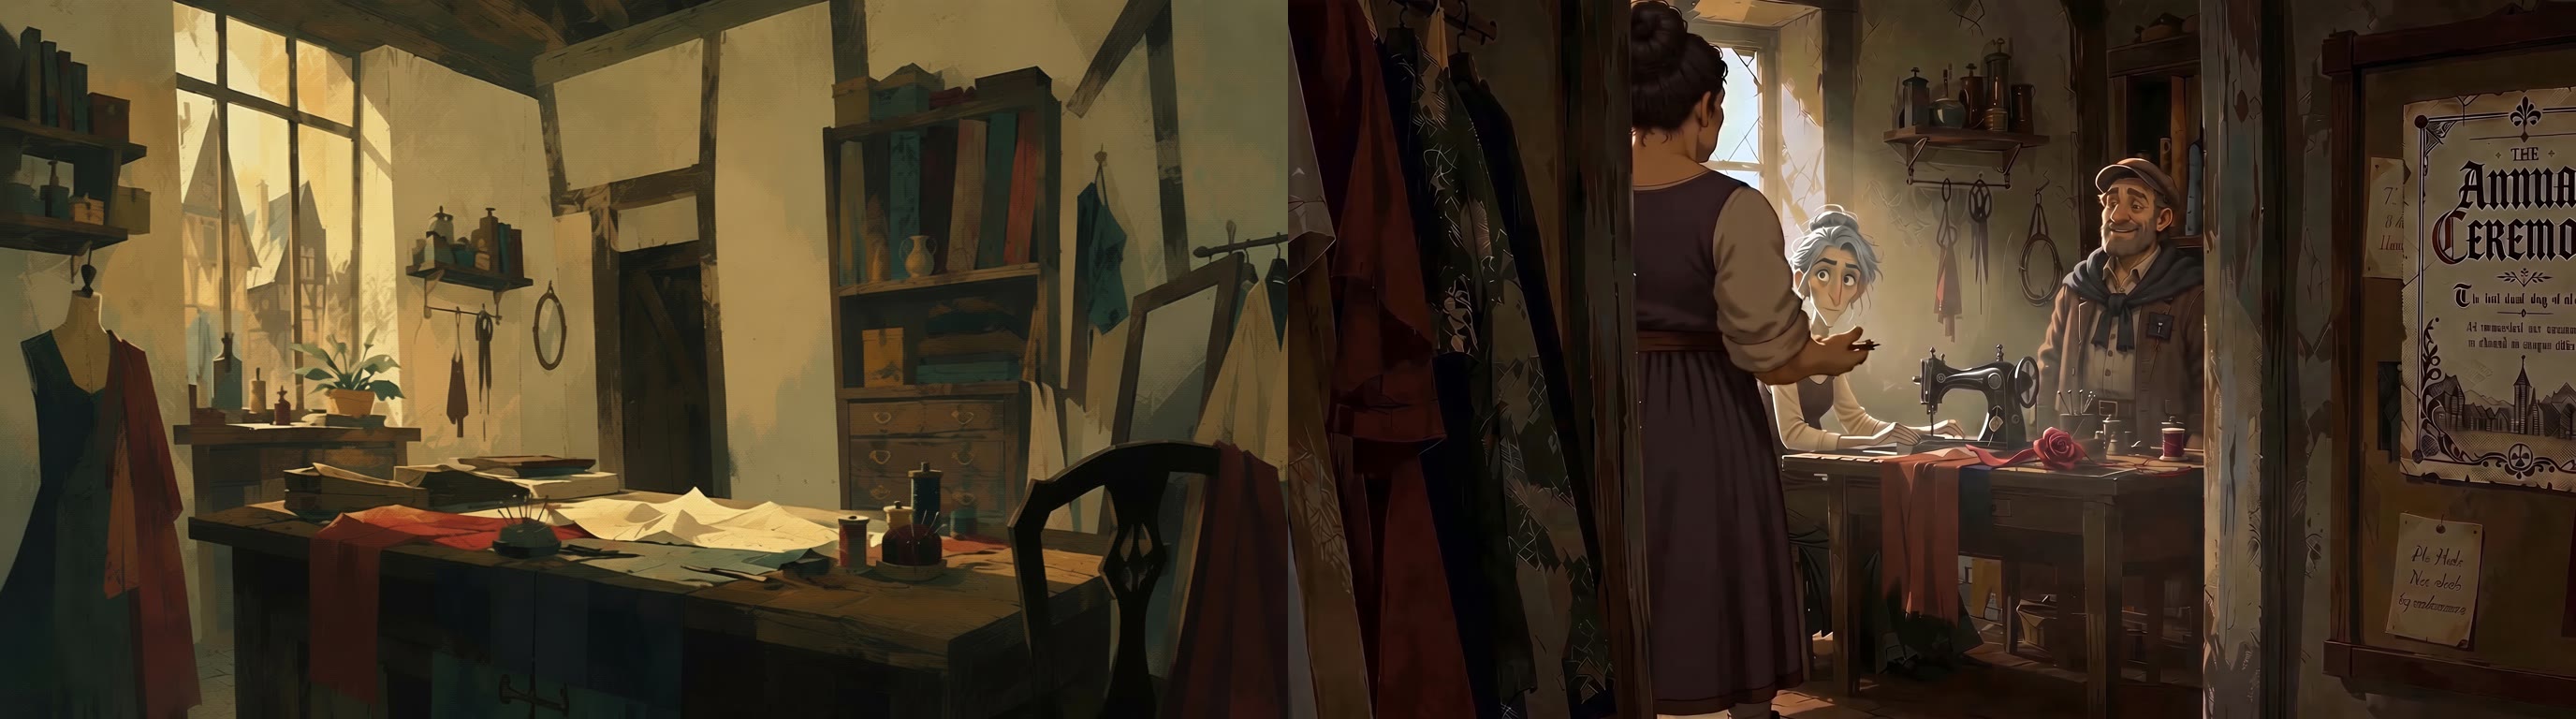
Empty and occupied shop views repeat a window, worktable, and hanging tools. Compare their relationships and the light direction. Familiar objects alone do not prove that the entire layout matches.
Check character-to-background contrast too. The viewer must find the traveler and umbrella at normal playback size. Adjust the costume, background, framing, or light as needed; no particular color is always the right answer.
Know when the board is ready
Keep the selected views and note what worked. If the hook moved or the station became a different building, correct that mismatch before collecting more angles.
Two good stills are not final proof. Chapter 4 adds a motion test to check whether the visual direction survives animation. Keep the world small enough to revise until then.
Before you continue
- I labeled each reference's purpose and source, kept usage notes, and removed contradictions.
- I compared two views against the same layout, light direction, and landmarks, and recorded each test.
- I checked that the traveler and umbrella are easy to find in the frame.