09. Build the sound
Bring: Your rough cut and early sound notes. Make: A simple cue list and a reviewed sound pass.
A soundtrack is everything the audience hears, not just music. Add sounds that establish a place, reveal an action, or shape a feeling. More layers do not automatically make the film richer.
Listen to what is already there
Play the cut before adding audio. Generated clips may already include sound. Note useful elements, unwanted speech, inconsistent ambience, or music you did not intend.
Decide what to retain or reduce before adding another layer. Otherwise, the same footstep or atmosphere may play twice. Listen through cuts, where those changes are often most obvious.
Give each layer a job
- Voice: Essential words. The station exercise does not need dialogue.
- Ambience: The ongoing place, such as distant station activity and water dripping from a roof.
- Action effects: Events such as shoes stopping on concrete or a handle touching a hook.
- Music: An optional emotional or rhythmic interpretation.
- Silence or reduction: Space for the viewer to notice a gesture. You can reduce music without removing all ambience.
A continuous ambience can connect different views of the same station. Footsteps can prepare an arrival before it is visible; an unrelated announcement can imply an event your film never shows. Choose sounds for meaning, not just atmosphere.
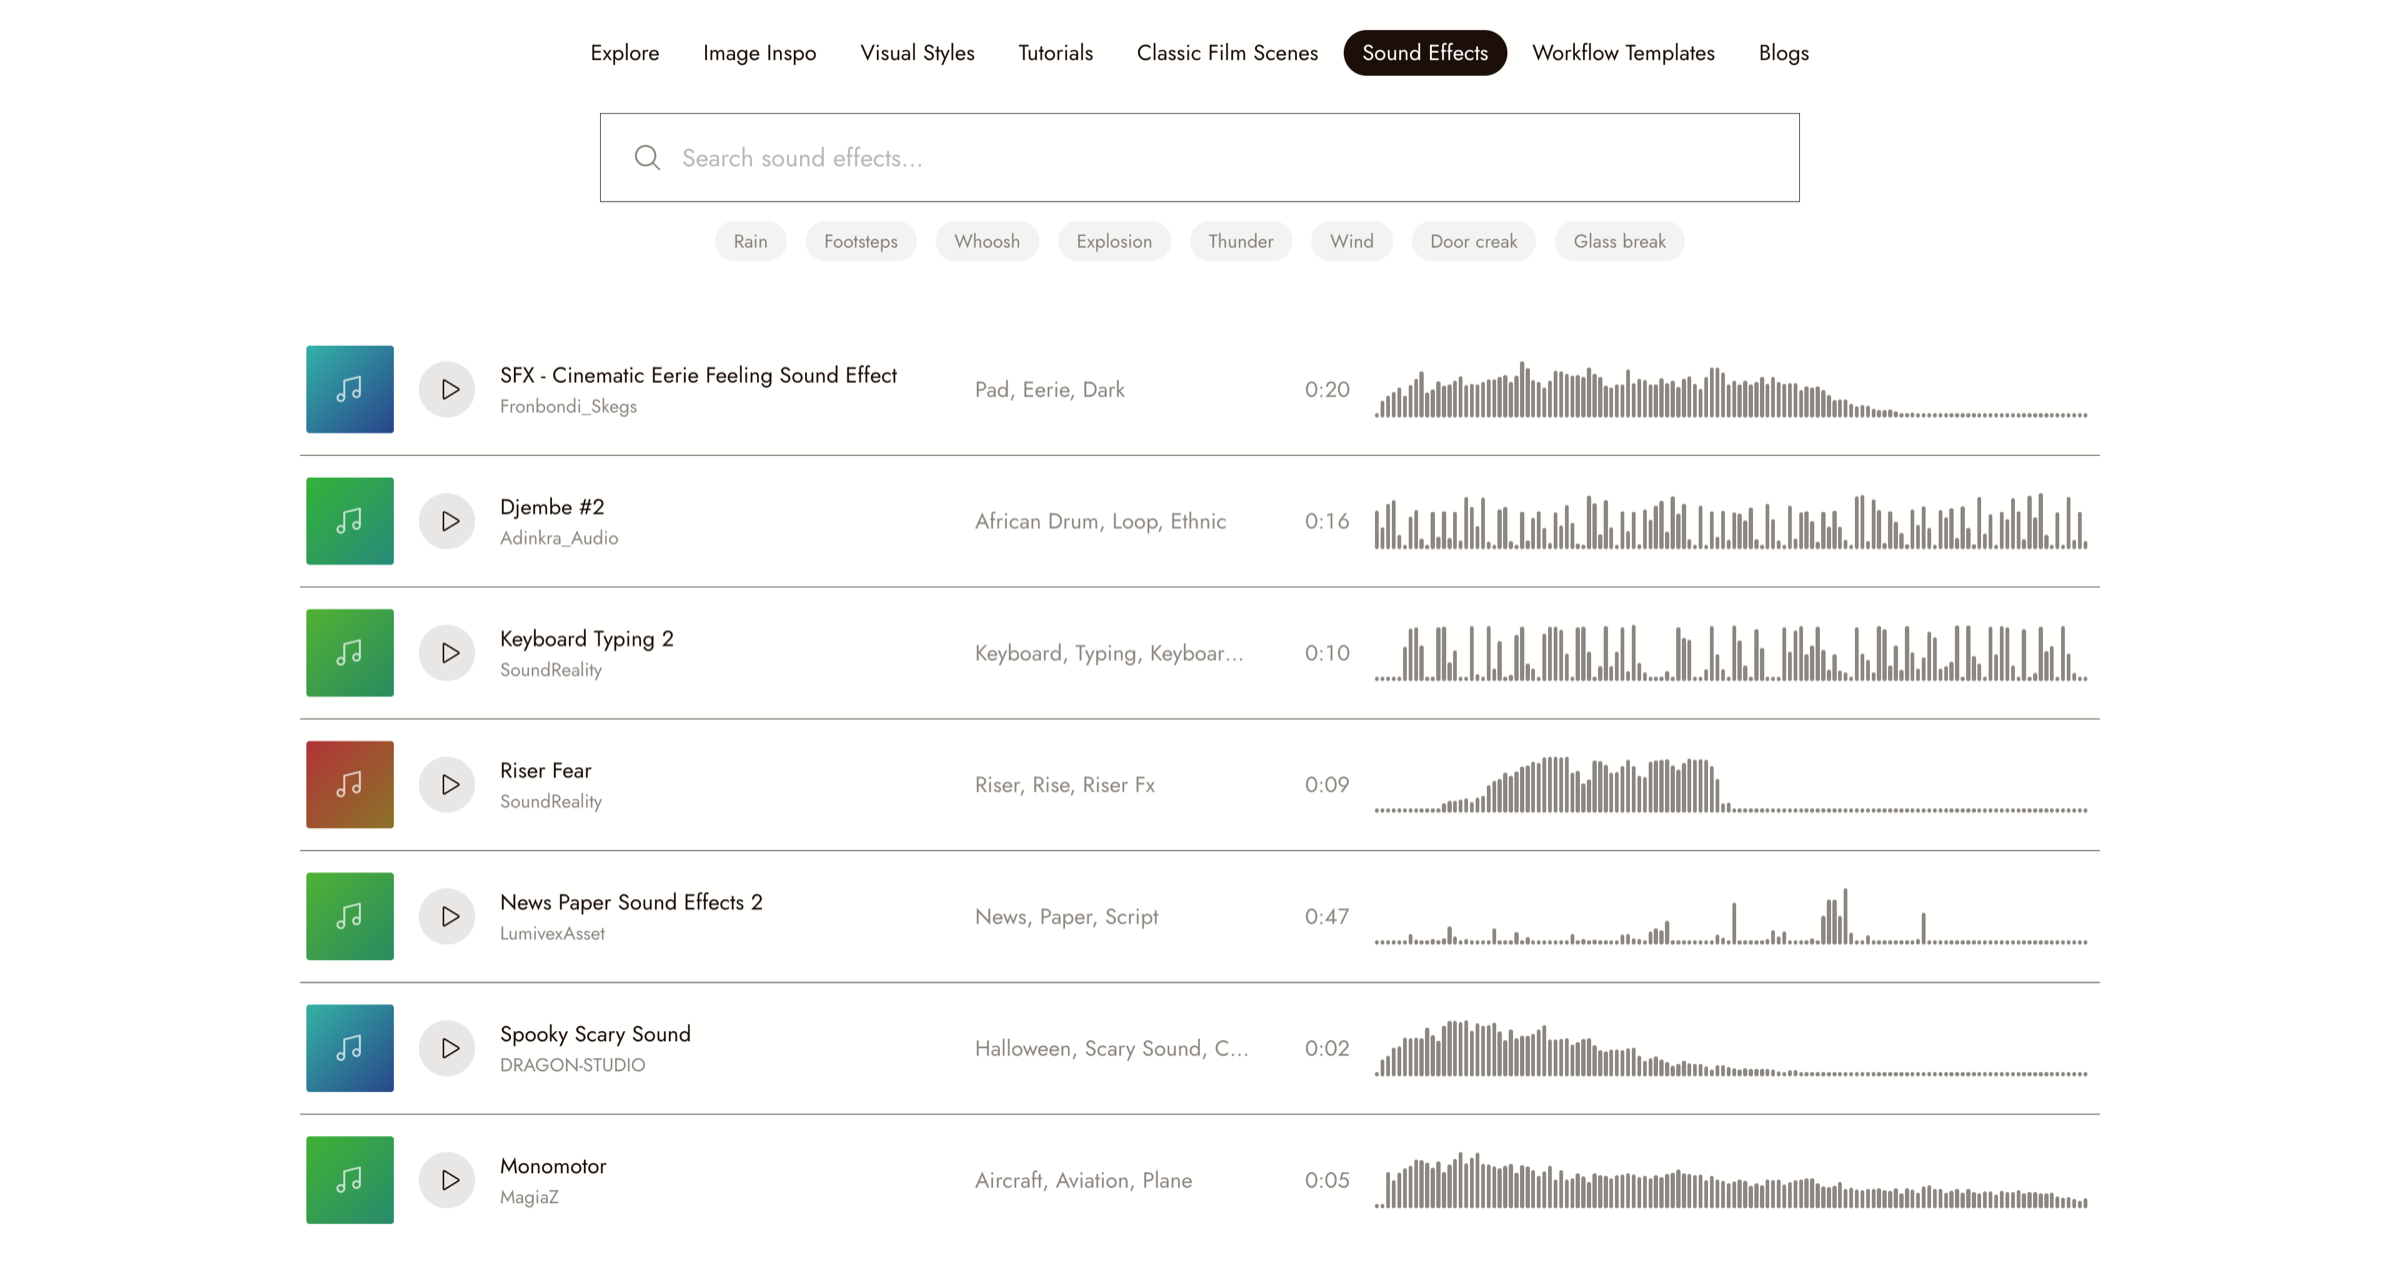
Flickpedia's Sound Effects view provides search and preview controls. Audition a sound for its source, surface, distance, and mood before adding it to the scene.
Match sound to the actual cut
A cue is a sound's entrance, change, or exit. Start with picture landmarks, then record timecodes and an intended exit for each sound. A cue that helped one moment may distract during the next:
| Picture landmark | Sound choice | Purpose | Exit or change |
|---|---|---|---|
| Traveler crosses the platform | Station ambience and footsteps | Establish the place and hurried movement | Footsteps stop at the pause; ambience continues |
| Traveler stops | Ambience without extra musical emphasis | Make room for the discovery | Continue across the next view |
| Umbrella is released | A small contact sound suited to the material and distance | Clarify the gesture | End after the natural decay; do not loop it |
| Traveler leaves | Receding footsteps and station ambience | Keep the ending ordinary and grounded | Let steps recede; finish the ambience with the scene |
Do not add an effect to every visible movement. Place sound against the edit, then adjust by listening. A generated target length is not exact synchronization to the picture.
Describe acoustic details
For an effect, specify source, material, distance, and rhythm. "Light water drops on a metal roof, heard from several steps away" is more useful than "cinematic rain."
If a sound feels wrong, identify the missing property. Is a footstep too heavy, too close, or on the wrong surface? Choose a better source or layer only the missing component. Two full-volume versions of the same event may simply sound doubled.
Music first: use a cleared track to explore pace, but let actions breathe rather than cutting on every beat.
Music after the rough cut: score against an existing reveal or dialogue rhythm, then recheck sound whenever picture timing changes.
Neither order is required. A score can also be prepared with a collaborator or another tool and imported. For this film, compare ambience alone with sparse, quiet music using assets you own or are cleared to use.
Build and compare in Flick
- Follow Import audio to place the chosen assets. Listen to the ambience-only version first and check it across cuts.
- Add the music candidate. With its clip selected, use Properties > Sound > Volume to balance it, and Fade > In and Fade > Out for its entrance and exit. Audio fades are separate from picture transitions.
- Compare with the music at 0%, keeping picture, ambience, and listening volume unchanged. Does music support the gesture, make it sentimental, or suggest a different story?
- Restore your chosen level, or leave music out. If there is dialogue, lower competing layers before raising the overall volume. Check every essential word.
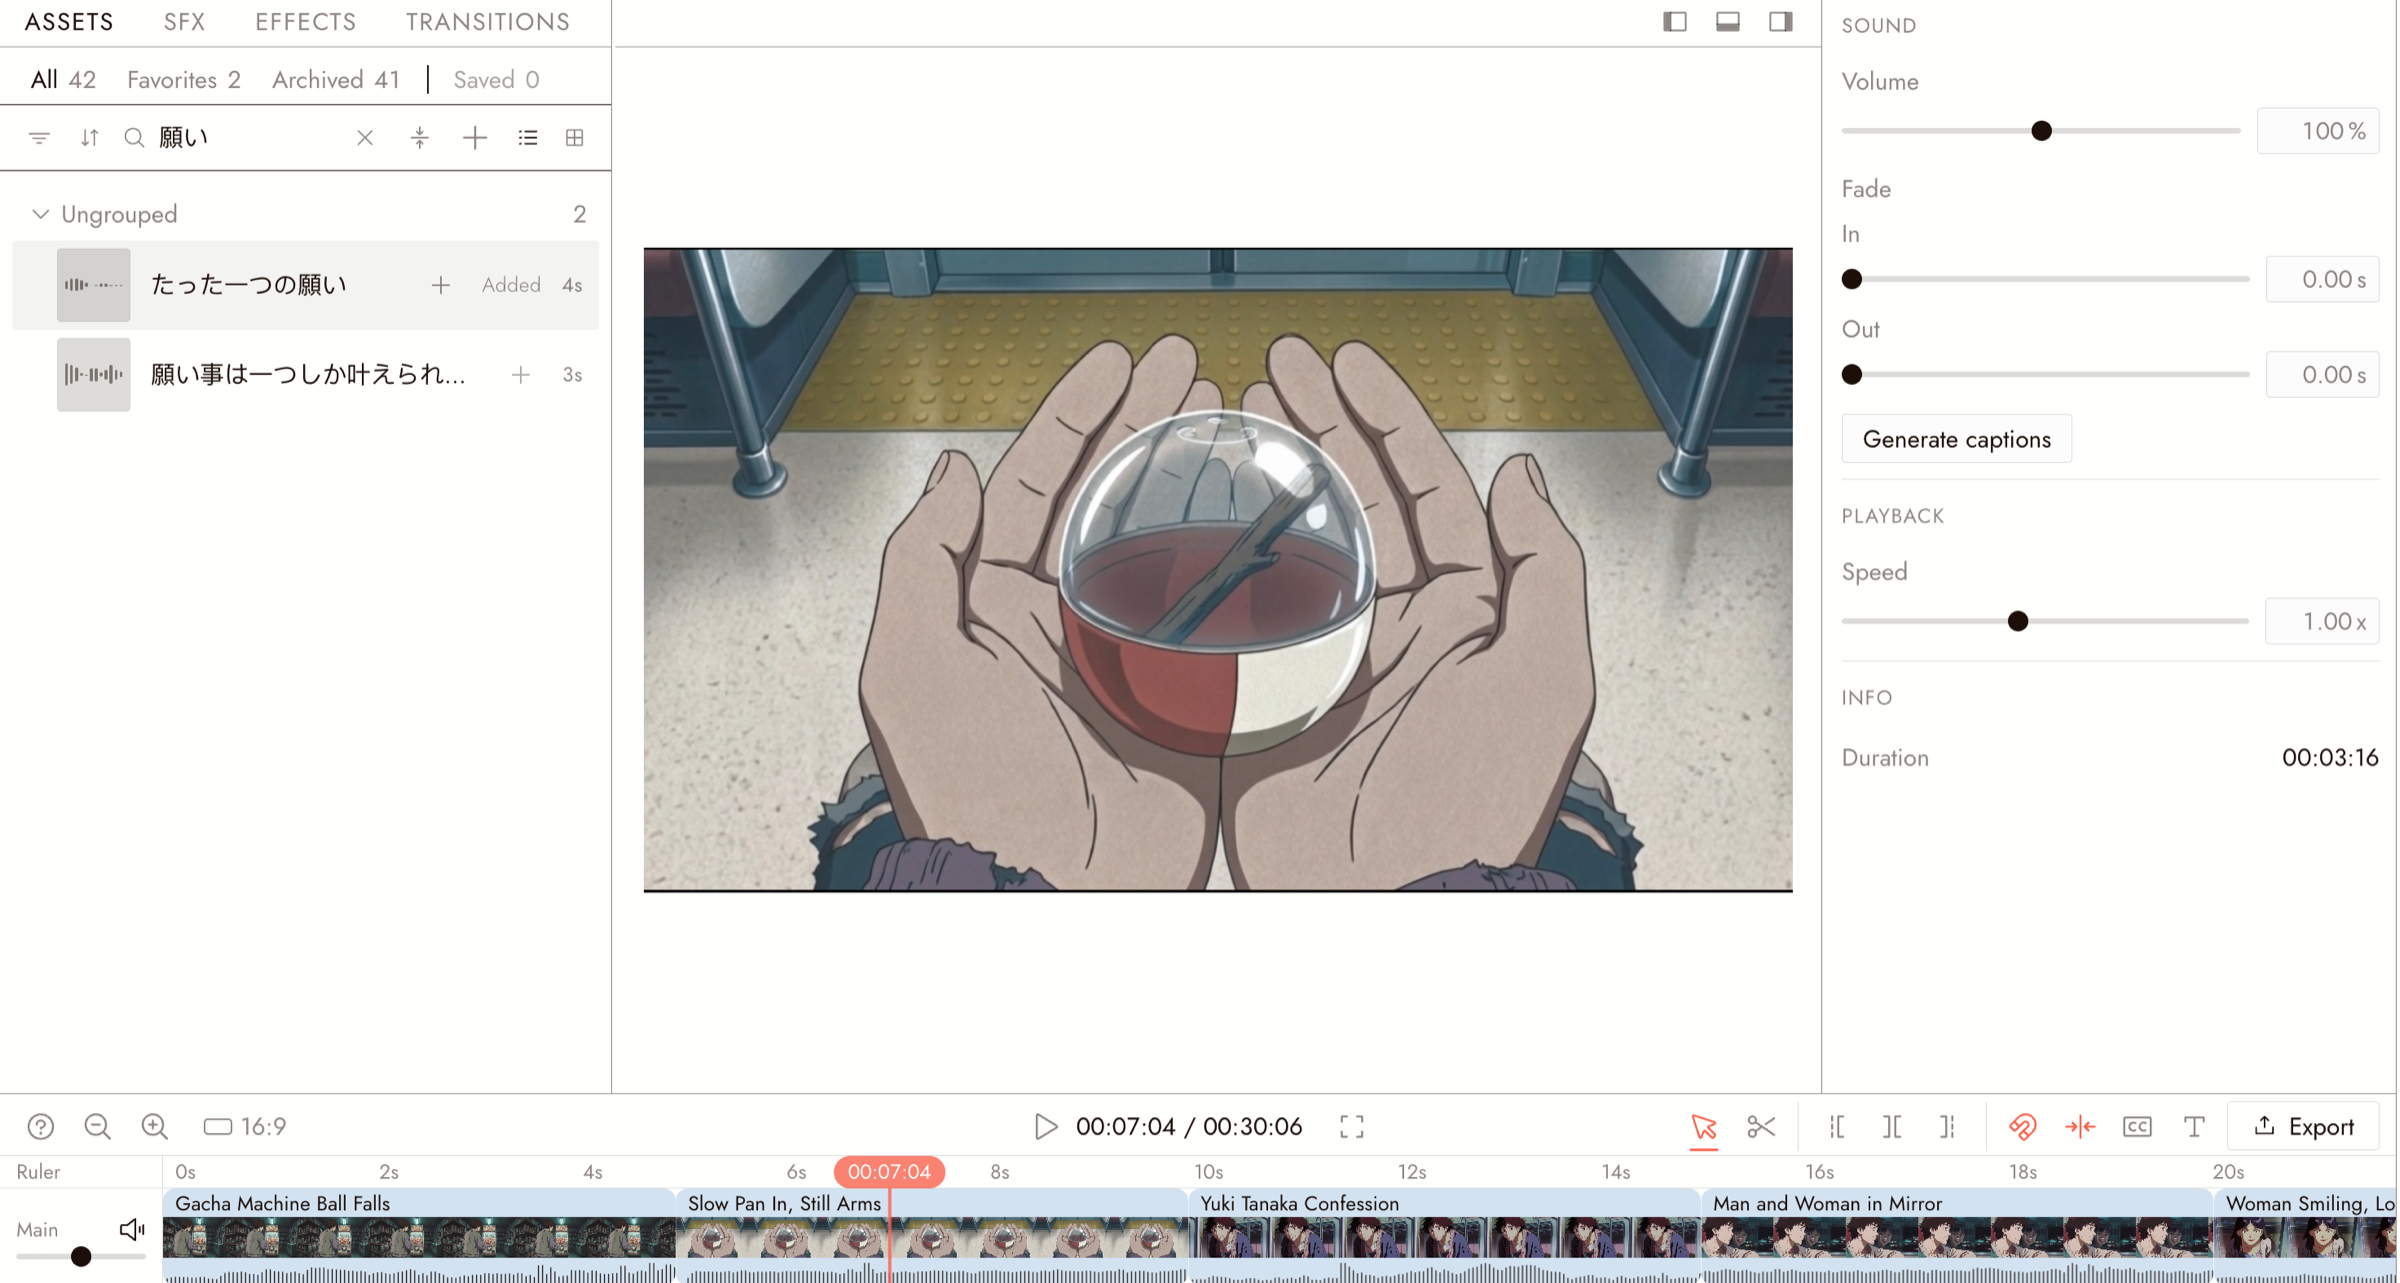
The selected clip's Sound properties show Volume and Fade controls. These affect the selected clip; listen to the complete mix after each adjustment.
If you need to generate music later, use the linked guide's Text to Music section for availability and controls. Describe instruments, energy, and vocal needs, then check the actual output. Generation is optional for this exercise.
Listen on headphones and ordinary speakers at a comfortable level. Check the transitions, unexpected jumps, dialogue, and final fade. If you finish the sound in another editor, review the exported mix with the same picture; external mixing controls are not automatically Flick features.
Before you continue
- I checked existing clip audio and gave each added layer a purpose.
- I placed and balanced cues against the actual edit, including its ending.
- I compared music with no music and listened through the selected mix on two playback setups.
Next: 10. Review and finish.