
How to storyboard a film in 6 steps, from a rough sketch to the AI shot
To storyboard a film, break the script into beats (moments where something changes) and number every shot, map the set from above, sketch one rough panel per shot (framing, camera, where everyone stands), label each panel, then cut the panels into a timed animatic to check that the story reads. You don't need to draw well: boxes, stick figures, phone photos or a 3D blockout all work. If an AI model makes your final frames, each panel is also the layout the model copies.
Turn your storyboard into a scene
Start from your panels. Each one becomes a frame with the same layout, then a clip.
What a storyboard is, and how it differs from a shot list and an animatic
A storyboard is your film drawn as one panel per shot, in the order the audience will see them. Each panel shows what the camera sees, from where, and what happens.
| Tool | What it is | What it answers |
|---|---|---|
| Shot list | A written table, one row per shot | What we shoot, in what size, from where |
| Storyboard | One drawn panel per shot | What each shot looks like |
| Animatic | The panels cut together, timed, with rough sound | Whether the scene works, and how long it runs |
Shot list, storyboard and animatic compared.
How to storyboard a film in 6 steps
Each step works for any film. "With AI" shows what changes when a model makes the frames, with real prompts from films made in Flick.
1. Break the script into beats, then into numbered shots
What it is: A beat is one moment where something changes: a look, a decision, a new piece of information. A shot list is a written table of every shot in the scene.
Why it matters: The list tells you how many panels to draw, and stops shots that do nothing.
How to do it
Mark the beats: mark each change in the margin of the script.
Give every shot one job: write what the audience learns from it. If two shots teach the same thing, cut one.
Write one line per shot: the shot size (wide, medium, close-up, or insert, a tight shot of an object), where the camera stands, and the action. Flick Academy's lesson Plan shots that cut together has a six-shot outline to start from.
With AI
Write the shot list as a text note on your canvas (the workspace in a Flick project), one note per beat; each line later starts a prompt. Xenogenesis by Gertywood (Flick Residency) has 18 of these notes (public canvas, October 2026):
Note: Beat 4's shot list, as written on the canvas (bold marks removed; "…" replaces dashes)
# Beat 4 … INT. FAMILY HOME / BEDROOM / MORNING
Cole wakes happy. Texts brother.

1. Wide … bedroom door frame … Cole stirs in bed, camera locked in the doorway. Observational. We watch him come back to life.
2. Insert … phone screen … his texts to his brother. Cocky, boyish. Camera reads the screen with us. Static shot.
2. Map the set from above before you draw a panel
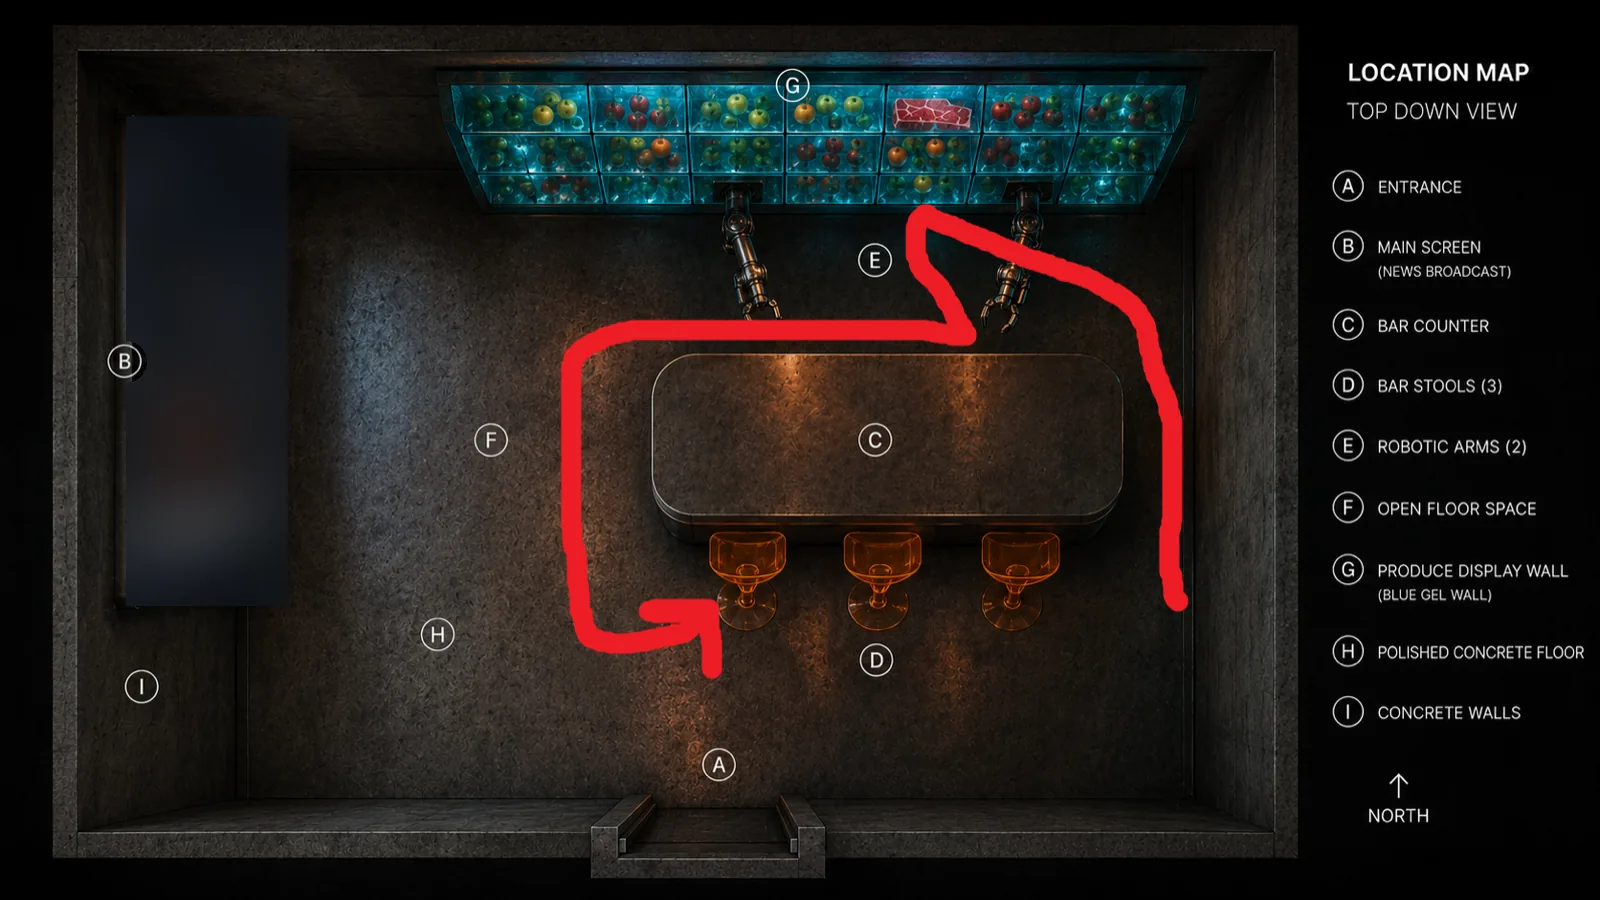
What it is: A drawing of the location from above: walls, doors, furniture, where each person starts, the path they take, and where each camera stands.
Why it matters: You check three things against it.
Screen direction: the direction movement travels across the frame. Someone walking left to right should keep going left to right in the next shot.
Eyeline: where a person appears to look. The next shot has to show what sits in that direction.
The 180-degree rule: draw a line between two people facing each other and keep the camera on one side of it. Each person then stays on the same side of the frame.
How to do it: Draw the room as a rectangle and letter every object. Draw each route in one color. Mark each camera as a numbered triangle pointing where it looks.
With AI: Models don't remember the room between generations, so the map is how you check that shot 4 still matches shot 1. Flick's Academy lesson shows this Xenogenesis map: "Every shot in that scene was checked against it."
3. Draw one rough panel per shot (or make one without drawing)
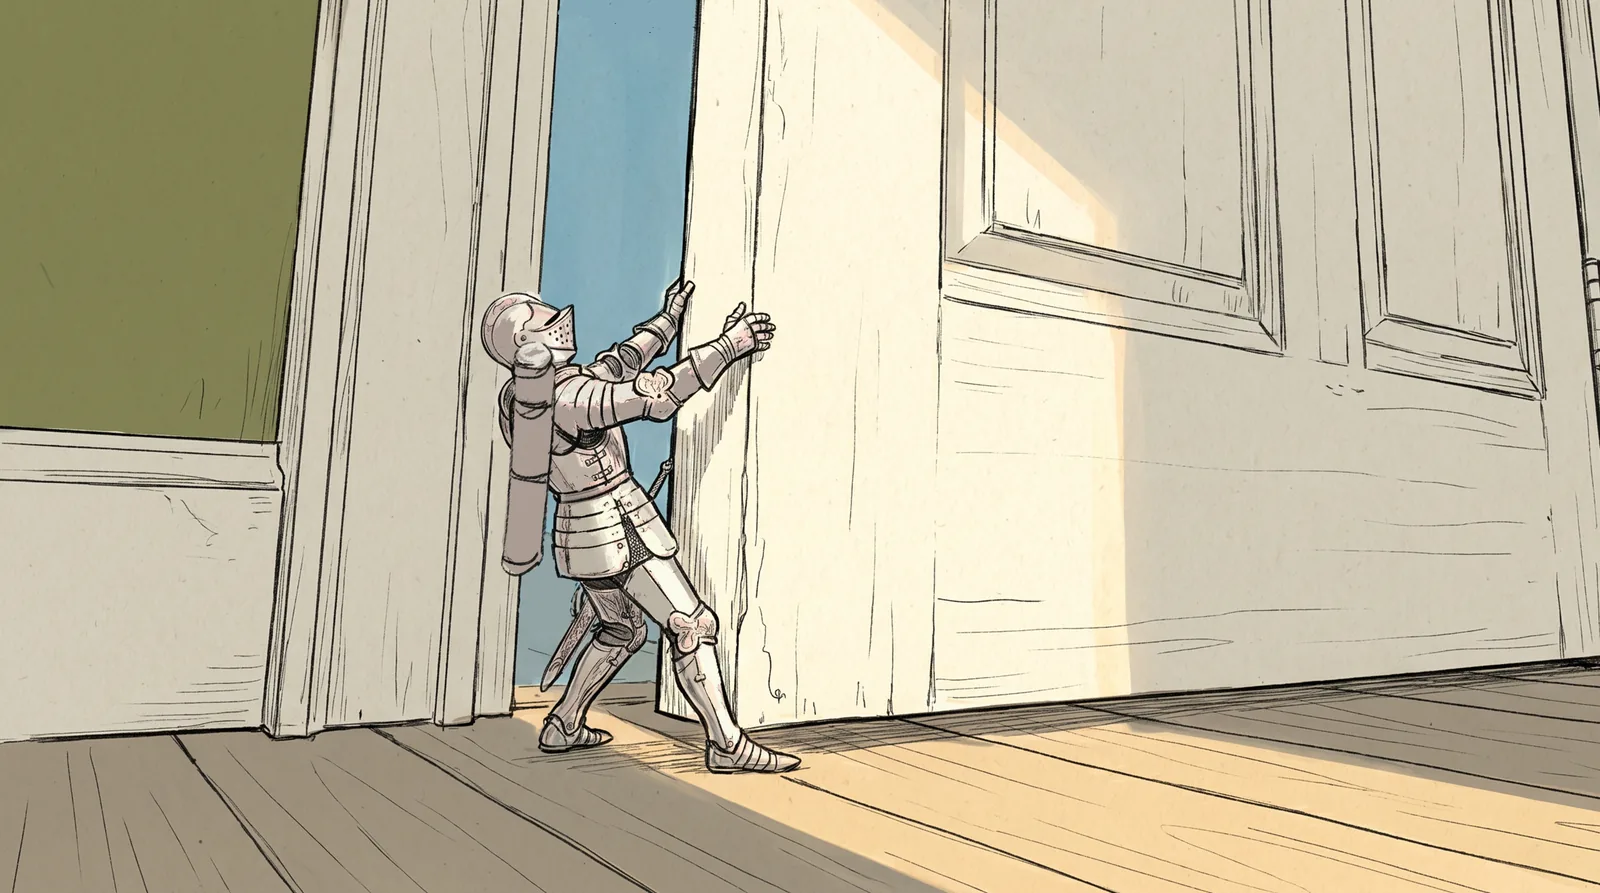
What it is: A panel is one box per shot, in the film's frame shape: 16:9 for most films. Small, fast panels are called thumbnails.
Why it matters: A panel shows what a shot list can't: how big the subject is, what stands in front of what, where the horizon sits.
How to do it
Draw the boxes first: six 16:9 boxes to a page, with room underneath for notes.
Use shapes and stick figures: size shows distance, so a small figure reads as far away.
Draw arrows for movement: one kind for people, another for the camera.
How rough? As rough as the shot is easy. Gertywood keeps his loose: "I actually do like a vague storyboard beforehand." Draw a full panel only where the camera, scale or blocking (where people stand and move) is unusual, like a tiny knight against a huge door.
Can't draw? Three other ways
Photos: pose friends or toys and shoot them on your phone from the camera position.
A 3D blockout: Jaime Yao blocked each shot of A Proper Introduction (Flick team) in Blender, then turned the screenshots into sketches because they looked synthetic (example 1 below). Flick's 3D Stage (3D blocking on the canvas) does the same.
An AI layout: In ’twixt Vows by Jaime Yao (Flick Residency) used GPT Image 2 for plain white-model layouts that fix space and camera; our guide to realistic AI videos shows one. For panels straight from a script, try Flick's AI storyboard generator.
With AI
Draw only what the model should keep: framing, angle, positions, scale, and where the light falls if it matters. Leave textures, materials and faces to the prompt. Flick's Ulysses workflow post puts it in one line: "A bad drawing with the right composition beats a beautiful paragraph."
4. Label every panel with a shot ID and notes
What it is: A shot ID is a short name for each shot: the scene number plus a letter, so S1A, S1B and S1C for scene 1. The notes say what the picture can't: the camera move, the action, dialogue and sound.
Why it matters: Everyone, and every file, calls the same shot by the same name, even after you add or cut shots.
How to do it: Copy this template into a doc or spreadsheet. The example row is ours, based on the door sketch above.
| Shot ID | Shot size | Action | Camera | Notes |
|---|---|---|---|---|
| S1A (example) | Wide | A tiny knight pulls a huge door open | Floor level, locked | Door fills the frame; the knight must read as small |
| S1B | ||||
| S1C |
Shot ID template: one row per panel.
With AI
Name each image on your canvas with its shot ID and call it by name in the prompt. Xenogenesis has 82 stills named this way, from S1A to S15A (public canvas, October 2026); its board is approved stills, not drawings. Its dinner scene asks for three shots in one take (one generated clip), each from its own still:
Model: Seedance 2.0 Ref, 15 s · Note: Names in brackets are stills on the canvas; trimmed (the full prompt also sets the cast, voices and look)
use [S1 CU MOM Wonder 3] for shot 1
use [S1F] for shot 2
Use [S1E] for shot 3
Three shots with hard cuts.
5. Turn each panel into the finished frame
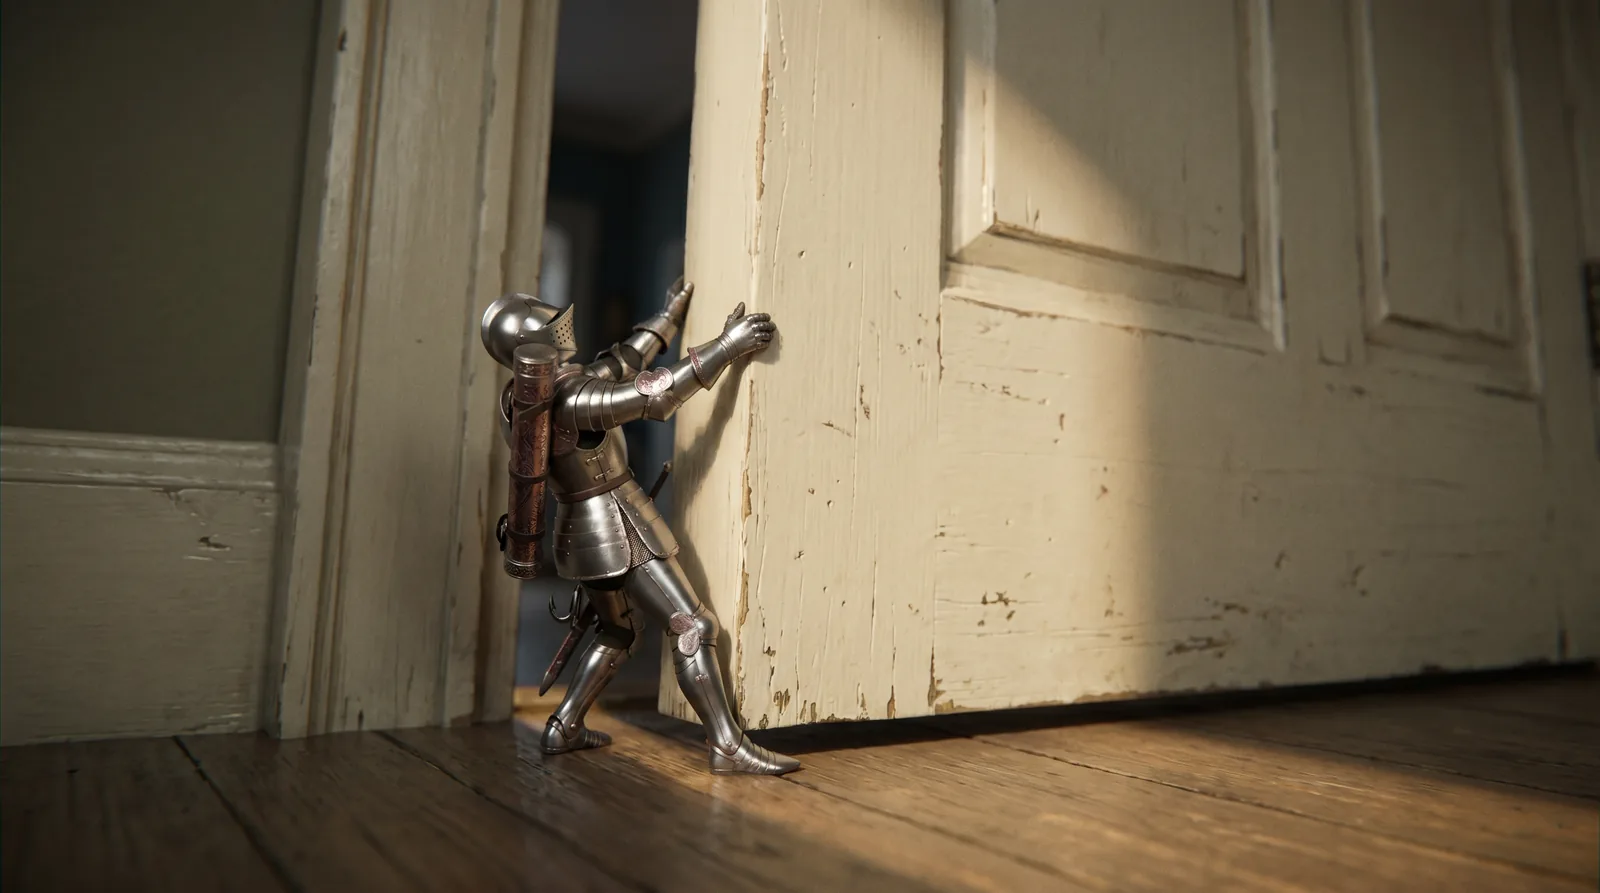
What it is: The finished image of the shot. On a set, the crew frames to the board; with AI, an image model draws it from the board.
Why it matters: What the board decided (camera, framing, positions) has to survive.
How to do it, with AI
Give each reference one job: the sketch is "the only composition reference"; the character sheet is "the only small knight design reference".
Lock what the board decided, one line each: "camera position 100% unchanged."
Then write what the sketch left out: light, materials, focus, grain.
252 of A Proper Introduction's 896 image prompts use a sketch as "the only composition reference" (public canvas, October 2026). This one made the frame above:
Model: Nano Banana Pro · Note: Edit with 2 references, the sketch and a knight turnaround sheet; trimmed
Use the provided base image as the only composition reference.
Use the provided character reference as the only small knight design reference.

Convert the sketch into a photoreal live-action image.
composition 100% exactly match the provided base image.
camera position 100% unchanged.
framing 100% unchanged.
door position 100% unchanged.
door gap width 100% unchanged.
character position 100% unchanged.
character action 100% unchanged.

The small knight 100% matches the provided character reference.
He is a tiny knight figurine, not a full-size human.
The scale contrast between the tiny knight and the huge door must read clearly.
He grips the edge of the door with both hands, leans his body backward, and pulls the door open with visible effort.
…
Focus on the knight figurine.
The knight is the sharpest subject in the frame.
… Make the overall image dark.
This is a dim real residential interior.
… A small patch of warm sunlight falls on the door surface and the wooden floor on the outer side of the door.
… The image must clearly read as: a very tiny knight figurine in a real domestic interior, struggling to pull open a huge door.

natural imperfect real-camera rendering.
subtle film grain. …
Watch for: a frame that drifts from the board. Check it against the sketch; if a lock failed, state it more plainly and make another take.
6. Cut the panels into an animatic, then test the riskiest shot
What it is: An animatic is your panels in order on a timeline, timed, with rough sound.
Why it matters: It shows whether the story reads and how long the scene runs, before you pay for finished shots.
How to do it
Lay out and time the panels: put them on any video timeline in shot order and hold each for its expected length. Add rough sound: footsteps, a line recorded on your phone.
Show it to someone who hasn't read the script. If they get lost, fix the board, not the shots.
Make the riskiest shot first: the hardest move, prop or action.
With AI
Put the frames on the timeline, then animate only the riskiest shot. Keep the video prompt short: the camera first, then the actions in order, then how the shot ends.
Model: Kling O3, 5 s, 1080p · Note: Image to video from the door frame; the clip above
handheld camera style.
smooth continuous motion.
The little knight strains to push the door open a little wider.
The door opens only a little more, never swinging wide open.
He then walks through the opening and enters the room.
By the end, he is fully inside the room.
No background music.
In Flick's Academy lesson, a Xenogenesis test showed the camera drifting as the character crossed to the fridge; the team learned this "from one 15 second clip, before building the rest of the scene." To block an animatic in 3D, see how to make AI movies.
Have your panels? Flick's storyboard to video tool turns each one into a frame with the same layout, then a clip.
Why AI interprets your drawings, and how to make it follow them
An AI model treats your panel as a strong hint, not a contract. The Flick Academy video follows Alejandro Alarcón, who storyboarded his short Tired Eyes before generating anything. Its narrator names the catch: "AI doesn't always execute drawings, it interprets them."
Make several takes: A Proper Introduction made 4 video takes from one frame, and 8 from another.
Know when to let go: sometimes the model's version is better. In Alejandro's words, "your job becomes to be a curator". If you keep it, update the board so the next shots match.
How to storyboard an action scene
Action needs more panels than dialogue, because each panel can show only one move clearly.
Break each move into beats: Jaime Yao's rule from Flick's tutorial How to Make an AI Film That Doesn't Look Like AI Slop: "For action scenes, I break each move into contact, force, reaction, and the next movement." Draw a panel for every beat that changes who has the upper hand.
Draw the fight on the set map: keep the camera on one side of the line between the fighters, and go wide again whenever the viewer could get lost.
Cut on action: end a panel mid-move and start the next shot inside the same move, so the cut hides in the motion.
With AI, give each beat a time window: "If I want three strikes in 1 second, the agent needs to describe each strike, its target, and the response within that second." Our guide to choreographing a fight scene with AI writes a 30-second duel as numbered shots with time windows.
Storyboard examples from films made in Flick
Both examples are from A Proper Introduction: the board, the frame it became, and the prompt between them.
Example 1: a 3D render turned into a storyboard frame, then a photoreal shot
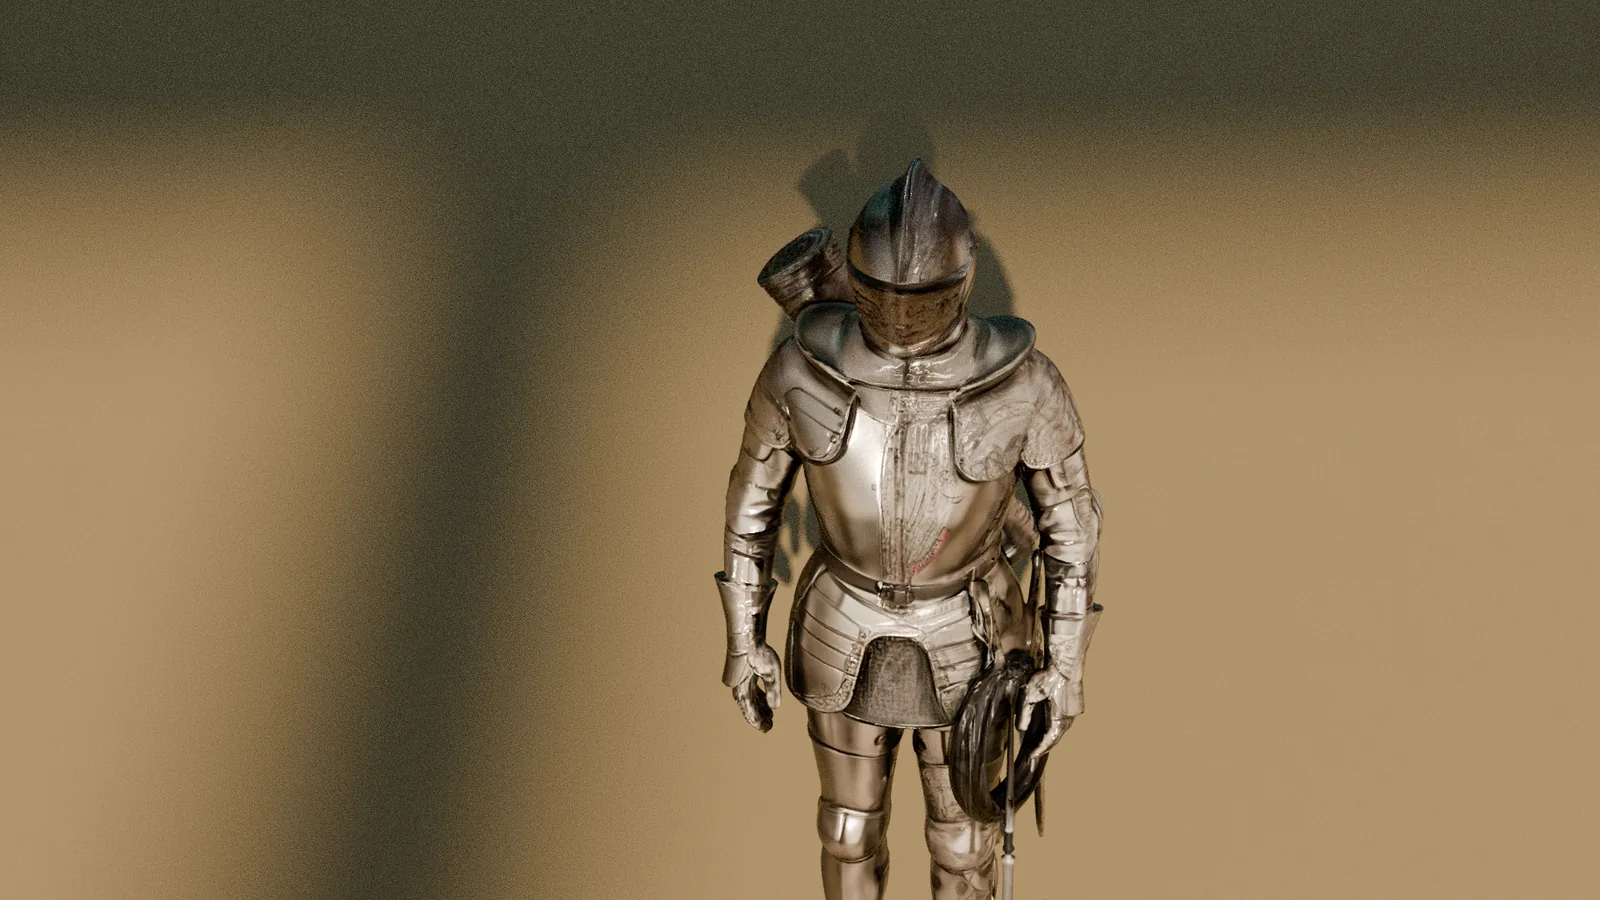
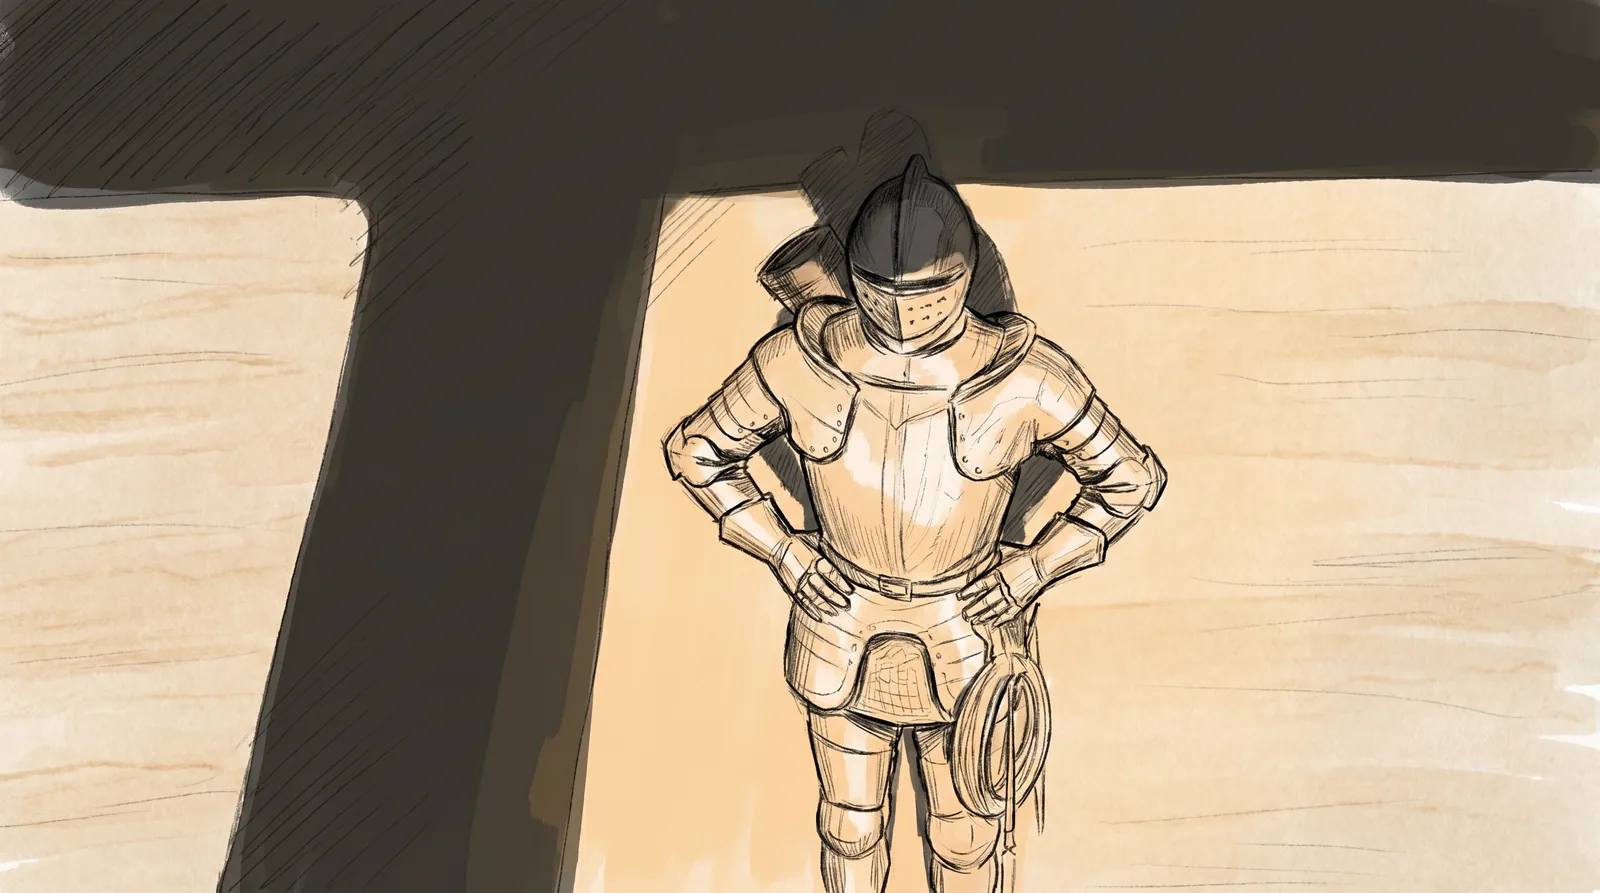
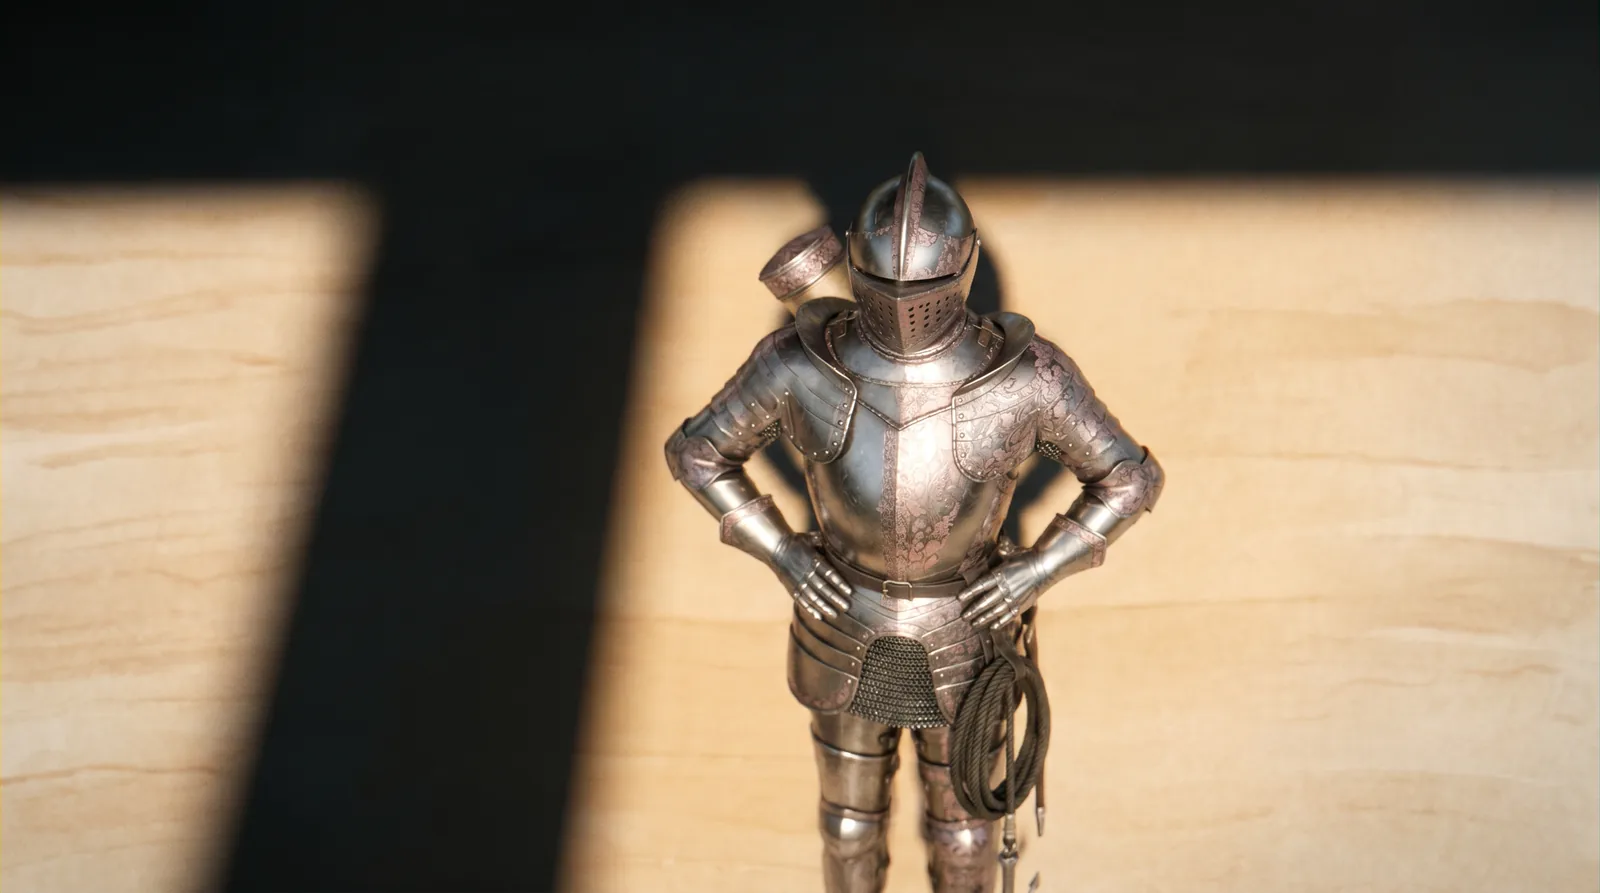
What the board fixed: the camera angle, the pose, and the line between shadow and sunlight.
How it was made: the drawn frame became the only layout reference for the final shot.
Use it when: a render looks too synthetic.
Model: Nano Banana Pro · Note: Edit, render to storyboard frame; trimmed
Use the provided base image as the exact base image.
Convert the image into a hand-drawn cinematic storyboard frame.
Composition 100% unchanged.
Camera angle 100% unchanged.
Top-down view 100% unchanged.
Character position 100% unchanged.
Character scale 100% unchanged.
Light direction 100% unchanged.
Shadow shape 100% unchanged.
…
Use clear pencil linework, ink contour lines, sketch strokes, line weight variation, and visible hand-drawn texture.
Add soft hand-painted color blocking.
Example 2: a first-person shot with three references
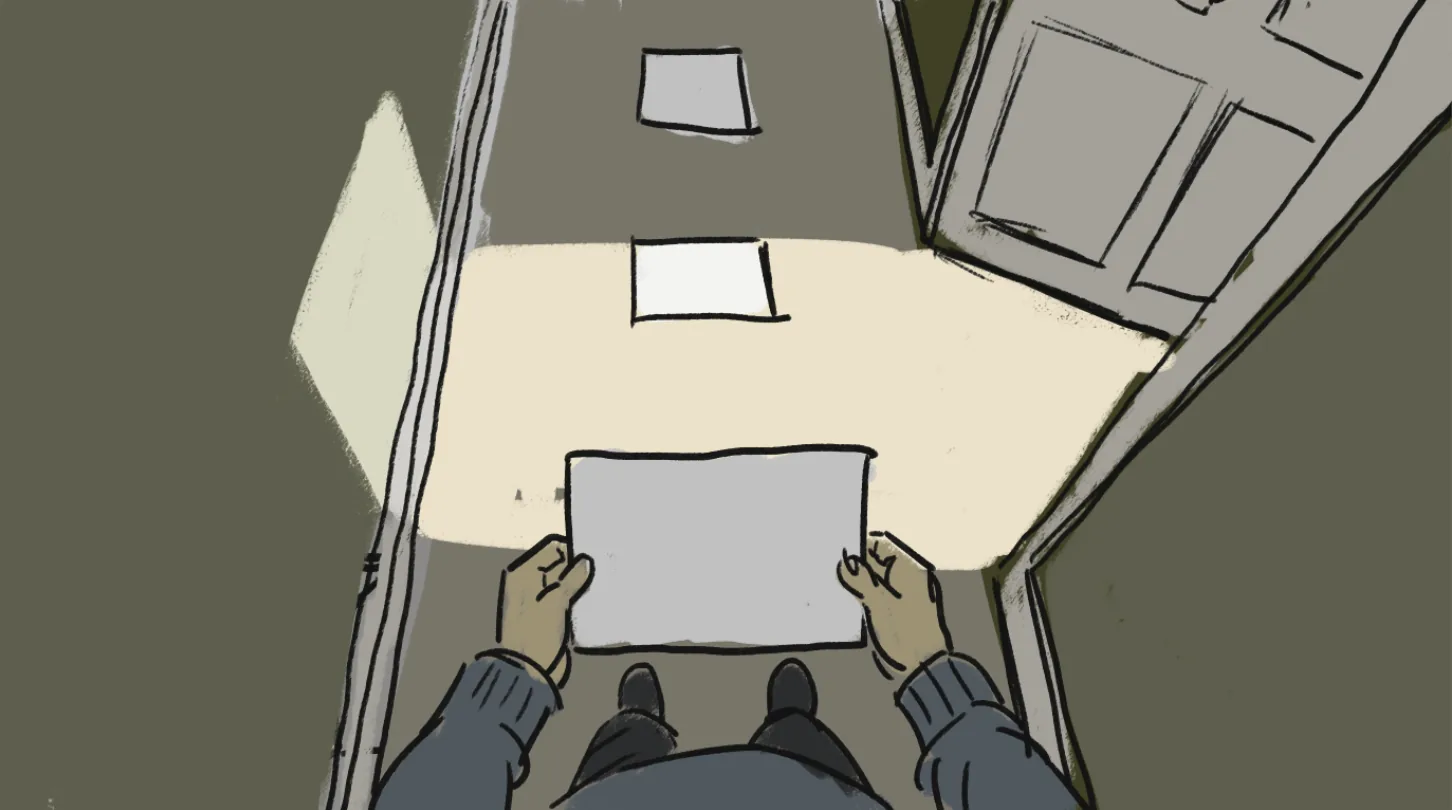
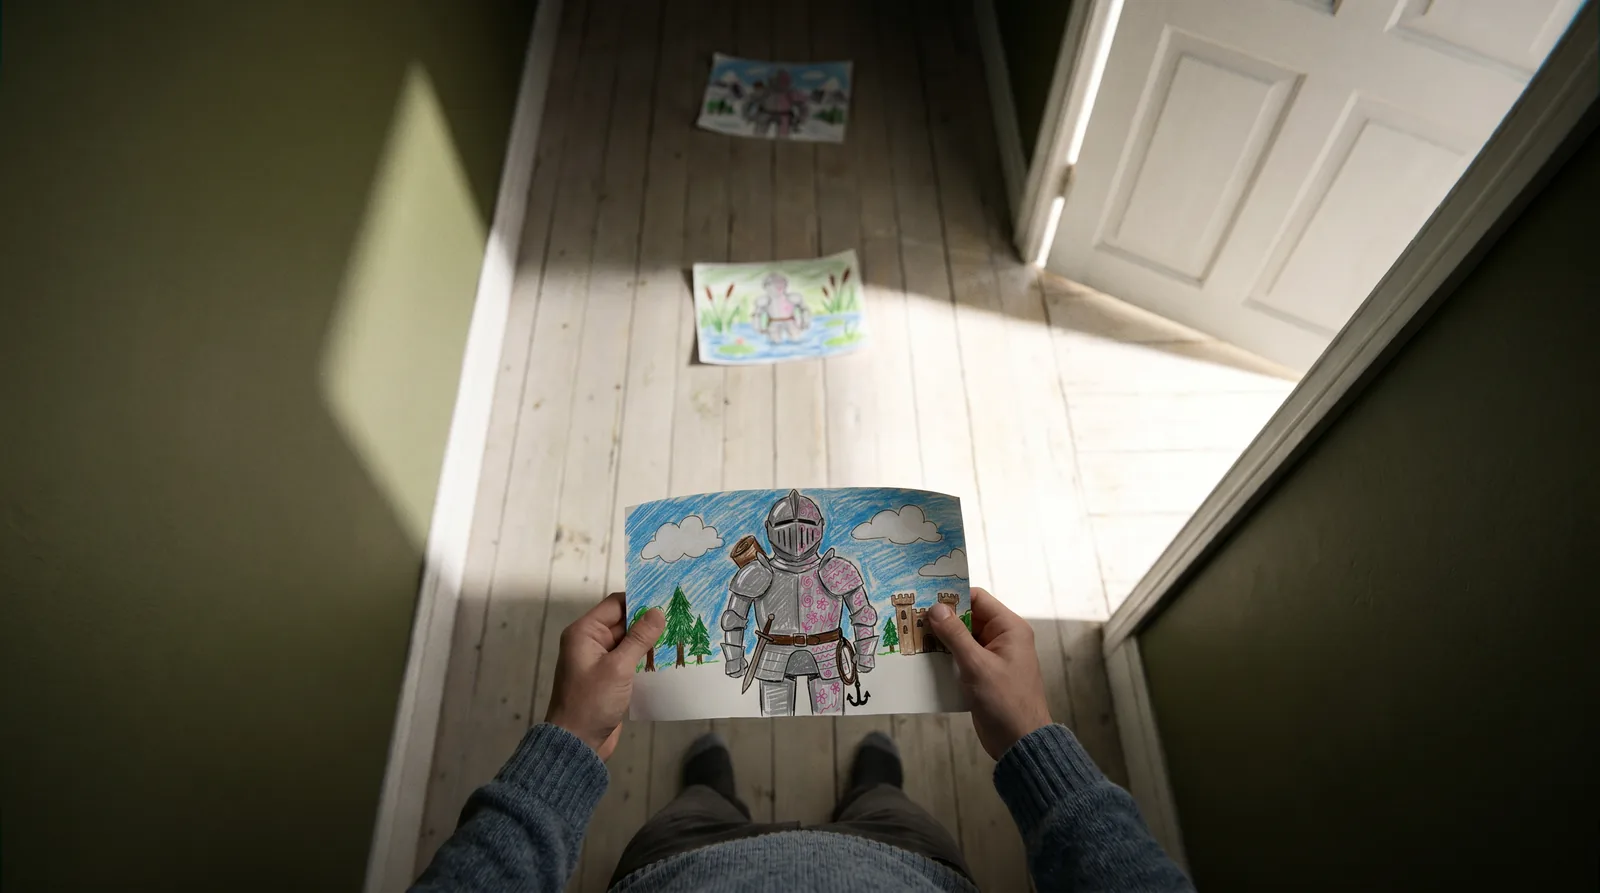
What the board fixed: the camera height, the downward angle, and where the hands, feet, drawings and doorway sit.
What the prompt added: one job per reference: the sketch for the layout, a person for clothing and build, a crayon drawing for the paper.
Model: Nano Banana Pro · Note: Edit with 3 references; trimmed
Use the provided sketch as the only composition reference.
Composition 100% exactly matches the provided sketch.
Camera height 100% exactly matches the provided sketch.
Downward viewing angle 100% exactly matches the provided sketch.
…
Use the provided adult reference only for the person's clothing and body build.
Use the provided little-knight crayon drawing only as the content reference for the drawing held in the hands.
What a storyboarded shot costs in Flick
In A Proper Introduction, a frame cost 30 credits on average and a Kling O3 video take about 503.
| Step | Model | Generations | Average credits each | Total credits |
|---|---|---|---|---|
| Panel to frame | Nano Banana Pro | 902 | 30 | 27,090 |
| Frame to clip | Kling O3 | 166 | about 503 | 83,440 |
| Frame to clip | Seedance 2.0 | 50 | about 988 | 49,408 |
Successful generations in A Proper Introduction's Flick project, discarded takes included. Flick data, April 20 to May 12, 2026 (queried October 2026). 61 generations on other models (6,854 credits) are left out.
Settle the board before you animate: video takes used 138,560 of the film's 166,792 credits (83%).
Turn your storyboard into shots in Flick
Sign up, open a canvas and turn your first rough panel into a frame.
Every account gets 100 free credits when you sign up, and 100 more every Monday.
Create your free Flick account →
Keep going
- Storyboard to video
- AI storyboard generator
- AI shot list
- Plan shots that cut together (Flick Academy lesson)
- How to make AI movies
- Xenogenesis behind the scenes
About the author
Bilguun Bayarkhuu is a growth engineer at Flick. This guide is built from Flick's Academy video and lesson on planning shots, the public workflows of A Proper Introduction and Xenogenesis, and Flick's generation data for A Proper Introduction.
Frequently Asked Questions
What are the 7 steps of storyboarding?
There is no single standard list of seven. Most cover the same six steps: beats and a shot list, a map of the set, one rough panel per shot, shot IDs and notes, finished frames, and an animatic.
Can ChatGPT generate storyboards?
Yes. A chat assistant can turn a script into a shot list, and an image model can draw a panel per shot. To keep a model on your own layout, give it your panel and write "Use the provided sketch as the only composition reference".
How do I make a storyboard step by step?
Write one line per shot, map the set, draw a 16:9 panel per shot, label each with a shot ID, then cut the panels into a timed animatic and fix the board before you make finished shots.
Is storyboarding difficult?
Storyboarding is easier than it looks. A panel only has to show the framing, the camera and where people stand, so boxes and stick figures work. Photos, a 3D blockout or an AI layout work too.
What are the basic rules for storyboarding?
Give every shot one job. Draw in the film's frame shape. Keep screen direction (movement keeps the same direction across shots) and the 180-degree rule. Cut back to a wide shot whenever the viewer could get lost.
What is the 180 rule in storyboarding?
The 180-degree rule says to keep the camera on one side of a line drawn between two people facing each other. Each person then stays on the same side of the frame.
What are the 7 types of storyboarding?
There is no standard list: guides count seven, eight or ten types. Most include thumbnail (small, fast sketches), traditional (drawn), digital and written boards, and animatics. Photo boards, 3D blockouts and AI layouts are newer ways to make the same panels.
Which AI tool is best for creating storyboards?
To turn your own panels into frames, use an image model that follows a reference closely: the Flick team film A Proper Introduction used Nano Banana Pro for 863 of its 896 image prompts (public canvas, October 2026). To make panels from a script, use a storyboard generator and check each panel against your shot list.