How to Create Consistent AI Characters in 2026: The Complete Guide
Jun 2026
In the ever-evolving landscape of AI filmmaking, achieving character consistency remains essential for creators, marketers, and businesses alike. Today, the best AI image and video generator models produce beautiful output. But without the ability to maintain a character across shots and scenes, these tools are useless for AI filmmakers to tell stories.
If you’ve ever created a character and watched it fall apart across new shots with different settings, camera angles, and fine details, you’ve experienced character drift. This is one of the most pervasive challenges in AI filmmaking. This guide explains precisely why character drift happens and the exact methods you can use to fix it, enabling you to keep characters consistent in Flick, Midjourney, Veo 3, Sora, and ComfyUI.
How to Create Consistent AI Characters in 2026 at a glance
For those who want a quick overview, here’s the short answer:
The most reliable way to create a consistent character with AI is to lock the character’s identity in a single reference image first, and reuse that reference for every new shot. This method is more consistent, precise, and reliable than re-prompting from scratch, which is why it has become the default workflow in 2026.
In Flick, this is the Character Reference tool and it takes only three steps:
- Generate or upload an image of your character — a clean, well-lit, front-facing portrait produces the best results
- Select that image, and click Character Reference
- Prompt your new scene freely (”walking through the neon-lit market at night, cinematic”), while your reference holds your character steady.
This is the highest leverage technique for almost all creators because it requires no training, no code, and no GPU — just one good reference image. Watch our tutorial: Nano Banana Pro Tutorial for Character Consistency
Get Started Now. Build Your Character.
Why Character Drift Happens
To fix character drift, it will help to understand what causes it. When you generate an image, the model begins with random static. It removes that static step by step, guided by your prompt, until a clear image emerges. This is called diffusion.
When you describe a character in a prompt, you are not actually pointing the model to a specific person. “A bearded man in his thirties” matches millions of images the models saw during training. Your prompt lands somewhere in the space of all those possibilities. The output is a generalized result drawn from the entire space of those images — an average of many different faces that fit your description.
As a result, even when you reuse the exact same prompt to describe a character, the model begins with a new random patch of static and ultimately settles on a slightly different point in that space. This causes the output to be slightly different each time, even though the prompt stays the same. Slight variations to your prompt, like adding new angles, a new character, or a different background, compound this effect. Shot after shot, these variations add up, and ultimately your original character drifts into someone else.
This is what Flick’s Character Reference feature fixes. Instead of storing your character in a prompt, the Character Reference tool stores your protagonist as a reference image. This way, every new generation reproduces your original character, even as you modify different aspects of the scene.
The character you define represents a generalized version of many images the model has encountered in training. Every image generation is a fresh one, and it starts with random static. The model removes that static step by step (diffusion) until an image appears that matches the prompt you’ve described. The character you define represents a generalized version of many images the model has encountered in training. Each generation starts from random static, and produces a slightly different face inside this range. As a result, over several generations, especially as you add more content to your prompt, your initial rendering of your character drifts into something totally new.
Create Consistent Characters with Flick
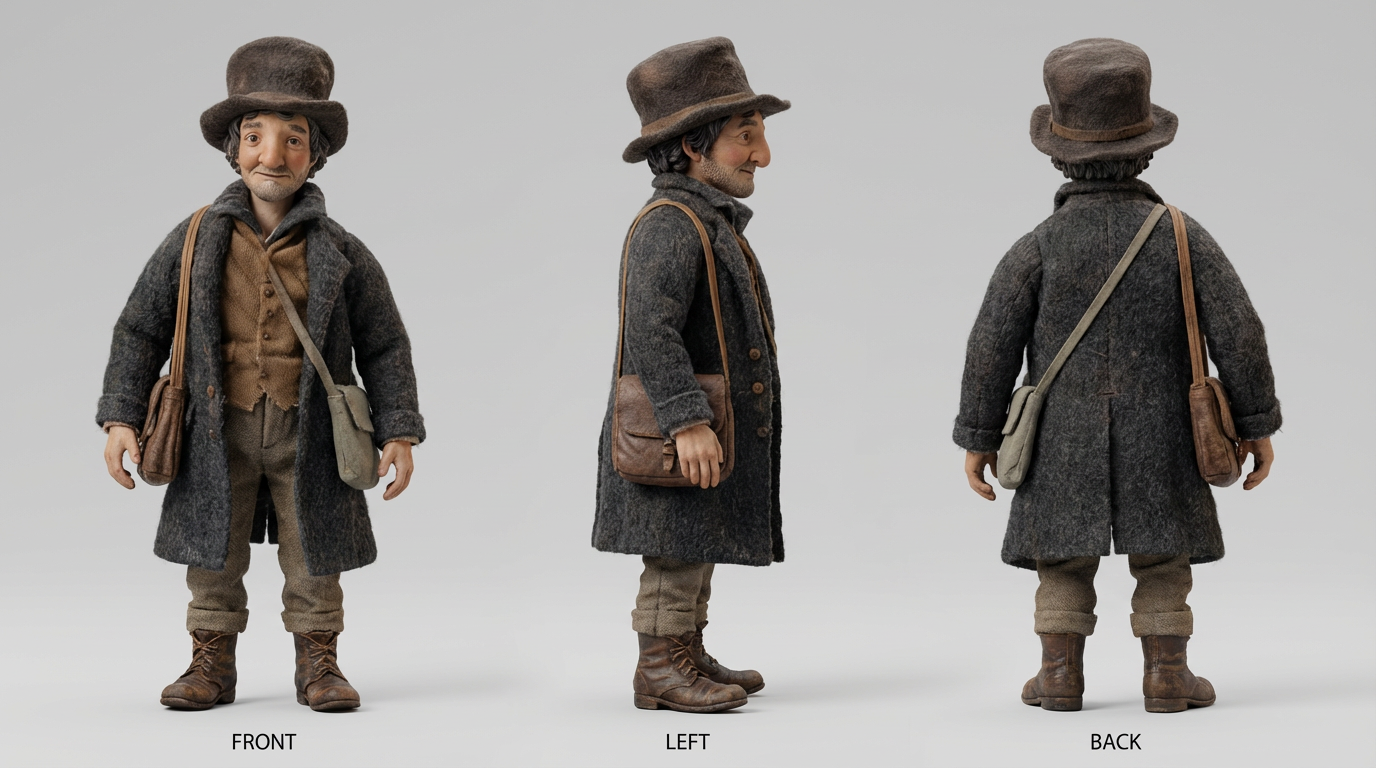
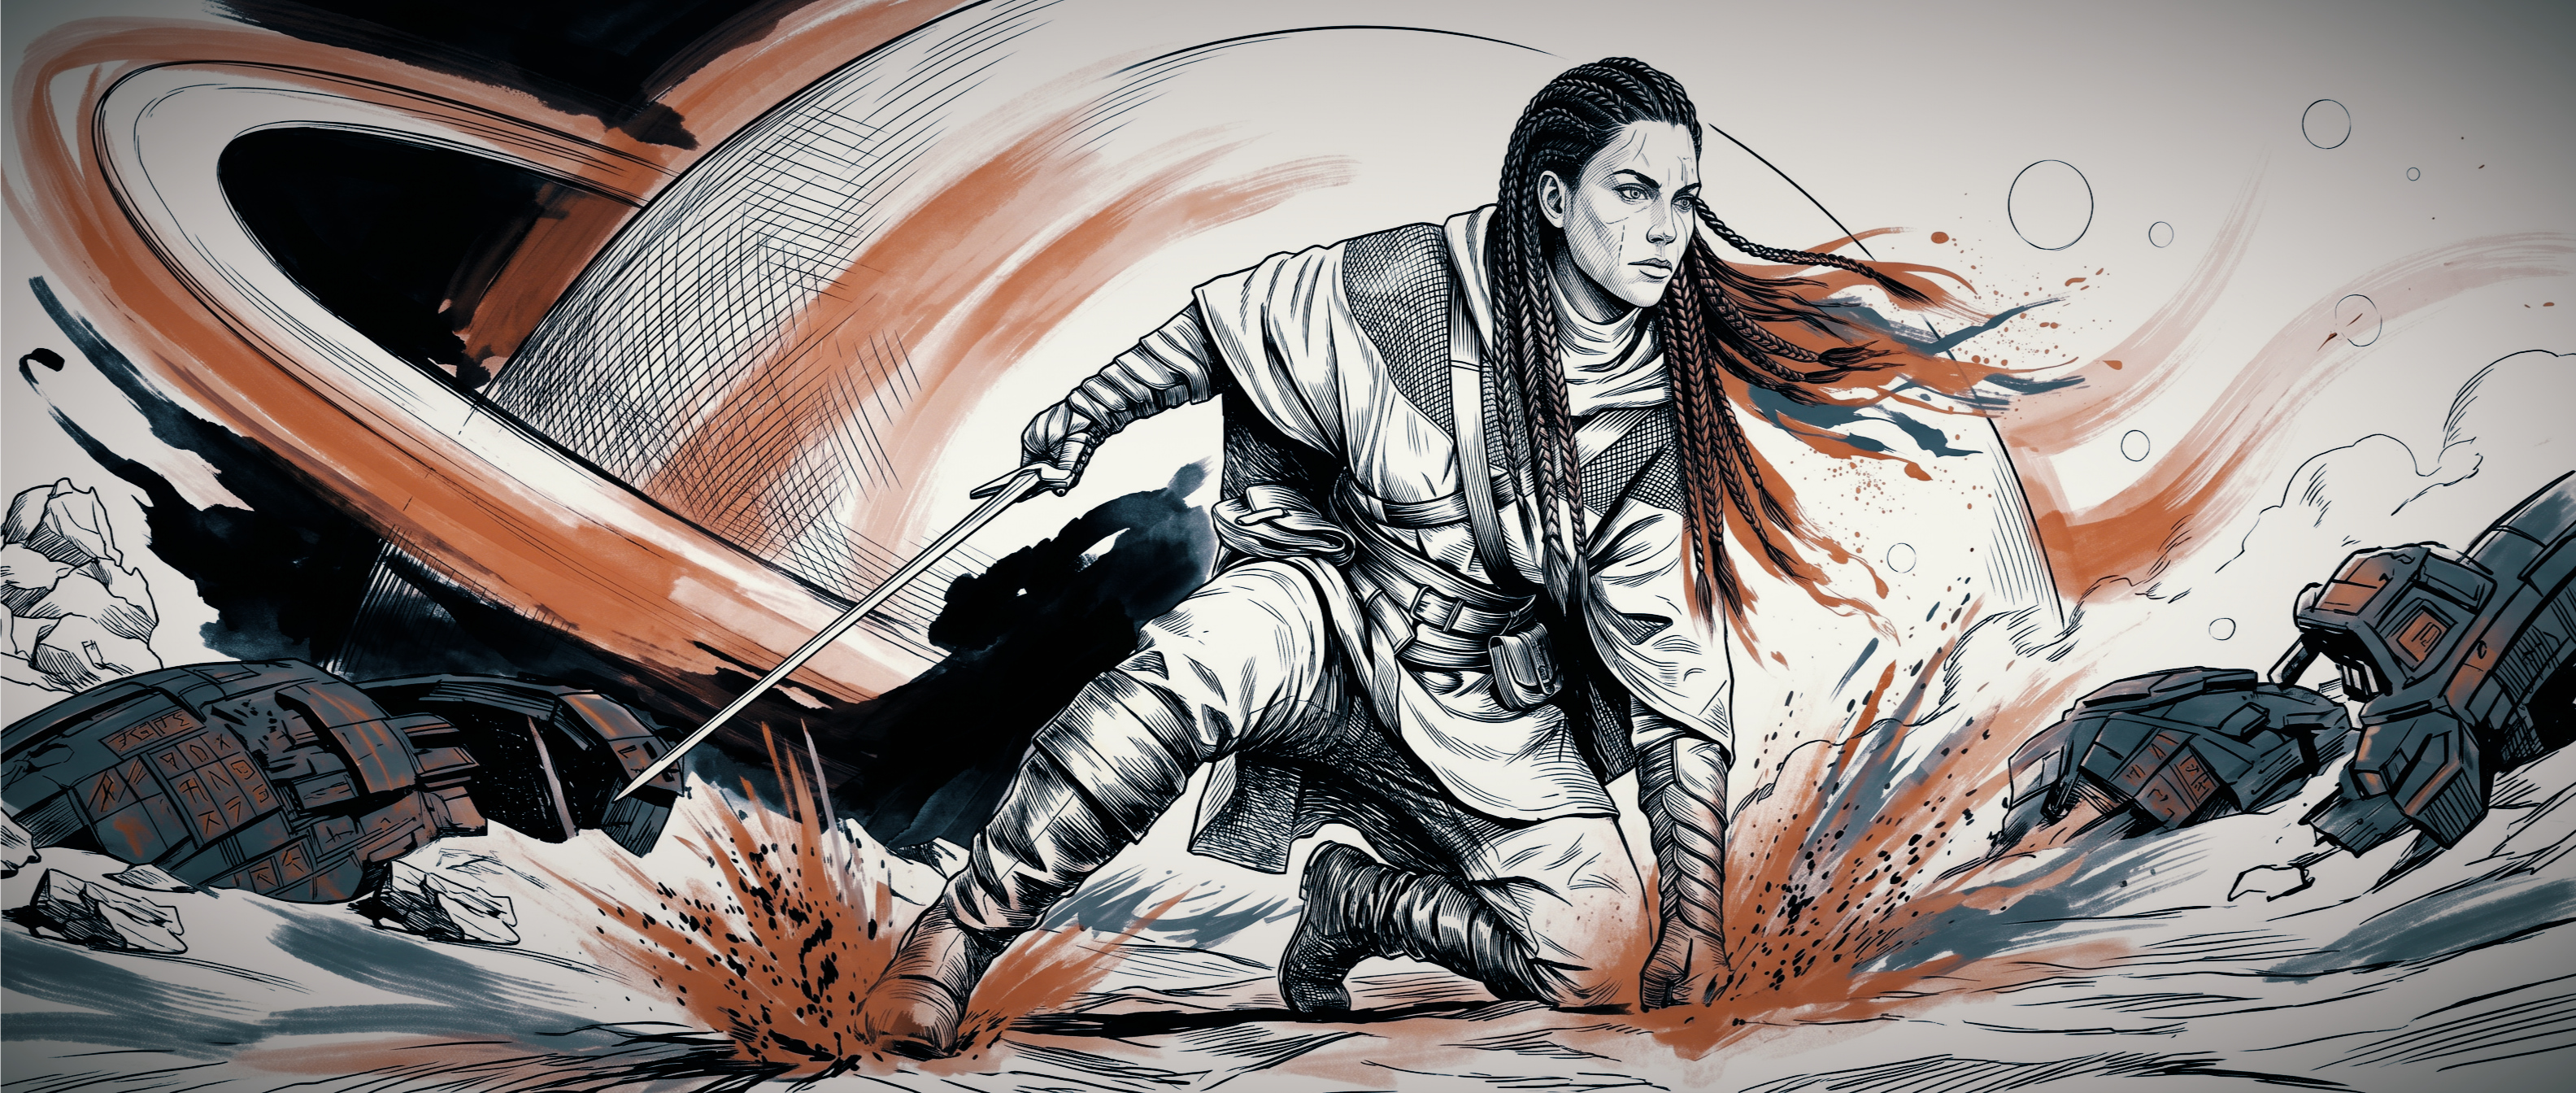
The Herder, locked as a single character reference. Watch the full film.
First, create a character — The Herder: not a hero, not a wizard—just a worker whose craft becomes invisible the moment it works. He is a tradesman from "modern Europe" (roughly 1800s–early 1900s). To keep him consistent from front to back (and shot to shot), use Flick’s Character Reference tool.
Start with a single reference image. From this initial image, draw multiple turnaround sheets—front/side/back—in different states: with hat, without hat, with umbrella, hands free, wet coat, gear shifting.
Then combine the turnaround sheets with Flick’s Character Reference tool, so the front/side/back silhouette of the character stays stable across shots.
5 methods for consistent AI characters, compared
There is no single “right” tool or model, but there is a right method for your skill level and how much control you need. Here’s a summary of the 5 best img2img character consistency approaches and who they are best for:
| Method | How it works | Best for | Effort | Consistency |
|---|---|---|---|---|
| Character Reference (img2img) | Upload one reference image; the model matches that identity in new scenes | Almost everyone — fastest path to a consistent character | Low | High |
| Character / turnaround sheet | Generate front, side, back, and 3/4 views to use as multi-angle references | Giving image video tools enough context for angles and movement | Low–med | High |
| Prompting | Reuse the same seed and a verbatim character description across generations | Quick variations on a single look | Low | Medium |
| LoRA training | Train a small custom model on 15–50 images of your character | Hundreds of shots with near-zero drift | High | Very high |
| Face swap (final cleanup) | Generate freely, then swap your character's face onto every frame | Fixing drift after the fact | Medium | High (face only) |
How to keep a character consistent in each major tool

Midjourney handles consistency through Omni Reference (the —oref parameter, with an omni-weight —ow to control how strongly it sticks to your reference). Use a moderate weight for balance (100 is default), and lower it when you’re modifying aspects of your character. It produces beautiful results, with incredible styles, but it can soften fine details like freckles or tattoos.
Google’s Veo 3 (and Veo 3.1) keeps characters consistent with its “Ingredients to Video” reference system. Feed it your reference images to lock your character’s identity, and be sure to use the exact same character description in every prompt. Veo also produces native synchronized audio and lip-sync, so your character can speak.
Sora built character consistency around recorded reference clips (originally “Cameos,” later called “Characters”) that created a reusable likeness across generations, with native audio. OpenAI discontinued Sora in 2026, but you can use OpenAI’s img2img image model, GPT Image 2, to generate scenes with your character in Flick.
For absolute control, ComfyUI enables you to combine tools like PuLID, InstantID, and IP-Adaptor with a custom trained character LoRA, plus pose control and face-detailing nodes. It’s the most challenging and most technical route, but ideal if you are looking for unlimited local generation with zero drift.
The End-to-End workflow: from Character Design to Final Cut
To move beyond images and integrate your characters into your full-length films, here’s the workflow that the best creators use in 2026:
- Design your protagonist. Generate a single strong portrait you love.
- Build a reference sheet. Create a turnaround (front, side, back, 3/4). Create references with different outfits, props, and expressions.
- Set the Character Reference in Flick and generate every shot in your scene, focusing on defining your character’s setting and action in each prompt.
- Animate from the still. Take each locked image and use an image-to-video model to create scenes of your character.
- Edit and Grade. Assemble your scenes in the video editor to produce your final result.
The practical rule: Anchor identity in a still image first, then animate it.
How to Achieve Even More Precision with Character Consistency in Flick
Our in-house filmmaking team has spent countless hours experimenting with different workarounds to achieve the best results for img2img character consistency in Flick. Along the way, we have discovered several advanced tips and tricks you can use to generate more precise shots, all while keeping your characters consistent.
One of the most crucial aspects of a strong character consistency workflow is prompting. We provide a comprehensive list of prompts you can use for img2img character consistency. Below, I provide the best prompts for character consistency you can use across different workflows.
For the first method, let’s begin without our single character reference, which we turn into a turnaround sheet, as follows:
From this point, our goal is to generate our first shot with our character. In this case, let’s create a shot of our character riding a luxurious carriage, looking at the window at a Nordic snowy plane outside.
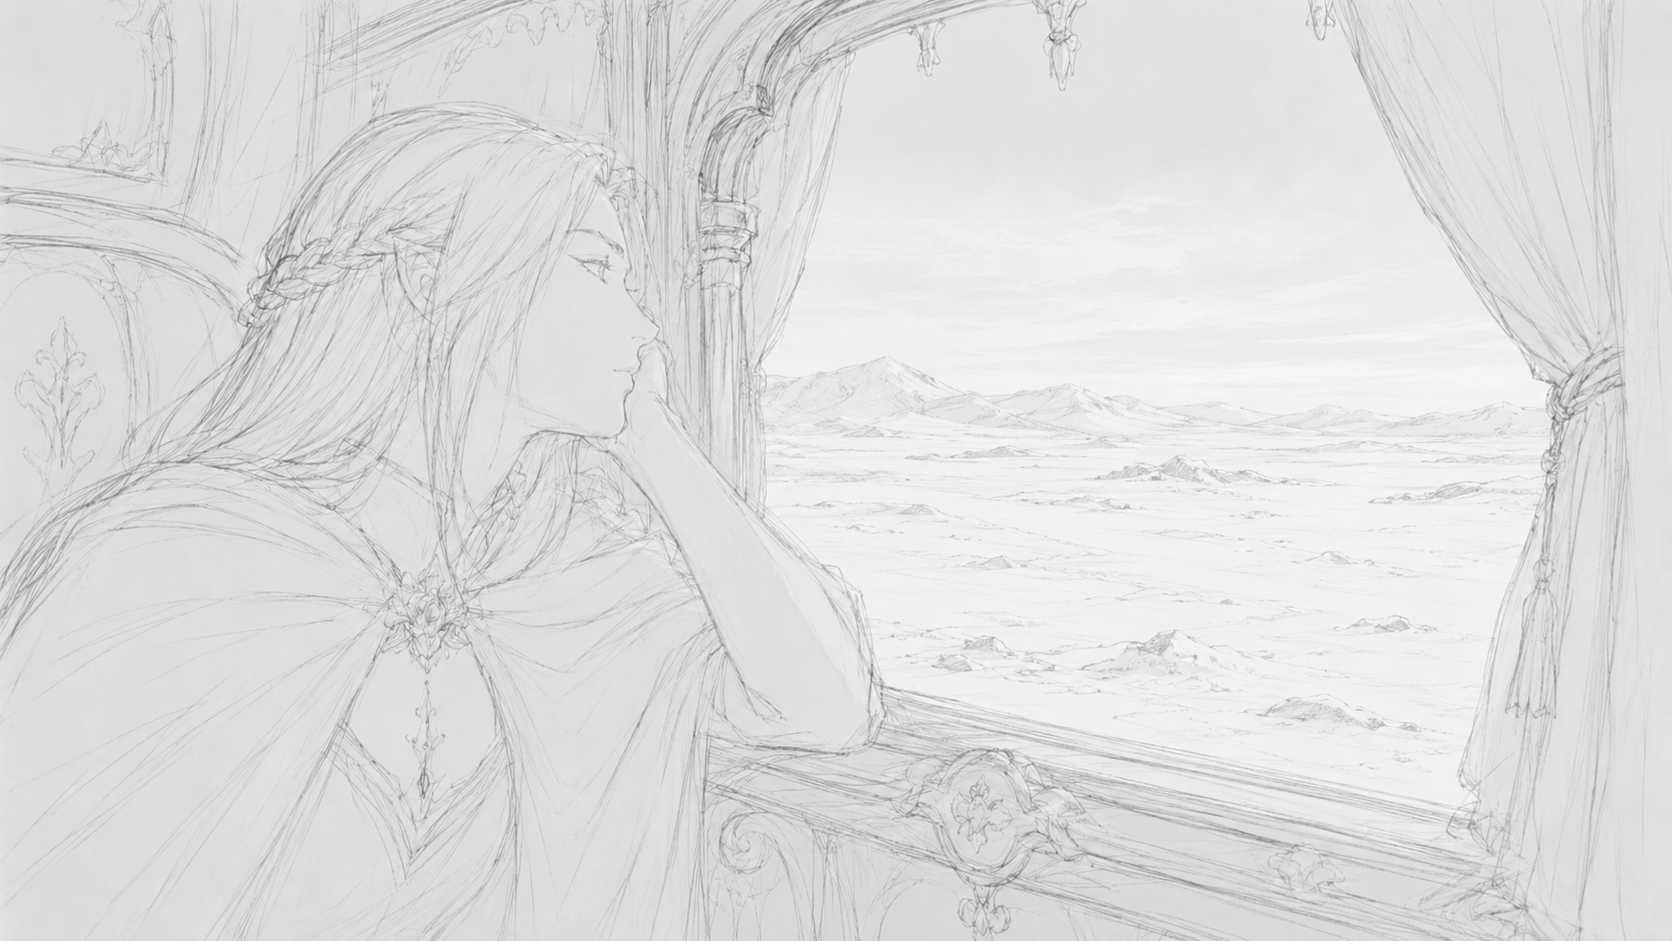
The trick here is rather than generating our image and our character in one shot, which offers less precision, let’s first generate a light stencil sketch generation of our desired image with our character description embedded in the text. It is important to not use too much detail here, as this is offering only a light schematic of our final frame. We can create a prompt to generate this image, as follows:
Create a light, rough outline pencil sketch. Aim for a rough schematic, without too much detail. The setting is inside a luxurious carriage. The carriage interior is overall very dim, with only faint ambient light inside. The only clear light source comes from outside the window. The carriage window is a fully open window opening with no glass. Heavy curtains frame the window. The carriage interior includes carved wooden decorative structure and a padded seat back. A thin layer of snow rests on the window ledge, and a small amount of snow drifts gently into the carriage. Outside the window is a Nordic snowy plain. The exterior is filled with dense morning fog. The white fog is very thick, and only faint shapes of a snow-covered open plain, low snowy hills, and very distant mountain silhouettes can be seen. The character is a young European woman in her early twenties. Her face is a slightly narrow soft oval, with a smooth forehead, defined cheekbones, a clean jawline, and a subtly tapered chin. Her eyebrows are dark, clearly shaped, and mostly straight. Her eyes are elongated almond eyes with clearly defined upper lids and a steady direct gaze. The irises and pupils are bright amber-gold, and the eyes have realistic moist reflections. Her nose bridge is straight and slender, with a small refined nose tip. Her lips are clearly shaped, with a relatively thin upper lip and a slightly fuller lower lip. Her expression is calm and serious. Her skin is pale with a slightly cool undertone, preserving faint freckles, realistic skin texture, visible pores, slight under-eye detail, tiny asymmetry, realistic lip texture, and subtle natural skin variation. She rests her chin on her hand in quiet contemplation gazing across a vast empty landscape of snowy Nordic plain.
Generating with GPT Image 2, here’s our result:
Since we are happy with our sketch, we can move on to generating our final shot. We can use an image model like Nano Banana Pro to generate our final frame, passing in our character reference images and our composition sketch so the model knows exactly what we want our composition character to look like.
Our prompt initially directs the model to use the provided sketch as the composition reference, to match our character reference images with 100% accuracy, and transform the sketch into a live-action photograph. Here’s the full prompt:
Use the provided sketch as the only composition reference. Use the provided side-profile reference as the only face and hair reference. Use the provided full-body reference as the only outfit reference.
Create a live-action close-up photograph of Serana. The character action, overall composition, and carriage interior structure 100% exactly match the provided sketch. The character identity, side-profile facial contour, facial features, skin tone, amber-gold eyes, and hairstyle 100% match the provided side-profile reference. The outfit design, colors, and overall character styling 100% match the provided full-body reference.
Transform the image into a live-action photograph. The setting is inside a luxurious carriage. The carriage interior is overall very dim, with only faint ambient light inside. The only clear light source comes from outside the window. The carriage window is a fully open window opening with no glass. Heavy curtains frame the window. The carriage interior includes carved wooden decorative structure and a padded seat back. A thin layer of snow rests on the window ledge, and a small amount of snow drifts gently into the carriage.
Outside the window is a Nordic snowy plain. The exterior is filled with dense morning fog. The white fog is very thick, and only faint shapes of a snow-covered open plain, low snowy hills, and very distant mountain silhouettes can be seen. A small amount of soft morning light passes through the fog and falls onto Serana’s face and hair edges. Bright areas carry a soft bloom, especially in the foggy highlights outside, along the window light, and on the morning light across her face.
Focus sits on Serana’s face. Her eyes, eyelashes, skin texture, and facial contour are the clearest parts of the frame, but they still carry slight natural real-camera softness and slight focus imperfection, rather than perfectly clinical sharpness. The exterior view is extremely out of focus and reads only as very soft blurred layers. The rest of the carriage interior is also softly out of focus, while keeping the basic structure readable.
Preserve realistic skin texture, visible pores, subtle freckles, realistic hair texture, realistic fabric texture, realistic wood texture, subtle film grain, slight sensor noise, mild lens softness, very subtle chromatic aberration, and natural imperfect real-camera rendering.
Generating with Nano Banana Pro, here’s our result:
Starting with a composition sketch before generating the final frame requires only one more image generation, but it offers superior creative control over the composition of our final shot. Then, doing a second generation with our composition sketch and character images as references means that our final shot follows our desired composition while maintaining character consistency flawlessly.
Moving from Character Stills to Video

So far, this guide has given you the understanding you need to create exceptionally precise shot stills with character consistency. The next step is generating videos with these shots, while avoiding character drift. This is a unique challenge in AI filmmaking, because your character has to stay consistent not only in a single image generation, but from frame to frame within your generated video. Furthermore, every new shot is a chance for your character to drift. Our filmmakers have found that most often, the following aspects break down as you go from image to video:
- Frame to frame drift. Especially as you animate your character into new poses, character drift occurs. The face of your character, for example, can morph mid shot as the head rotates away from and back toward the camera.
- Profile and back views. Most reference systems are trained on front-facing faces. When you character turns three-quarter or full profile, this reference can break down. This is why using a turnaround sheet, showcasing several angles of your character (front, side, back, 3/4) is imperative.
- Output and prop drift. Image-to-video models tend to focus most on maintaining the face of your character throughout a generated video. Clothing and accessories, as a result, receive less attention during generation. This is why its critical to lock your wardrobe in your reference still, and reinforce in the prompt you provide the image to video model.
- Length limits and chaining shots. Most image to video models cap a single clip at 5-15 seconds. This means that generating longer long-form shots requires generating a clip, extracting its last frame using Flick’s Extract Frame tool, and feeding that frame as the start frame of the next clip. Every chain hop into a new image-to-video generation is a fresh chance for your character to drift.
The Reference Modes You’ll Actually Use for Video Generation
- Reference-to-video — supply one or more images of your character with Flick’s state of the art integration with powerful models like Kling Omni Reference and Seedance Reference to Video.
- Start/end frame — supply the first frame (and optionally the last) in your image-to-video generation. Using start frames and end frames with precise renderings of your character and your desired composition, building on the composition sketch method we outline above, give the best results.
- Character LoRA — for minimizing drift across a full film, train a LoRA on your character references using an abundance (50+ images). Models like Wan 2.2, we have found, are best for this. Applying this LoRA at generation enables you to produce great video results while maintaining characters consistency.
The Flick Video Workflow with Character Consistency
This is where the Character Reference workflow, built around Flick’s native Character Reference feature, pays off. Because you’ve already locked your character in a shot still and built a turnaround sheet, you’re feeding the video model the best context on what you want your character to look like in final generation. Here are the two best methods our in-house filmmakers have found:
Using Omni Reference to Achieve Character Consistency
For this method, you begin with an image of your desired setting. For example, let’s generate a a snowy mountain environment in a our desired clean blue-tone, specifying composition, color palette, camera angle for superior precision. Here’s our prompt:
Cinematic wide-angle photograph of a vast snow-covered alpine mountainside, featuring a smooth pristine snow slope cutting diagonally across the frame, massive negative space, untouched powder, subtle wind-carved textures in the snow, distant rocky ridgeline emerging from the glacier, minimalist landscape composition, soft winter sunlight, pale blue atmospheric color grading, cold mountain air, serene wilderness, no people, no trees, no structures.
Photographed from a high alpine viewpoint, emphasizing scale and emptiness. Clean geometric shapes created by snow and shadow, gentle tonal transitions, expansive frozen terrain stretching beyond the frame.
Ultra-realistic photography, medium telephoto compression, National Geographic expedition photography, high dynamic range, crisp detail in snow texture, subtle atmospheric haze, natural lighting, premium outdoor cinematography, Icelandic glacier aesthetic, Scandinavian minimalism, breathtaking sense of isolation and calm.
Composition: strong diagonal leading line, asymmetrical framing, 80% snow and sky tones, extreme negative space, minimalist fine-art landscape photography.
Color palette: ice blue, glacier white, soft gray rock, muted winter tones.
Camera: Sony A1, 135mm lens, f/8, ISO 100, polarizing filter, cinematic color grade.
Generating with Nano Banana Pro, here’s our result:
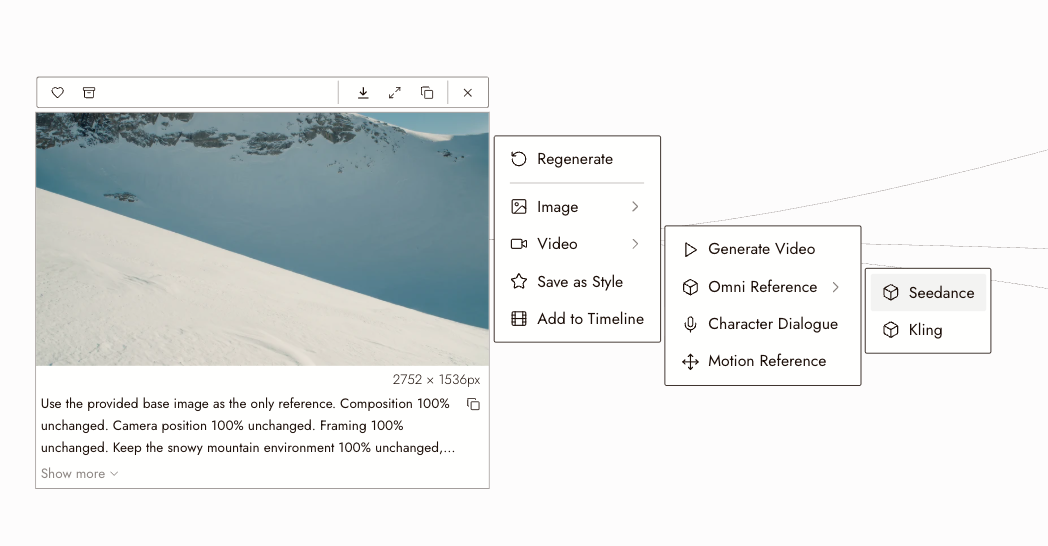
From this point, we can use either of Flick’s flagship Omni Reference models to animate our character into the scene. Both Kling and Seedance offer great results and precise character control. To access Omni Reference, we can hover over our generated image of our setting, select video, and choose Seedance 2.0.
Character Consistency with Seedance 2.0

From here, we can provide our setting image and our character reference images as input. Since we plan to animate our character’s full body walking through the scene, it’s best to provide full body reference images of our character. To add dialogue, we can optionally attach audio as reference, and direct the model to make our character speak that dialogue.
For this example, let’s generate a video of our character walking through our scene and speaking our dialogue “Ah! It’s so good to breathe out here.” We can also specify hand held camera style to produce the exact video results we are looking for.
Flick’s state-of-the-art mentions system enables you to reference specific inputs in your prompt, so you can direct the model exactly how to use each input in the final generation. For example, we can tell the model to use the first image as the start frame, and then use our three character reference images to create our character’s appearance. We specify our character’s movement, and then direct the model to have our character speak our attached dialog. Here’s our final prompt:
Take @Image1 as the start frame. Reference the Serana's appearance from @Image2 , @Image3 and @Image4 . Handheld camera style, Serana walks into the frame from the lower left corner, stretches as she walks, and speaks @Audio1 .
This prompt is short and simple — and that’s the point. Most of the information we want our model to rely is our reference images. We can harness the capabilities of Seedance 2.0 and Flick’s mention system to specify exactly how, producing a precise final video generation, while maintaining character consistency flawlessly. Here’s our final result:
Character Consistency with Kling O3 Pro Omni Reference

Achieving character consistency videos with Kling O3 Pro consists of many of the same steps as doing so with Seedance 2.0. Start with an image of your setting and your character reference images. From here, we can hover over our setting reference image and access Omni Reference. Flick’s mention system also extends to Kling Omni Reference, which empowers you to provide up to 12 image references the model can reference in the final generation.
To use Kling O3 Pro Omni Reference with character reference, select the model selector and pass in your desired start frame. For this example, we will use our setting reference image. Then, you can use Flick’s mention system to create an Element. Elements empower you to store multiple reference images in a single mention. Once we passed in our setting image as our start frame, we can create an Element to represent our character. By default, this element will be called “Element1”. We can attach our three full-body character reference images to this single element, and reference it in the prompt.
In the prompt, we instruct the model to reference our character’s appearance from “Element1,” and specify a handheld camera style. We define her movement, she “walks into the scene with her arms open, like’s she’s feeling the wind,” and finally tell the model to avoid generating background music. Here’s our final prompt:
Reference Serana's appearance from @Element1 . Handheld camera style. Serana walks into the scene with her arms open, like she's feeling the wind. No background music.
Again, we can keep our prompt simple, because most of our information we provide to the model via our Start Frame, which represents the setting of the shot, and an Element, which represents our character through our three provided reference images. Having inputted our setting image as start frame, defined Element1 to represent our character, and written our prompt, we are ready to generate:
Here’s the result. It nails character consistency, keeps our setting exactly as we specify in the start frame, and follows our handheld camera style instruction precisely:
Achieve Character Consistency Videos with Even More Precision in Flick: The Face Swap Method
Rather than generating your video, including your scene, character design, and prompt in a single shot, for this method, our in-house filmmakers recommend two separate video generations.
In the first video we generate, we exclude any reference to our character. Rather, we provide an image of the setting we want the shot to take place in, and then use our prompt to detail the action we want to see. Once we have generated this video, we extract the final frame using Flick’s extract frame tool. We pass this image into Nano Banana Pro, and regenerate it with our character reference image as reference. This produces a final frame with our exact character.
In the second video we generate, we pass the new we generated end frame with our character and the initial video we generated into Kling O3. This produces a final video that replicates the initial generation video precisely but with our exact character. The first generation enables us to have precise control over the scene and the action that takes place within it, while the second generation enables us to swap in our character, thereby maintaining character consistency.
Here’s how to do it:
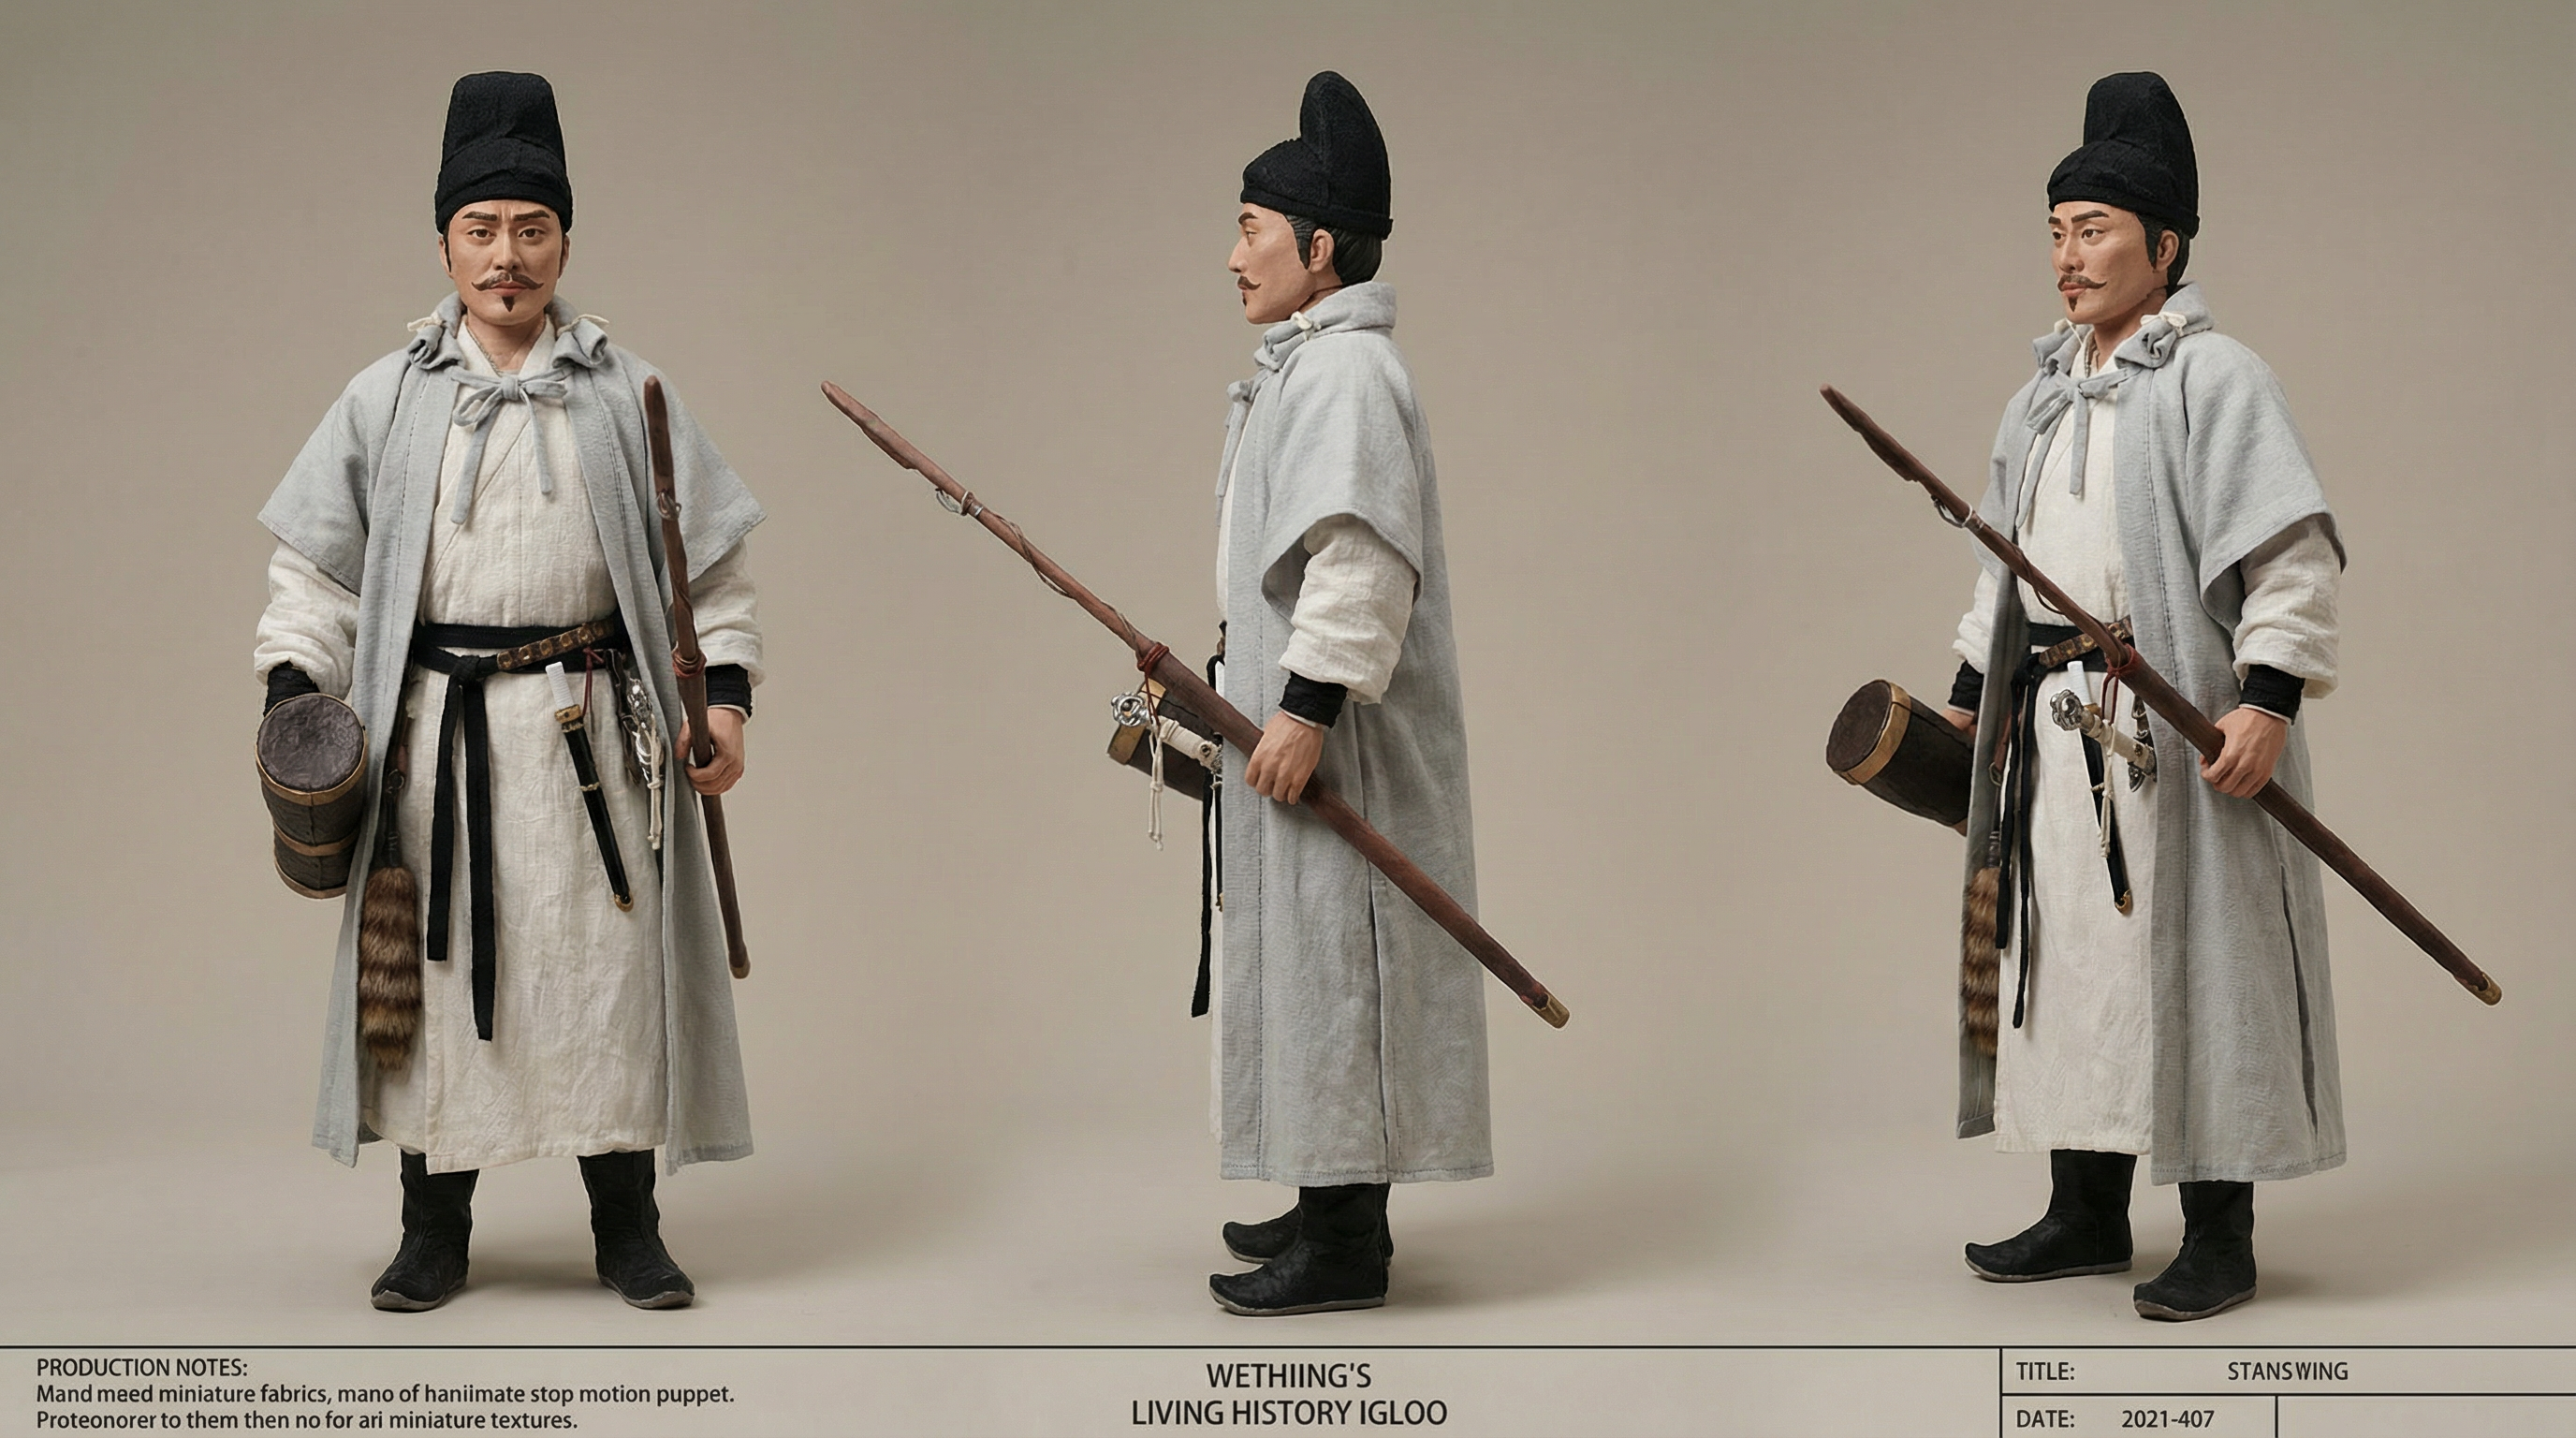
For this method, we begin with a single character reference image that we turn into a turnaround sheet, displaying three full-body views of character arranged side by side. Here’s the prompt we use:
Use the provided image as the exact character reference. Create a character design turnaround sheet of the same historical Chinese male figure in a handcrafted stop-motion puppet style, with subtle clay and costume-doll texture. Show three full-body views arranged side by side: front view, pure side view, and 3/4 side view. Preserve the costume design exactly as in the reference image, including the tall black hat, the pale gray outer robe, the white inner robe, the robe length, sleeve shape, collar structure, waist belt, hanging ornaments, black boots, the long pole weapon, and the cylindrical container. Keep the clothing silhouette, layering, proportions, garment cut, accessory placement, and overall outfit construction unchanged. Do not redesign or simplify the costume. The only transformation is the visual medium: handmade puppet character, stop-motion film aesthetic, slightly textured fabric, slightly sculpted face, subtle clay-like surface treatment, handcrafted costume details, realistic miniature wardrobe construction, studio turnaround presentation. Neutral plain background, soft even lighting, full body visible, clean spacing, highly readable costume design sheet, polished production character board, Chinese folk fantasy stop-motion aesthetic, detailed but controlled, less glossy, less digital, tactile handmade feeling.
Here’s the result:
We also generate an image of our desired setting for our scene. We can do this in two ways. First, we can enter a well-defined prompt into a text to image model like Nano Banana Pro or GPT Image 2 to generate the schematic of what we want our scene to look.
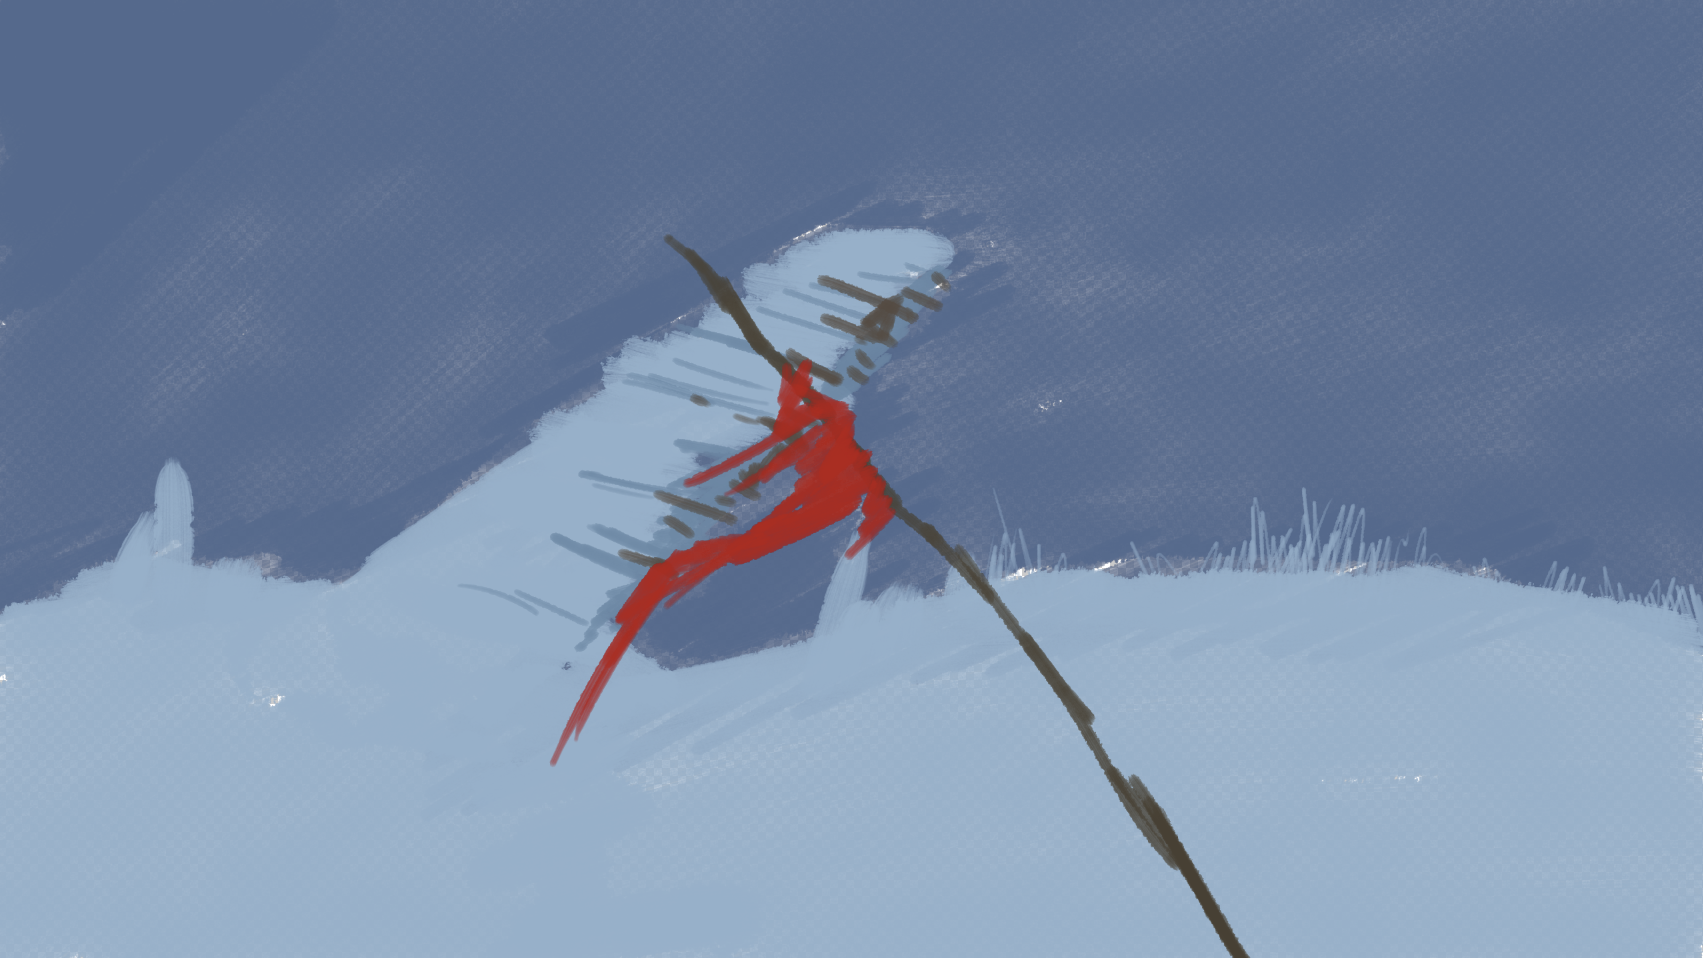
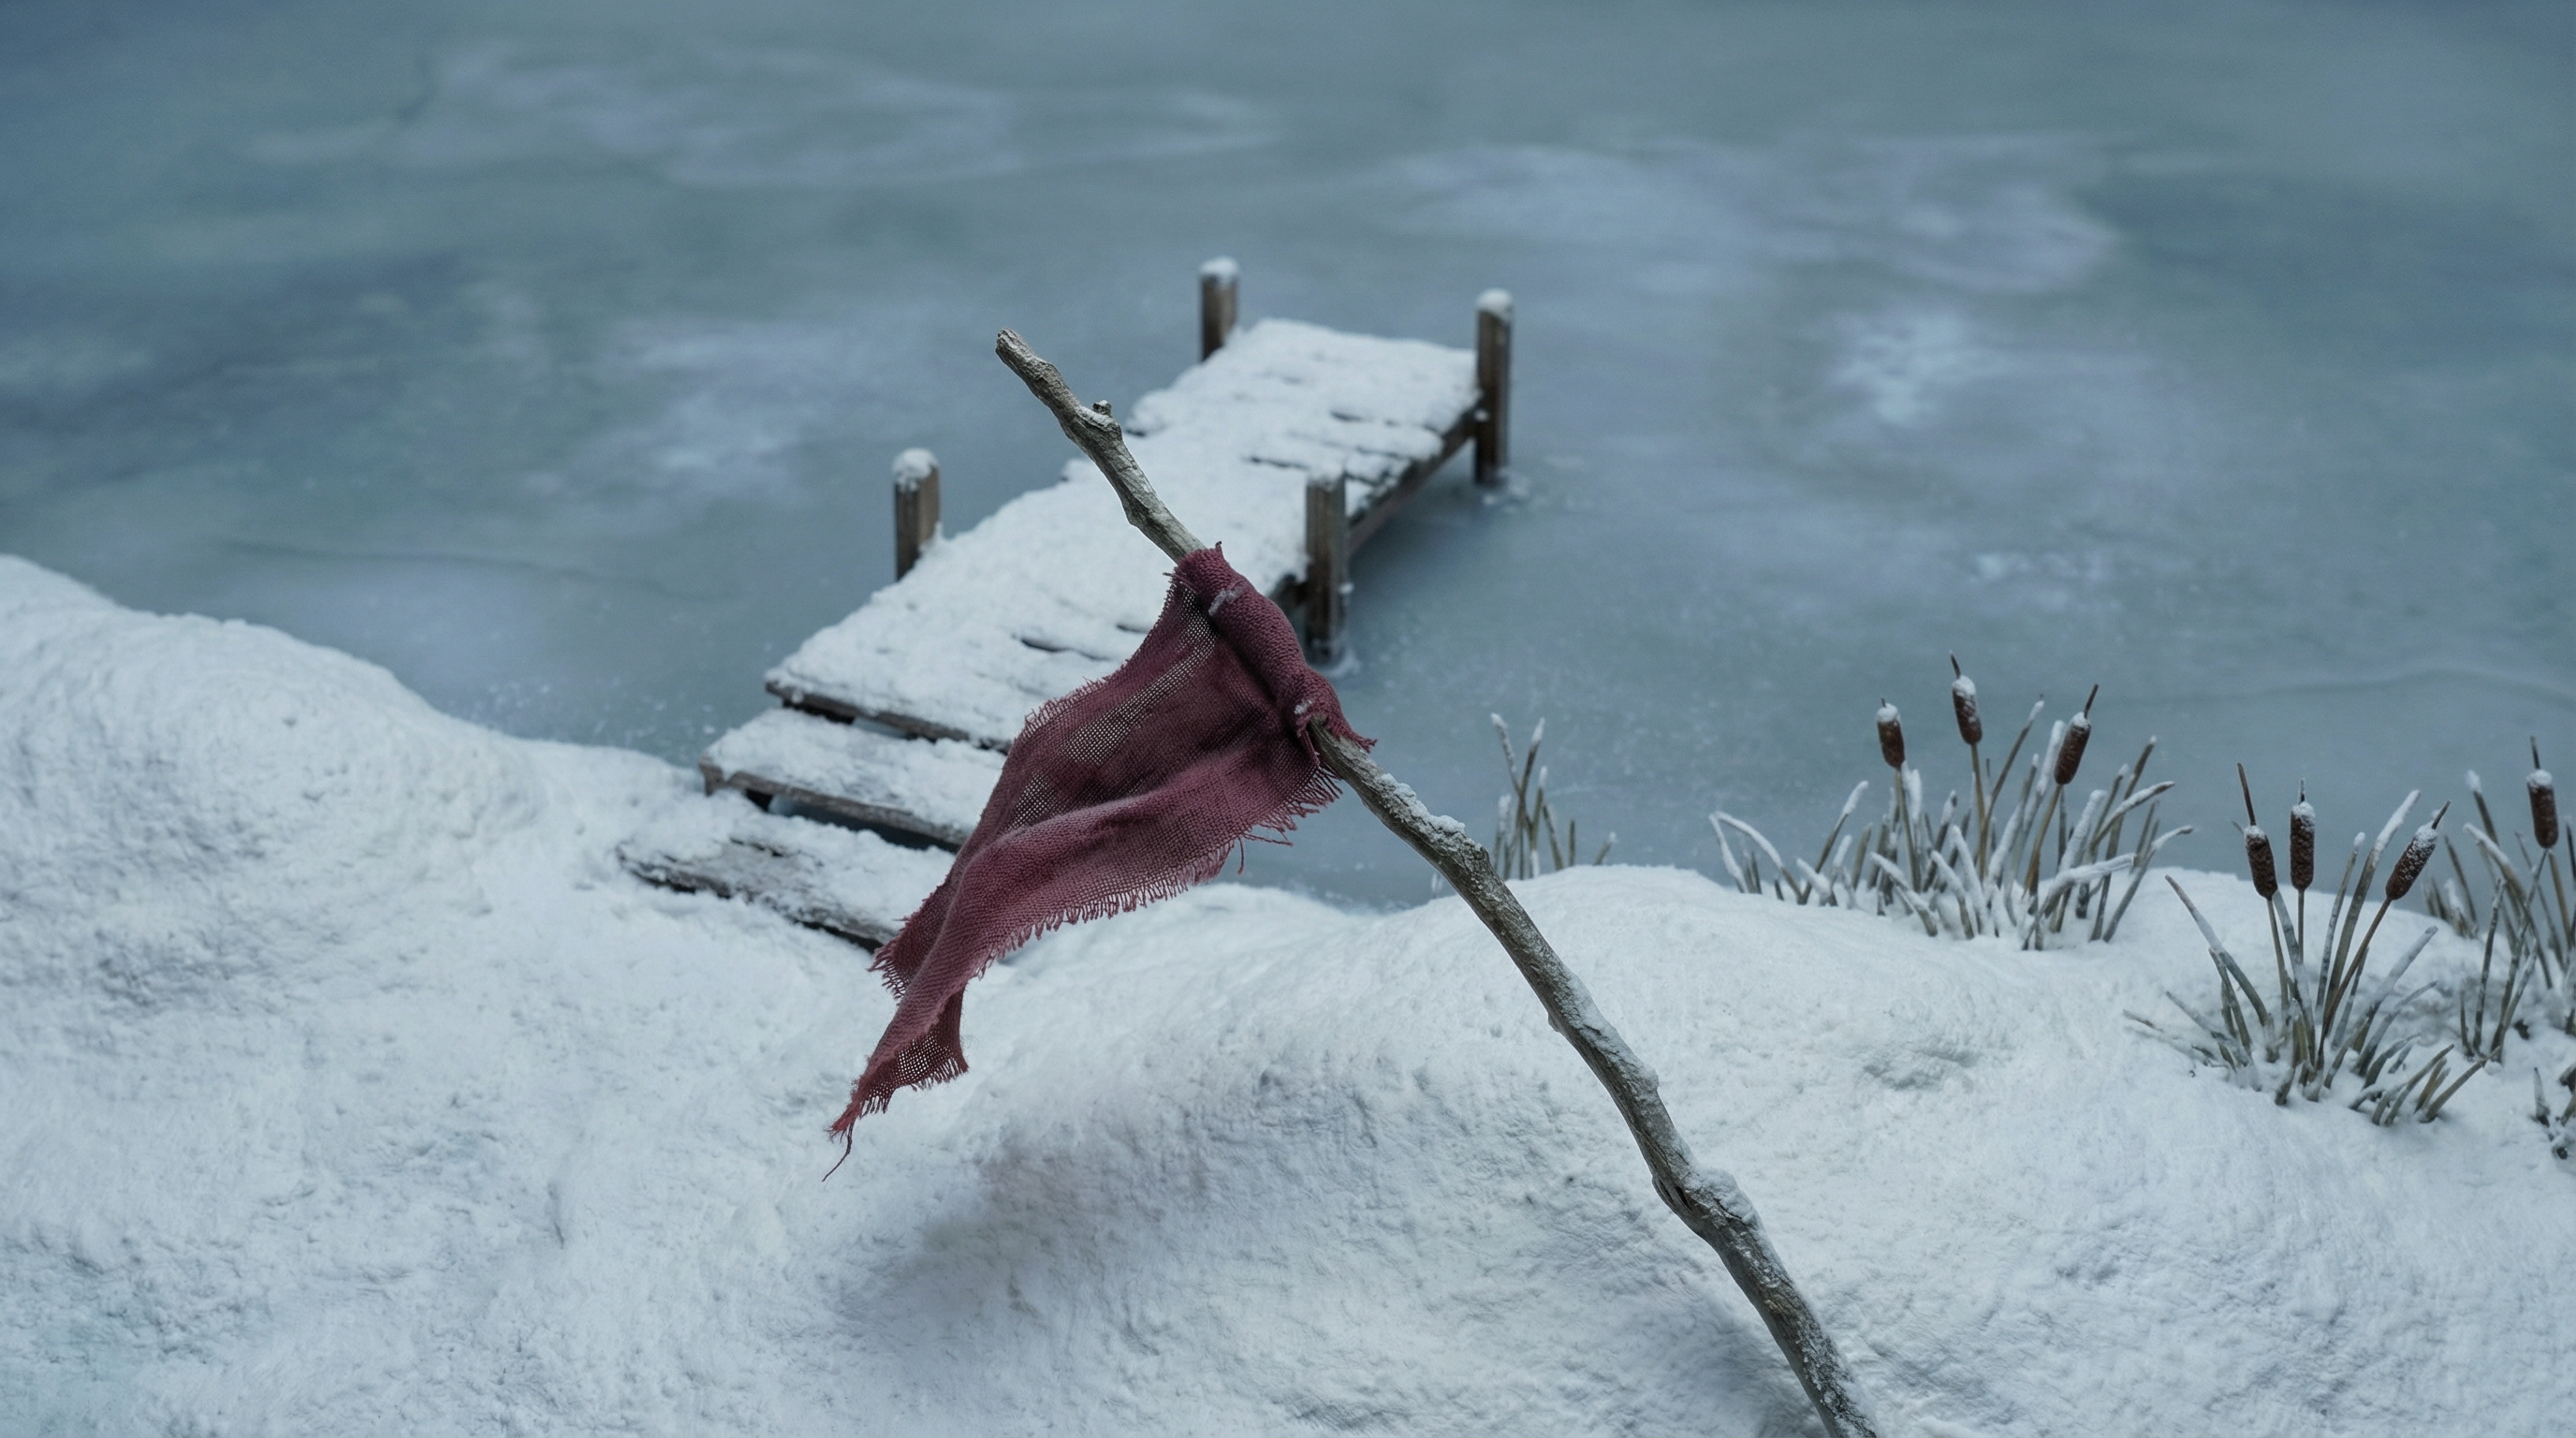
For even more precision, we can harness our second method. Rather than generating with a text to image model, we can storyboard our desired setting by hand in a tool like Microsoft Paint. Then, we can have Nano Banana Pro reference our sketch in the final generation. For this example, let’s sketch a snowy dock on a iced-over lake, with a tarnished red flying in the foreground. Here’s our sketch:
Then, we can pass our sketch into Nano Banana Pro with a descriptive prompt, detailing exactly the realistic details we are looking for, and using our sketch as reference. Here’s our prompt:
Use this hand-drawn storyboard sketch as the strict layout and composition reference. 100% preserve the current composition, camera angle, framing, subject placement, and large shape design. Chinese folk stop-motion puppet miniature set, a bare lakeside branch stuck diagonally in the snow with a faded dark red cloth tied around it, a small snow-covered wooden dock behind it, clusters of snow-bent winter reeds and cattails along the right shoreline, tactile handmade snow, hand-built dock, natural branch texture, fabric cloth with subtle weave, cold blue-gray winter palette, matte handcrafted finish, poetic restrained atmosphere. The lake surface becomes a studio miniature ice surface with soft opaque blue-gray ice, subtle plaster-shaped unevenness, matte resin-like finish, shallow frost layers, faint milky patches, delicate frozen grain, gentle handmade surface variation, minimal reflection.
Here’s our result:
Rather than text-to-video, which relies on encoding your character in a prompt, Flick provides a better approach. Use your generated shot stills, each with the exact composition and character design you are seeking, as references for the image to video model. This anchors the first frame, and enable the model will hold your character consistent across the rest.
From here, we can generate our first video with Kling O3 Pro, or another image-to-video model. We can pass our setting image as the start frame, and specify the action of our character. Since we are not providing our character image as reference here, we can keep our character description brief. For this example, I will simply request a “stop-motion puppet fisherman.” We specify his action: walking through the snow onto the dock and stopping at the end of it. We define our desired character movement and direct the model to make the snowfall grow heavier and heavier, blowing across the frame. Here’s our final prompt:
A stop-motion puppet fisherman in a straw rain cape and bamboo hat walks through the snow onto the dock, slightly hunched against the cold, one hand steadying himself, the other holding his coat close. The handcrafted miniature camera slowly moves forward and tilts slightly upward. Snowfall grows heavier and heavier into a dense winter storm, snow blowing across the frame and gradually obscuring the frozen lake. By the end, the fisherman reaches the far end of the dock, stops, and stands still for a brief moment facing the ice.
With our setting image as reference, this produces a precise, beautiful result:
Here’s where the advantage of the face swap method comes in. When we are happy with our first video generation, we can extract the final frame of this video using Flick’s extract frame tool. Using the turnaround sheet of our character we generated earlier, we can pass both images into Nano Banana Pro, and direct the model to swap the character in the final frame with our character reference, while maintaining the lighting, composition, camera angle, and setting of our initial generation. Here’s our prompt:
Use the snowy dock scene as the main composition reference and use the provided stop-motion puppet character design sheet as the character reference. Replace the fisherman standing at the end of the dock with this exact character. Match the back-view silhouette, hat shape, robe length, pale gray outer robe, white inner robe, black boots, waist belt, hanging accessories, long pole object, cylindrical container, and overall body proportions from the character sheet. Keep the character facing away from camera at the far end of the dock in the same back-facing staging as the current image. Preserve the existing camera angle, composition, dock, frozen lake, branch with faded red cloth in the foreground, snow-covered shoreline, and snow-bent reeds. Keep the Chinese folk stop-motion puppet miniature style, handcrafted materials, tactile snow, matte ice, subtle puppet proportions, and quiet winter atmosphere. The new character should feel naturally placed into the same miniature set, with the same scale, same back-facing pose logic, and the same restrained cinematic mood.
Together with our two inputs, our turnaround sheet and the extracted final frame, we use Nano Banana Pro to generated our new final frame:
Here’s our result:
What makes this method so powerful is that we can be exact about how we want the composition of our scene to look. Rather than instructing the model to generate our final video with our setting image, character references, and prompt in a single go, we split this into two passes. In the first, we create our scene, paying little attention to the character for now. Then, we generate a new final frame with our desired character, and do a second pass to generate our final video.
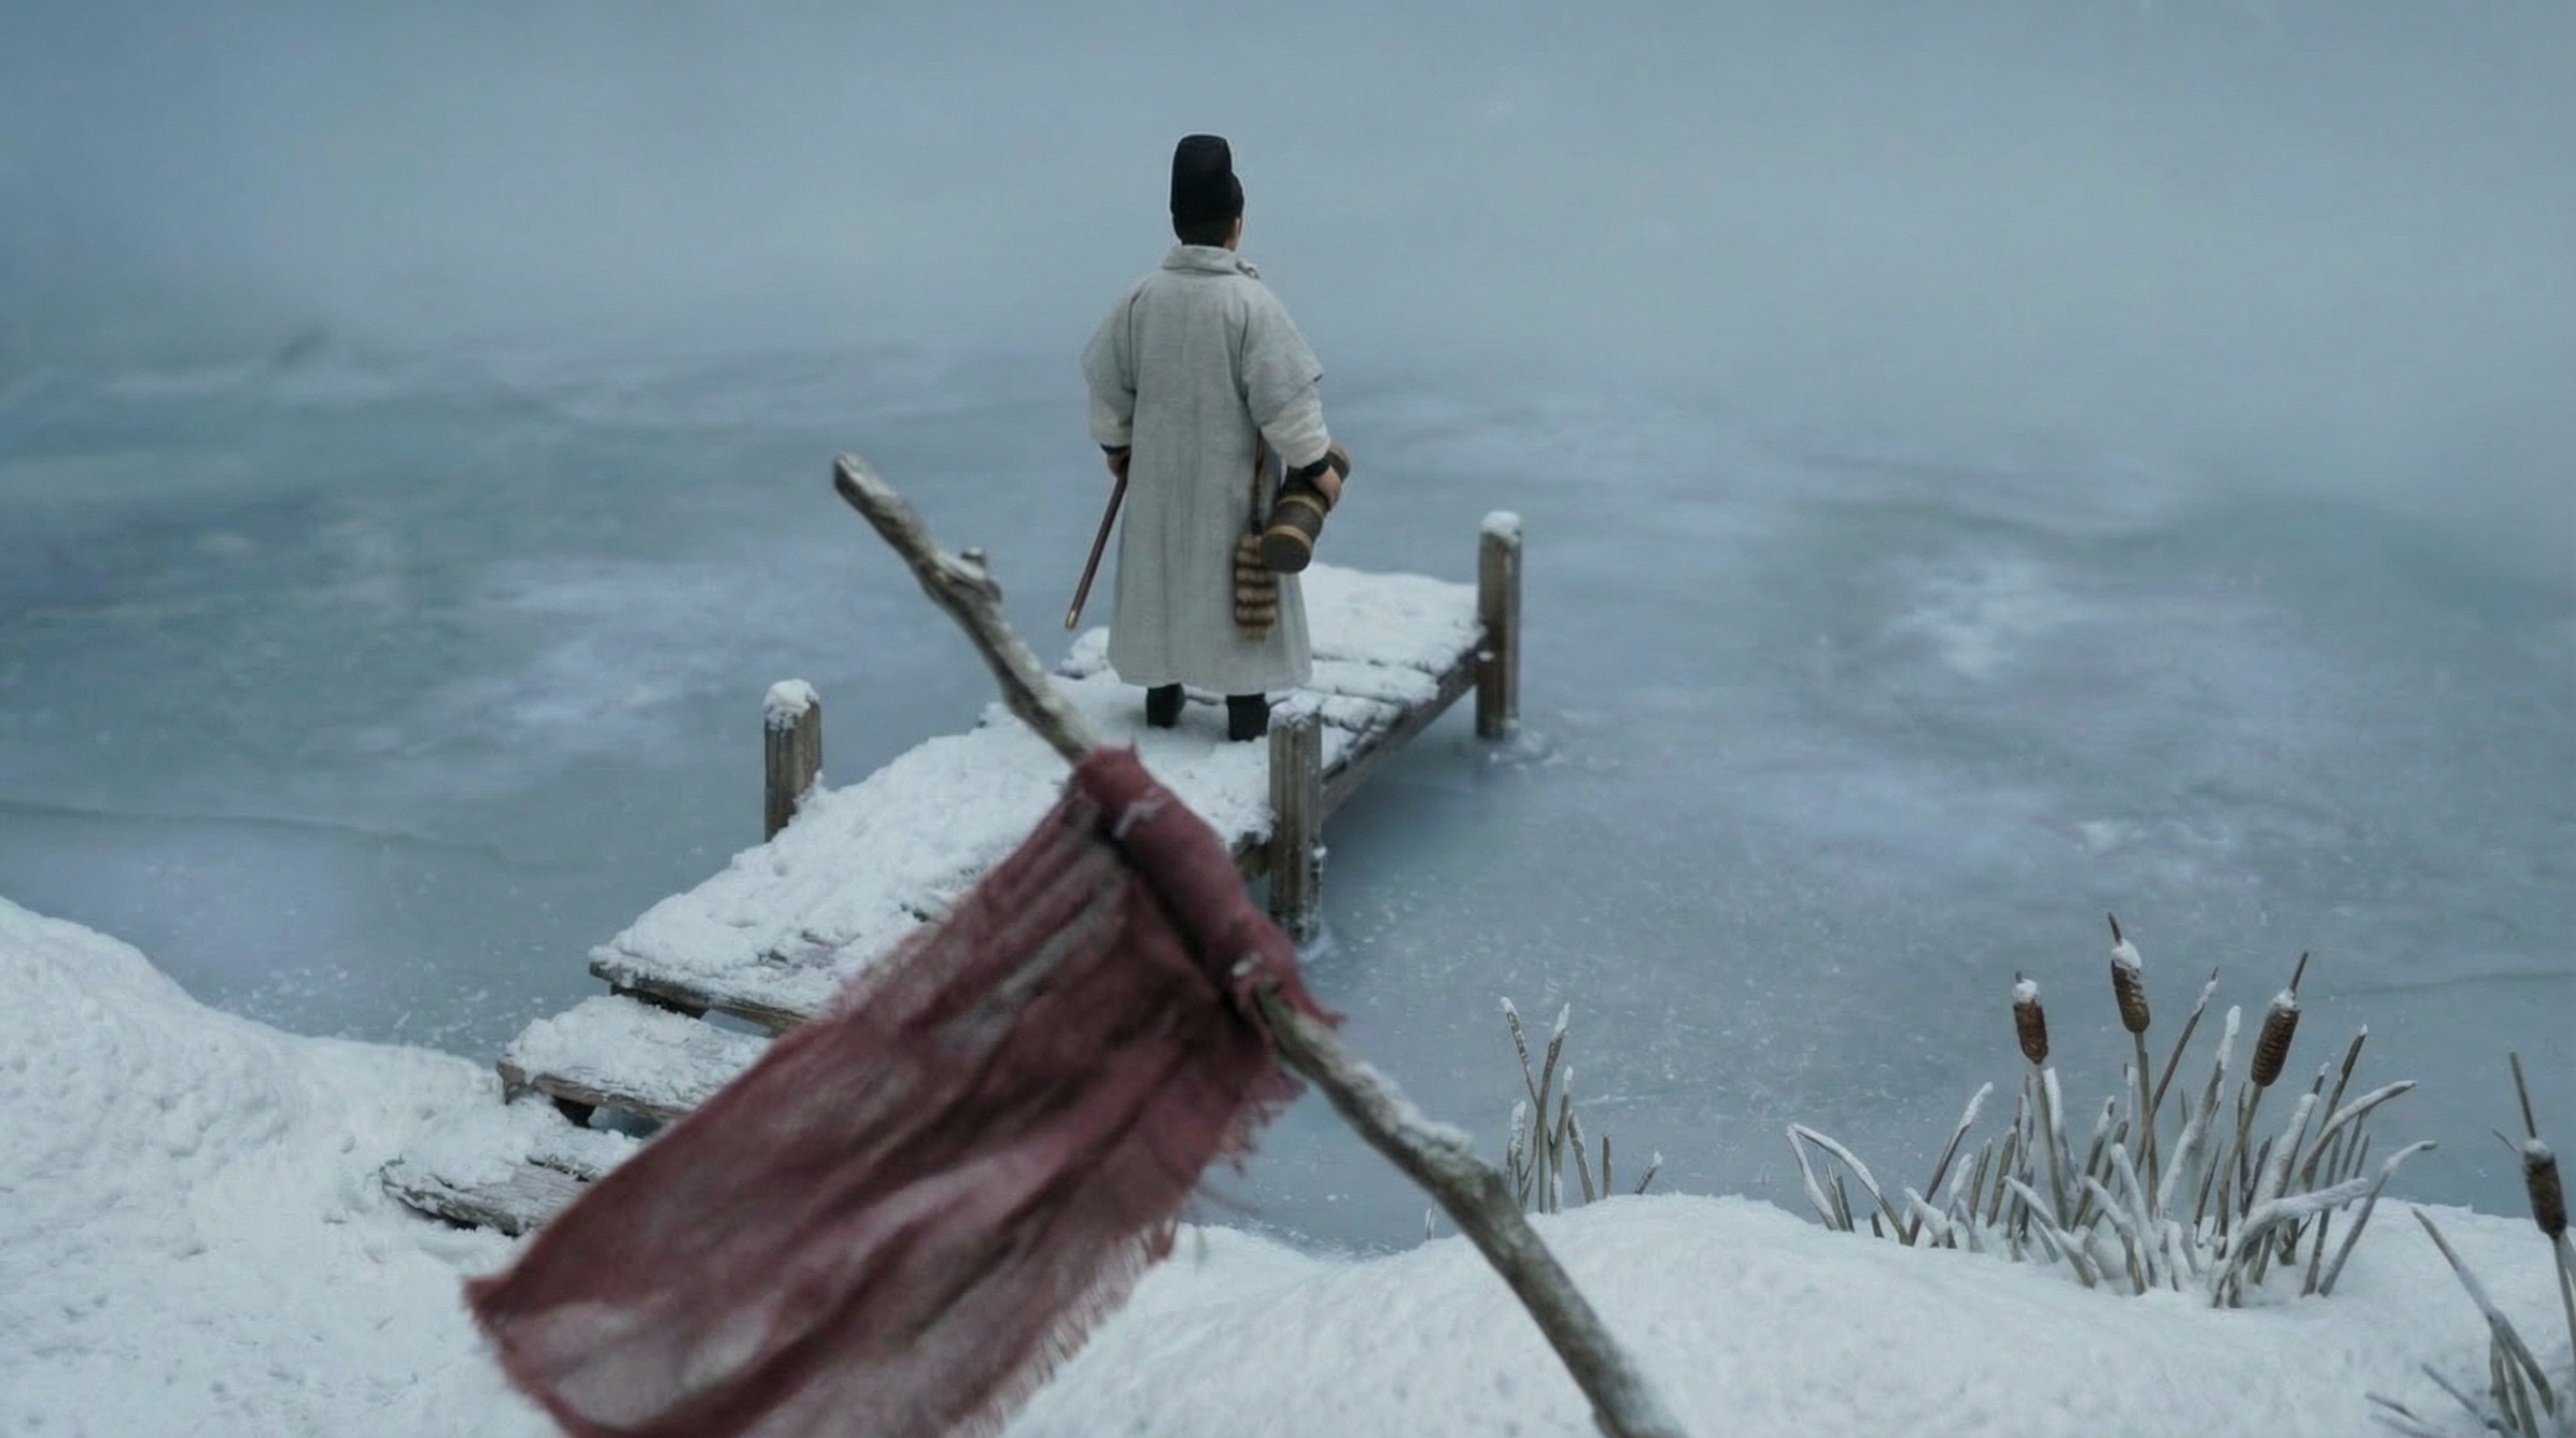
Using our setting image we created earlier as our start frame, and our new refined end frame that includes our character reference, we generate our final output. In addition to our character reference embedded in the end frame, we use a prompt to remind the model of our characters description, his movement, the setting, and our desired camera movement and background audio. Here’s our prompt:
A Chinese stop-motion puppet scholar-official in a tall black hat, pale gray outer robe over a white inner robe, black boots, with a quiver and a hengdao sword hanging at his side, walks slowly through the snow onto the dock with restrained deliberate steps. The handcrafted miniature camera slowly moves forward and tilts slightly upward. Light snow drifts gently through the frame. The frozen lake remains quiet and still. By the end, the scholar-official reaches the far end of the dock, stops, and stands still facing the ice. Very quiet atmosphere, only soft footsteps in the snow and on the wood.
And here’s our final result:
This method is more advanced, but provides extremely precise control over the composition of our scene, while maintaining exact character consistency. While it does require you to run two separate video generations with Kling or another model, which is more expensive, it saves you credits that you otherwise would waste a single imprecise video that is not to your liking.
Frequently Asked Questions
What is the best AI tool for consistent characters?
There's no single best tool — there's a best method. For most people, an img2img Character Reference workflow (like Flick's) is the fastest, most reliable way to keep a character consistent without any training. For high-volume production with near-zero drift, a custom-trained LoRA in ComfyUI is the gold standard.
What does img2img Character Consistency mean?
Image-to-image (img2img) character consistency means generating new images of your protagonist — in a new setting, with added details, at a fresh angle — while maintaining the exact visual identity of your defined character.
How can I achieve character consistency in Flick?
You supply a reference image of your character. Using the Character Reference tool, the AI generates new images that preserve the visual identity of your protagonist. Rather than describing your character in words, and simply hoping the model produces the same output twice, you hand it the reference and say, “this character, now in a new scene.”
How do I make a consistent character in Midjourney?
Use Omni Reference (--oref) with your character's reference image, and tune the omni-weight (--ow) so the model holds the identity while still following your scene prompt.
Can I keep a character consistent in AI video?
Yes. Lock the character in a still image first, then animate that image with a video tool's reference feature — Veo 3's "Ingredients," Runway's References, or Kling's "Elements." Animating from a locked still gives far better consistency than text-to-video.
Do I need to train a model to get a consistent character?
No. Training a LoRA gives the tightest possible lock, but for most projects a single good reference image with a Character Reference feature is enough. Only train a model when you're generating hundreds of shots and drift becomes expensive to fix manually.
Why does my AI character keep changing?
Because each generation is created from scratch with no memory of the last one, so small variations accumulate into drift. The fix is to give the model a fixed reference to match rather than re-describing the character in words every time.
How do I get started in Flick?
Watch our tutorial: Flick 101: Getting Started. Create your first project, complete onboarding, and begin your AI filmmaking journey!