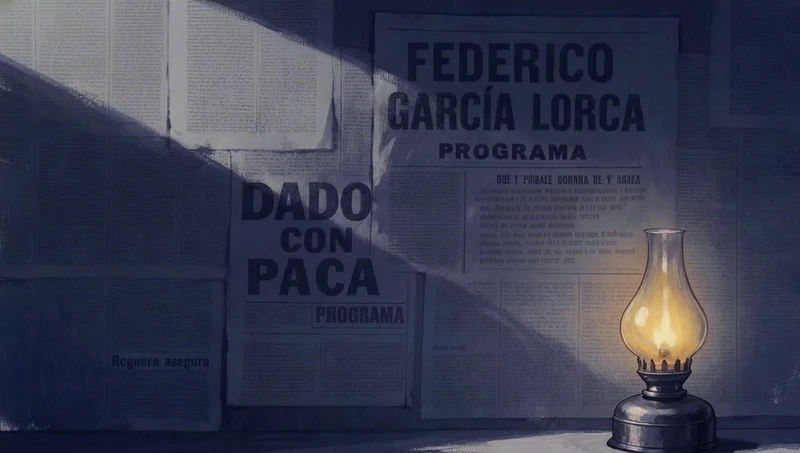
Remove: four words to clear the crows
A removal can be this short when the object is easy to name and nothing needs to take its place.
remove all the crows
Marius Jensen, director of Still Time
Paint a mask, a rough brush stroke over the part of an image you want to change, then describe what goes there. The rest of the picture stays as it was.
By Zoey Z.Last updated
Regenerating a whole image to fix one detail usually costs you what you liked about it: the face shifts, the light moves, the framing drifts. Inpainting avoids that by changing one region and leaving the rest of the picture alone. We collected 8 edit prompts that filmmakers wrote to fix single frames in 7 films made in Flick, from 4 words to 209, and 5 of the 8 spell out what must stay the same. This page shows each one with its result, explains when to paint a mask and when a written edit is enough, and walks through inpainting in Flick in four steps.
| You want to | Use in Flick | Why |
|---|---|---|
| Remove, replace or fix one object | Inpaint, with a mask | The mask fences the change in |
| Put an object from another picture into this one | Inpaint with Nano Banana 2 and a reference, or Edit & Merge | The reference shows exactly what to add |
| Change the grain, grade or brightness across the frame | Edit & Merge, with a written prompt | The change is everywhere, so there is nothing to mask |
| Change the framing, angle or pose | A new generation, or Change Angle | Most of the pixels have to move |
A removal can be this short when the object is easy to name and nothing needs to take its place.
remove all the crows

The prompt sets the tower's size and place, bans any text on it, and lists what stays, from the shoreline to the film grade.
Add a single classic California wooden lifeguard tower standing far back on the dry sand, set right up against the low grassy dune line on the distant horizon, well away from the shoreline. It should appear small and distant, placed deep in the background near the dunes, NOT in the near or mid foreground. Raised on tall stilts with a small enclosed cabin, ramp and railed deck, big sloped windows, weathered white paint with faded red trim, a small red flag on top. The tower has absolutely NO text, NO numbers, NO letters, NO signage or markings anywhere on it, clean bare weathered wood only. Keep everything else in the image completely identical: same wet sand and foamy shoreline foreground, same wide expanse of dry sand, same dunes and grass, same huge hazy sky and tan sandstorm haze, same washed out warm bleach bypass film grade and palette, same grain and dreamlike mood. The distant tower sits naturally with a soft grounded shadow, empty and quiet, no people. Cinematic wide shot.

A second image supplies the life ring, and the prompt asks for it weathered to match the metal while the rest stays identical.
Add the logo from Image 2 (the textless orange life-ring buoy) onto the metal door of the chamber in Image 1. Reproduce Image 2's logo EXACTLY as it appears, same ring design, same orange color, no text or lettering, no alterations. Place it centered on the upper portion of the door at a natural, readable size, weathered slightly to match the grimy metal and sand blasted surface so it sits believably on the door.

Keep everything else in Image 1 identical: the chamber, the big window, the "435" numbering, the sand drifts, the storm, the lighting, and the color grade. Preserve the palette: deep teals and cool greys #161E20, #253534, #1B2727, #3F5153, #545456, #777775, warm amber #F2A462 and burnt sienna #BE704A. Preserve the logo's own orange as given in Image 2.

One edit in a run of several, adding two drawings deeper in the shadow while forbidding any move of the knight.
Use the provided base image as the direct scene reference.

Continue editing from the current result.
Keep everything else in the current image unchanged.

Add two more children’s crayon drawings deeper in the hallway.
These two drawings lie flat on the wooden floor.
They sit behind the main drawing and extend farther into the shadowed depth of the hallway.
One drawing is placed in the mid-to-deep shadow area.
The other drawing is placed even farther back in the deeper hallway.
Both of these drawings are smaller in the frame than the main foreground drawing.
They must clearly read as children’s crayon drawings.
The two drawings must have different content.

One drawing shows the little knight in a swamp.
The drawing includes the little knight, green swamp ground, puddles, wet grasses, and a simple childlike fantasy setting.
The other drawing shows the little knight in snowy mountains.
The drawing includes the little knight, white snow ground, snowy mountains, a cool-toned sky, and a simple childlike fantasy setting.

Both drawings keep a children’s crayon style but in the shadow.
The paper is real white paper with slight bending and slight curling.
Do not change the position or content of the main drawing.
Do not change the little knight’s pose or position.

One region, one change and a direction, from black to deep navy or teal, with the glass highlights kept by name.
Make the porthole windows slightly lighter — change them from very dark black to a deep dark navy blue or very dark teal, keeping the glass reflection highlights. Keep everything else identical.

The prompt lists what stays first, down to the drops on the lens, then grows the cloud cover and keeps its texture.
Use this image as the base. Keep everything exactly the same: ladder position and shape, camera framing, perspective, depth of field, color grade, rain direction, and the water droplets on the lens.

Only adjust the storm clouds so they occupy more of the frame. Increase the dark cloud mass and coverage so the sky feels more filled and heavy, with less open light area visible. Keep the same cloud texture and softness as the original, just expand the cloud coverage.
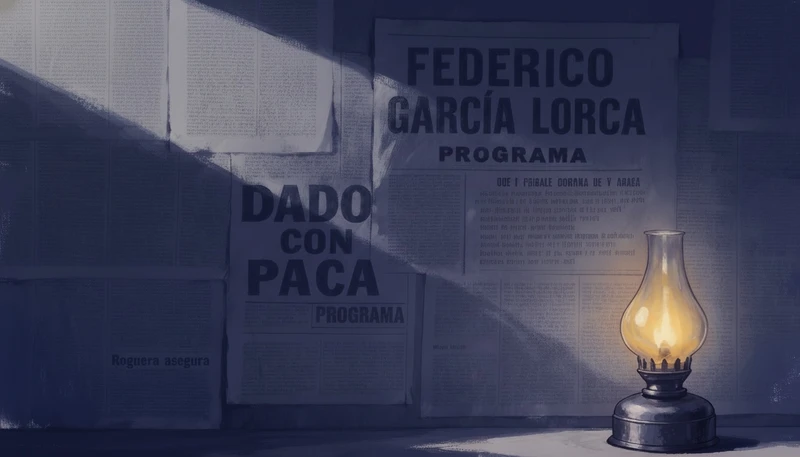
Naming the exception works like a mask drawn in words: the room goes darker and the lamp keeps its glow.
make the whole scene sliightly darker, except the oil lamp

Grain covers the whole frame, so there is no region to mask, and especially to the scenery and background, not just her carries it past the subject.
even more analog film grain, especially to the scenery and background, not just her
On a Flick canvas, open the image's menu, choose Image, then Inpaint, and brush a little past the edges of the area to change.
Use Pruna (2 credits) for a quick fix, or Nano Banana 2 (20 credits) when a reference image must show exactly what to add.
Write what fills the mask, its size and its light, then what must not change, as 5 of the 8 film prompts above do.
Check the edges against the original, and if one part is still off, edit the result again rather than starting over.
Listing what stays, even in four words, tells the model where the edit ends.
Keep everything else identical.
One change per pass makes a bad result easy to spot and undo.
Continue editing from the current result.
Keep everything else in the current image unchanged.
Without a scale and a spot, the model may put a new object front and centre.
It should appear small and distant, placed deep in the background near the dunes, NOT in the near or mid foreground.
Ask for the new part to wear the same grime, grain or grade as its surroundings, or it looks pasted on.
weathered slightly to match the grimy metal and sand blasted surface so it sits believably on the door.
When most of the frame changes, one clause can protect the part that must not, such as a light source or a face.
make the whole scene sliightly darker, except the oil lamp
Ban text, extra people or new props by name, because image models like to add them.
The tower has absolutely NO text, NO numbers, NO letters, NO signage or markings anywhere on it
AI inpainting is an image edit that regenerates one masked area of a picture and keeps the rest. You paint over the part to change, describe what should go there, and the model fills it to match the surrounding light and texture.
A mask is the area you paint over to tell the model where it may change the image. Everything outside the mask is protected, which is how inpainting can fix a hand or a sign without touching the face beside it.
Yes. Flick's Inpaint runs Pruna at 2 credits and Nano Banana 2 at 20, and both are on the Free plan. You get 100 credits when you sign up, and 200 more for joining the Flick Discord.
Yes, with a written edit: describe the one change and say that everything else stays the same. In Flick that is Edit & Merge, and it works best when the change is easy to name, such as removing birds from a sky or darkening a room around a lamp.
Inpainting changes something inside the picture; outpainting extends the picture past its edges. Flick inpaints: Inpaint takes a painted mask and fills it with Pruna or Nano Banana 2, and Flick has no outpainting tool.
Attach the second image as a reference, then say where the object goes and how it should look there. In Flick, Nano Banana 2 inpainting takes reference images, and Edit & Merge combines several images with a prompt.
Usually the mask is too tight, or the prompt says nothing about light and texture. Paint a little past the object's edges, and ask for the new part to match the scene's grain, colour grade and shadows.
Flick's Inpaint edits still images. To change a shot, inpaint its start frame, then animate the edited frame with Image to Video.
Paint over what is wrong, describe the change, and keep everything you liked about the image.
Try for free, no credit card required.
Ask AI about this page:ChatGPTPerplexityClaude