in ’twixt vows behind the scene
Sep 2026
1. HOW TO AVOID AI SLOP
Everyone is trying to make videos, but they don't tell you how to avoid making AI slop. What I'm about to tell you is the way.
Hi, my name is Jaime, award-winning AI filmmaker and the director of IN ’TWIXT VOWS. Today, I'll teach you 5 tricks to make your film feel less AI.
2. REAL-WORLD REFERENCES
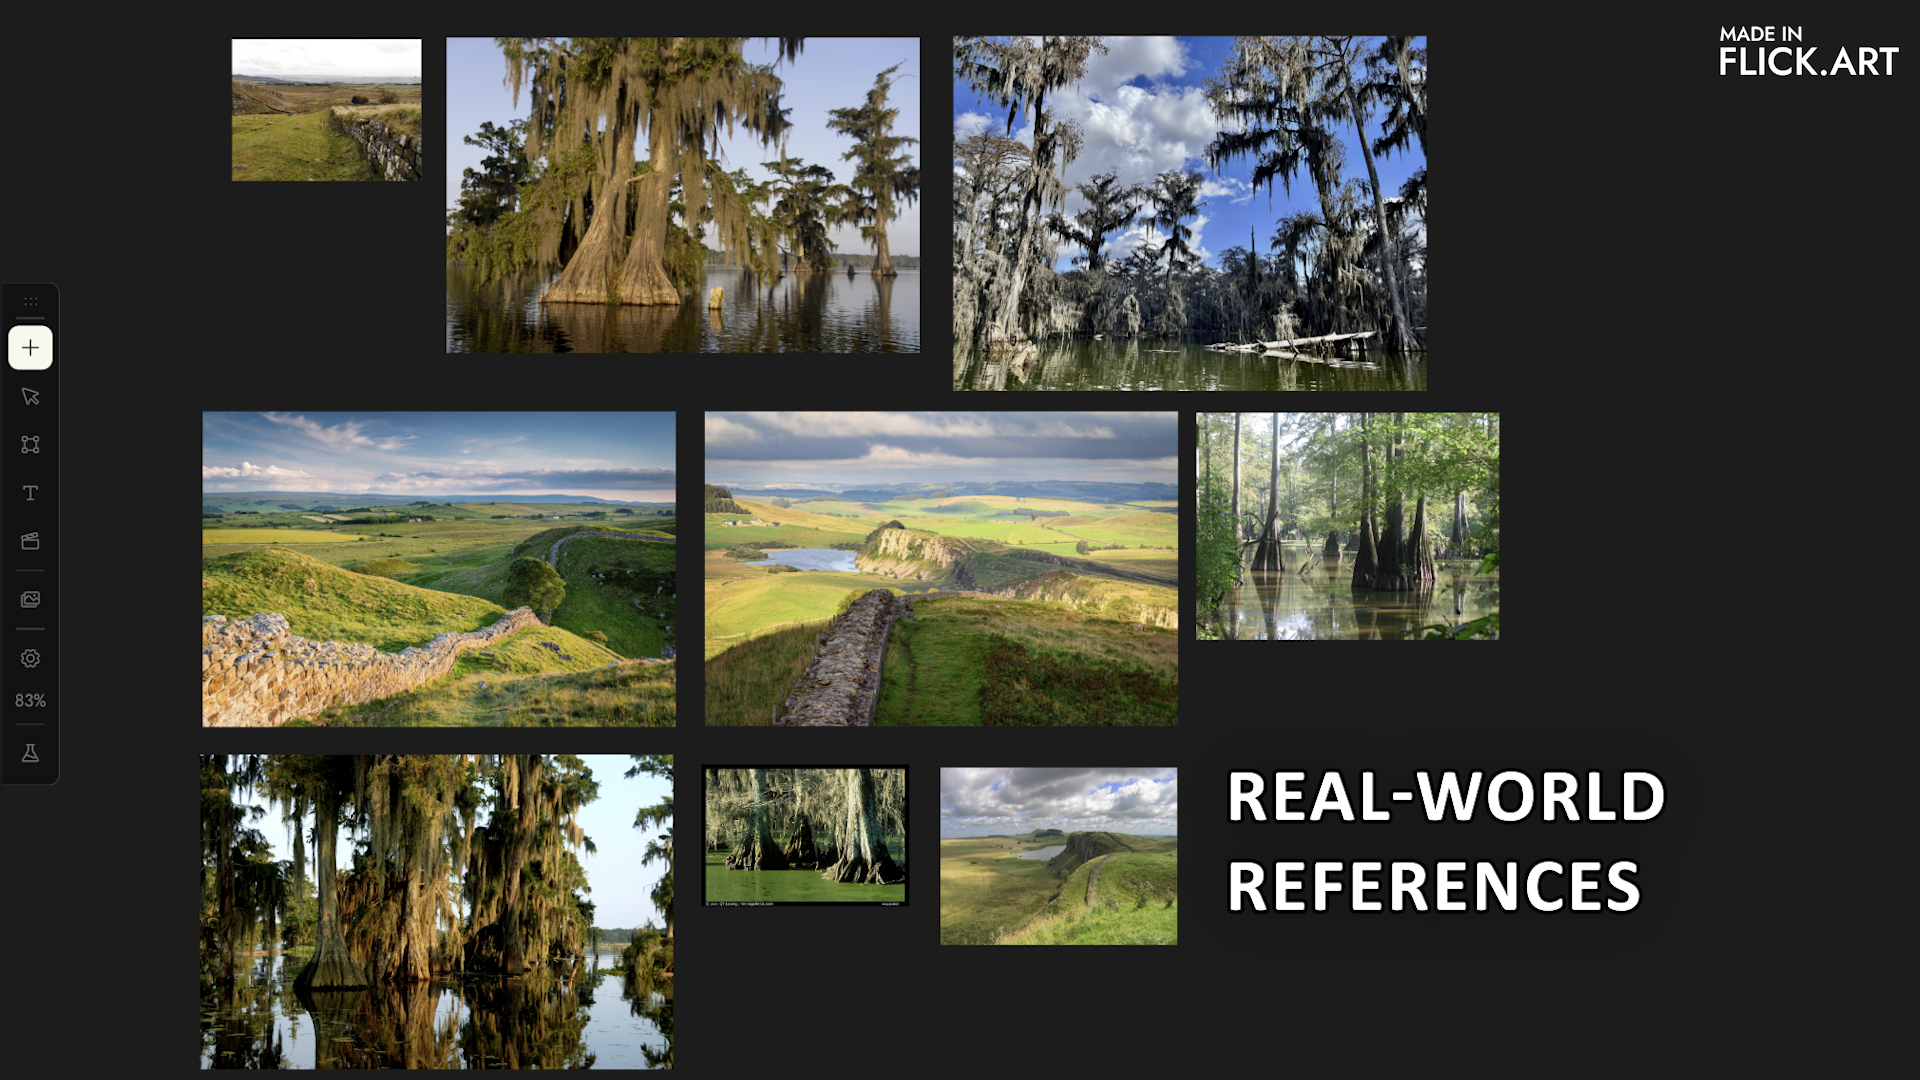
When designing environments and characters, I start with real places, objects, and clothing references. The outpost, for example, draws on Hadrian's Wall. The research gave us specific design choices. Exposed dark rock, shallow soil, short grass on the ridge, and denser vegetation in the sheltered valley below.
I then ask the agent to compile that research into an environment handbook covering terrain, vegetation, materials, and lighting. Whenever I generate something happening in that location, I have the agent follow the handbook strictly when writing the prompt.
And here's something I really want to emphasize: don't write the prompts yourself. Have the agent write them, then review and correct them yourself.
3. MODEL PROS&CONS
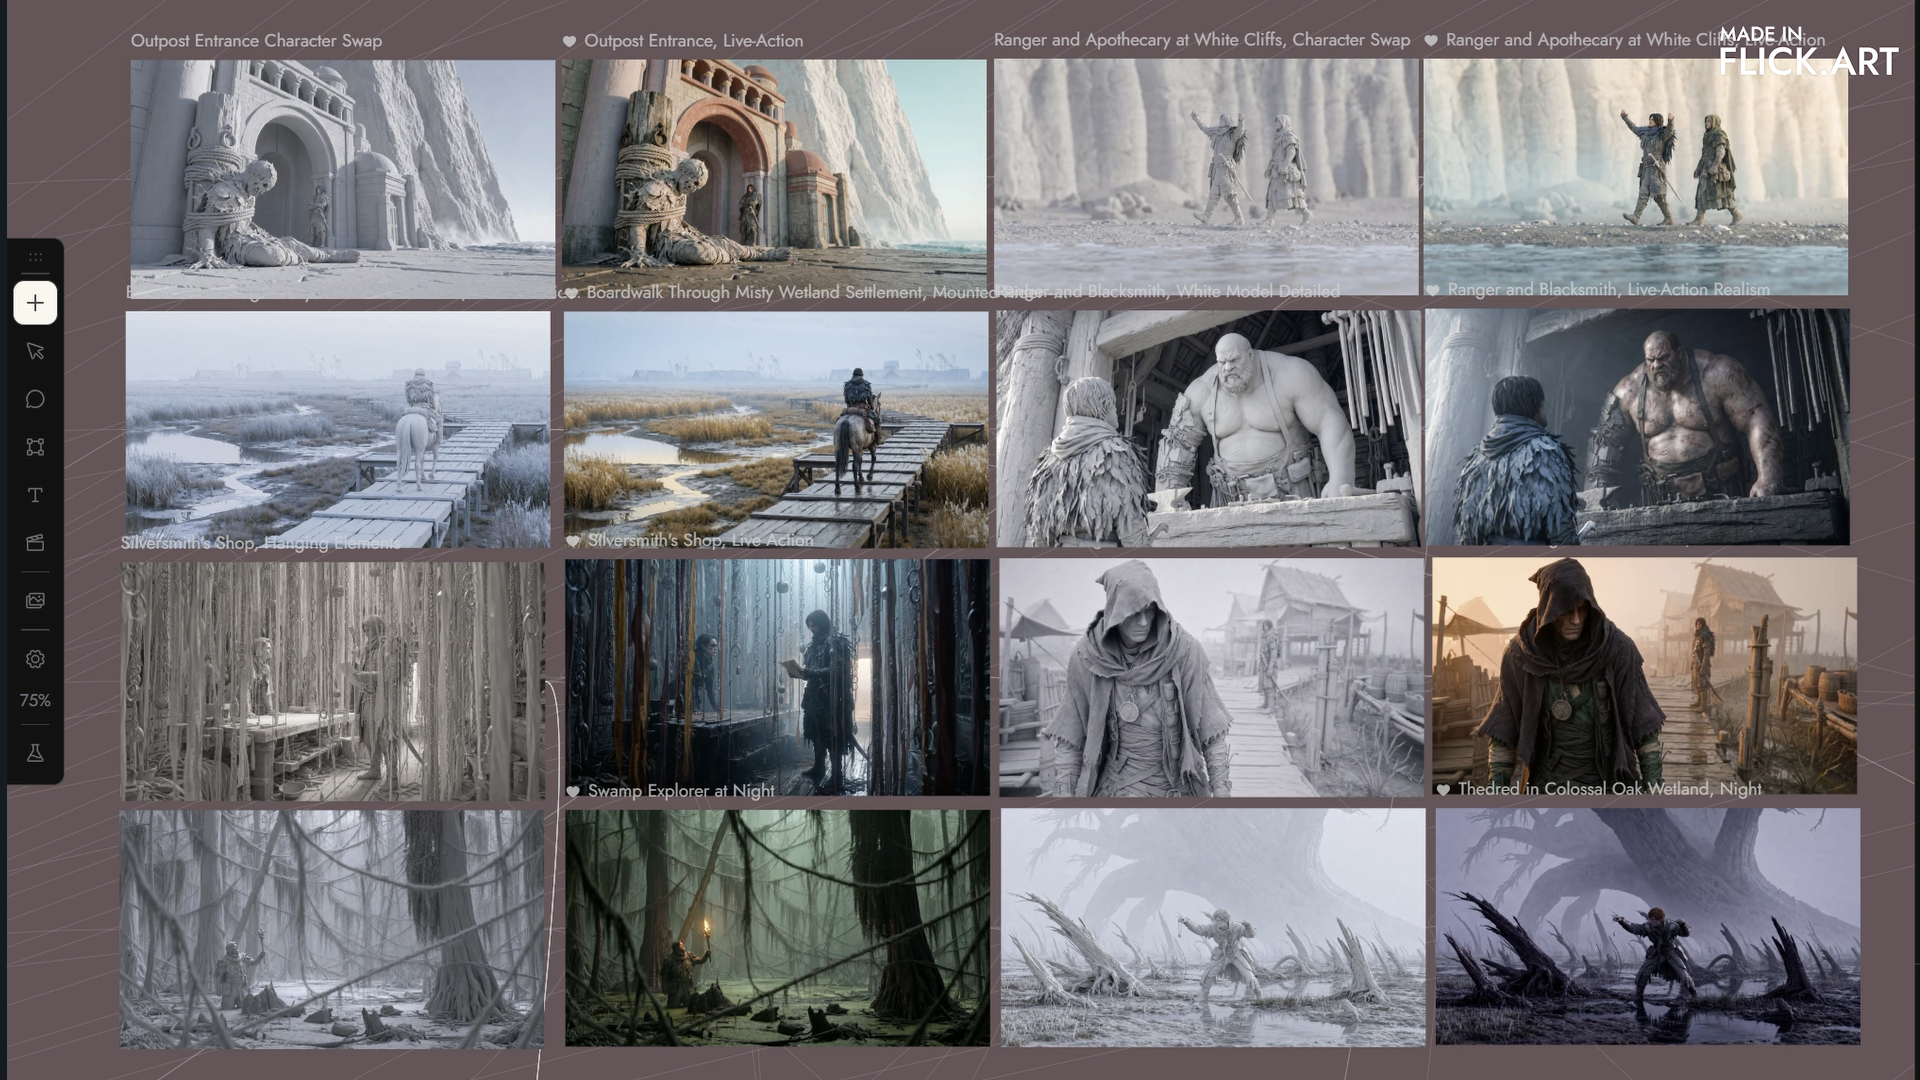
Once the design is established, I work on making the still feel photographed. For my final still renders, I use Nano Banana Pro. Midjourney is a great ideation tool. GPT Image 2 is the strongest at understanding spatial relationships. We can use Midjourney or GPT Image 2 to create black and white sketches and work out the composition. Then use Nano Banana Pro to turn them into photorealistic frames.
Here are several key rules from my prompt cheat sheet.
First, lock what's already established in the references.
Second, describe only the changes and missing information.
Third, replace vague style words with visible instructions.
Let me show you how that works in this shot.
I started with a clay-style composition image generated in GPT Image 2. In my experience, it handles spatial relationships well. Keeping this stage in a white clay style also helps me avoid the unwanted blotchy textures I sometimes get in its finished images.
Here, I'm working out the camera angle, the 2 characters' relative scale, and their positions around the counter.
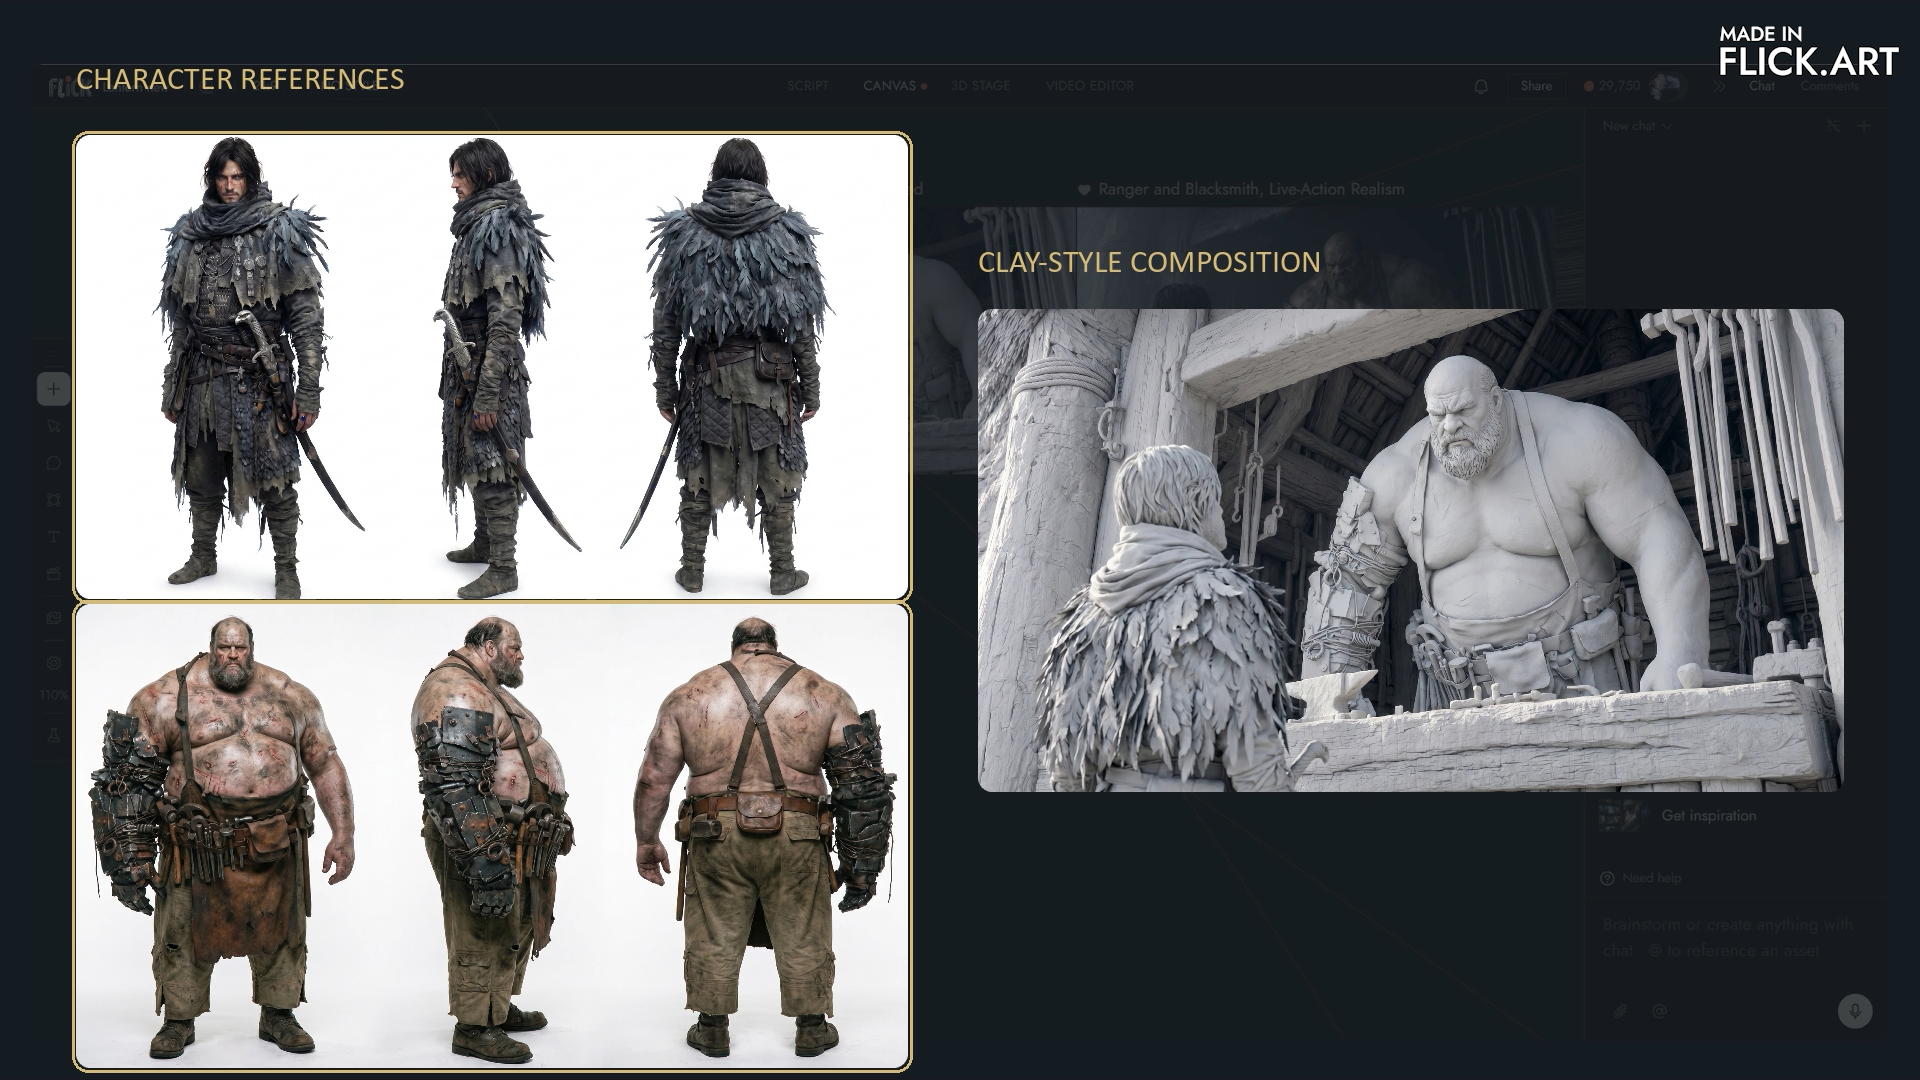
I'm leaving the final material rendering for the next step. I then gave Nano Banana Pro 3 images: the composition image, and a separate reference for each character.
They have different jobs.
The base establishes the shot. The character references establish appearance.
That's why the prompt starts with use @image1 as the direct edit target. I then specify that the composition, camera position, framing, spatial relationships, character placement, and scale must remain unchanged. Instead of describing the whole room again, I'm telling the model which existing decisions to preserve.
Then I define the transformation.
Live-action realism is the overall goal, but most of the prompt explains what that should actually look like.
Take the lighting. I don't just ask for cinematic light. I specify bright, foggy afternoon daylight coming through the doorway. The blacksmith's doorway-facing surfaces should be brighter, while the surfaces facing into the workshop fall into deeper shadow. Behind him, the interior stays dark, with a fast falloff in light. Those are concrete relationships I can check in the result.
I also specify a muted cool blue-gray palette, with a slight gray-violet cast in the shadows.
The same applies to materials. I ask for aged wood, aged iron, grime, and damp surfaces. On the blacksmith, I specify realistic skin, beard, and scar detail while keeping skin, leather, and the metal arm clearly distinct. I'm changing how the existing objects are rendered rather than asking for more objects or more detail everywhere.
Next, I specify focus. The blacksmith's face and upper body are the focal subject. The foreground man, nearby doorway, deeper workshop, and hanging objects fall out of focus. But the blacksmith should be the clearest part of the image, not unnaturally razor-sharp.
Finally, I ask for slight focus imperfection. Subtle grain and sensor noise, mild lens softness, and slight chromatic aberration. These are restrained finishing details, not a substitute for lighting and materials.
Now compare the base with the final image. The basic composition is preserved, while the lighting, materials, and depth of field create the live-action look.
That's the division of work. The references establish the composition and characters; the prompt directs the transformation. Give the sheet to your agent, let it help write the prompt, and review both the instructions and the result yourself.
4. CAMERA & SPATIAL CONTROLS
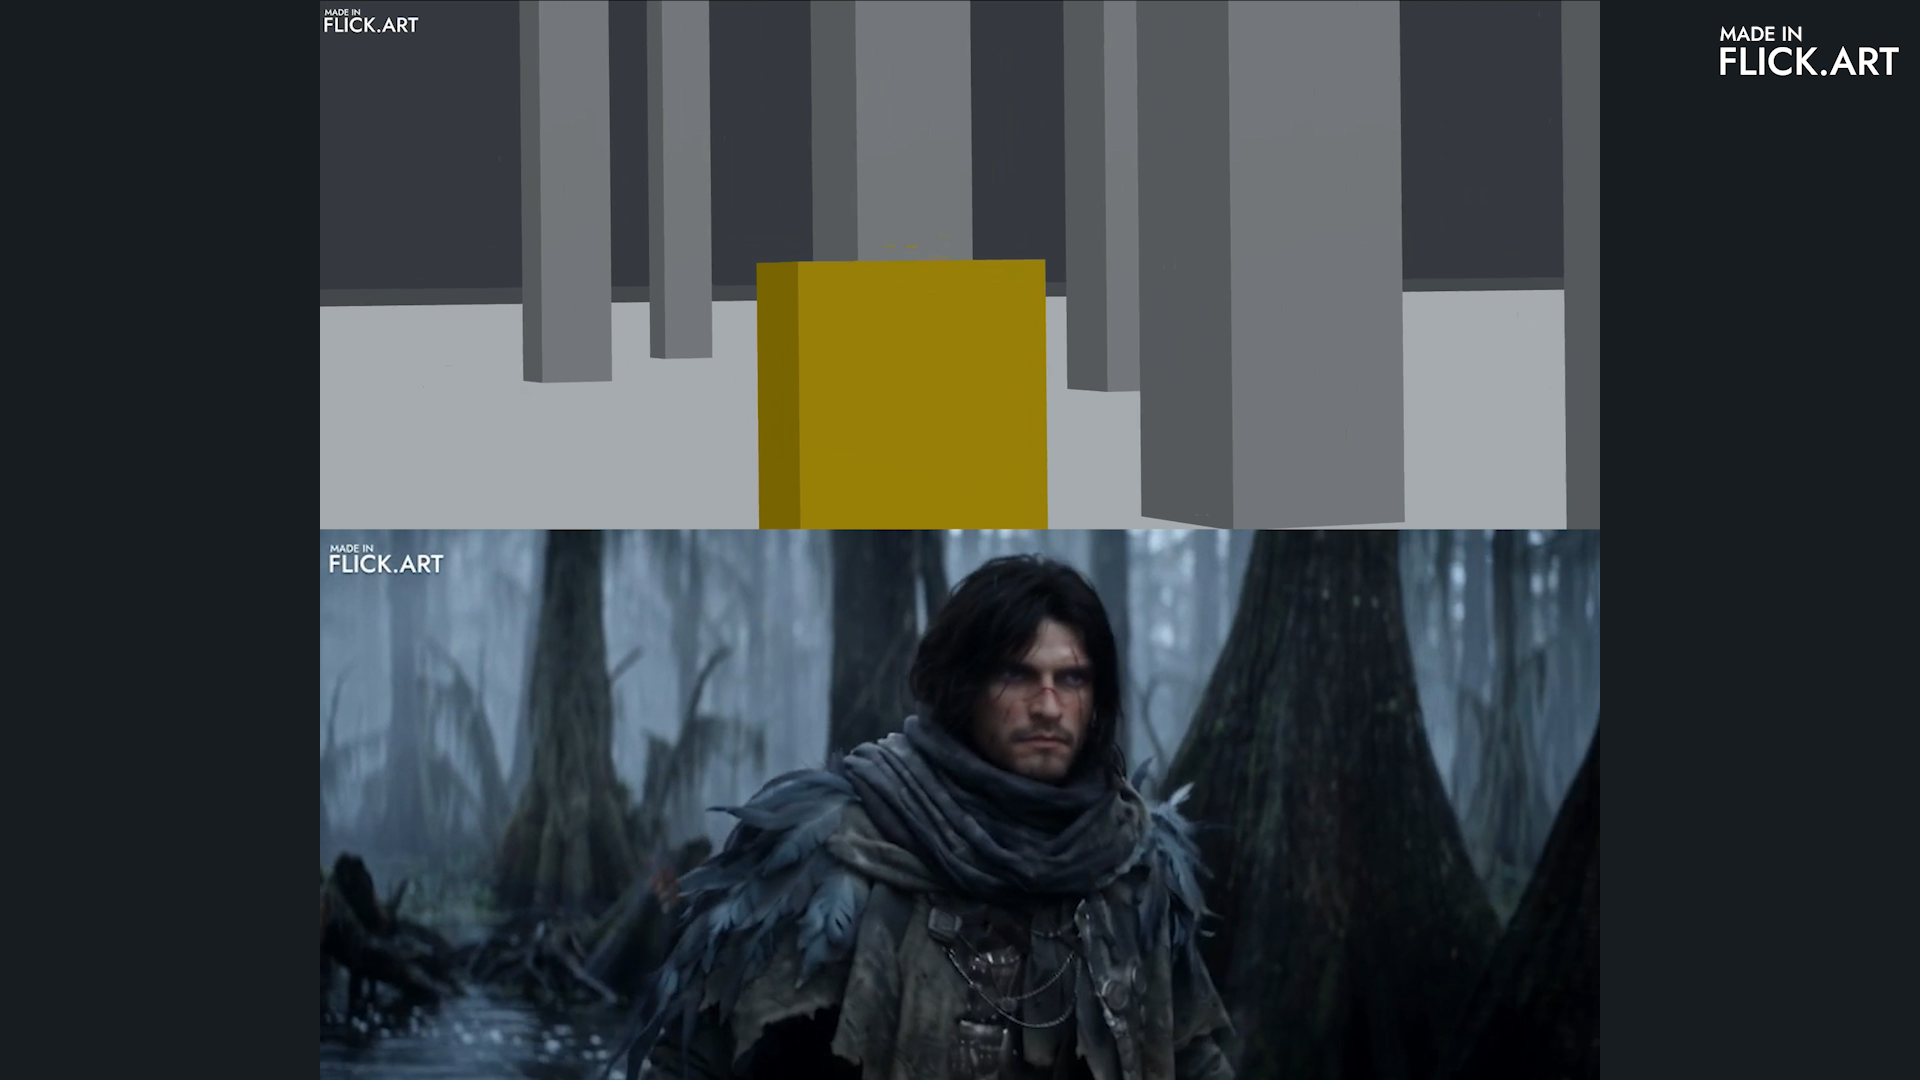
Sometimes a prompt on its own isn't enough. If you want really tight control, you can use the 3D Stage built into Flick. I always try to solve things through prompting first. But for this shot, I needed the camera to turn exactly 90 degrees, and the prompt just wasn't giving me the movement I wanted.
Start with your scene image on the canvas and click To 3D Stage. This opens Flick 3D Stage, where the agent automatically builds a scene based on your image.
Once the scene is ready, you can add your camera movement. For this shot, I first set the camera to follow the character. Then I add keyframes to rotate the camera 90 degrees. That gives me the movement I wanted while keeping the character and environment in the same consistent space.
Next, I record the camera preview and click Send to Canvas.
Back on the canvas, I use that clip as a video reference for Seedance. Instead of relying on a written description alone, I'm showing it the camera movement and spatial relationships I want it to follow.
You don't need any prior 3D experience for this workflow. The agent builds the scene for you, and you can even set up the camera movement by describing what you want in the chat.
5. DIRECT PERFORMANCE
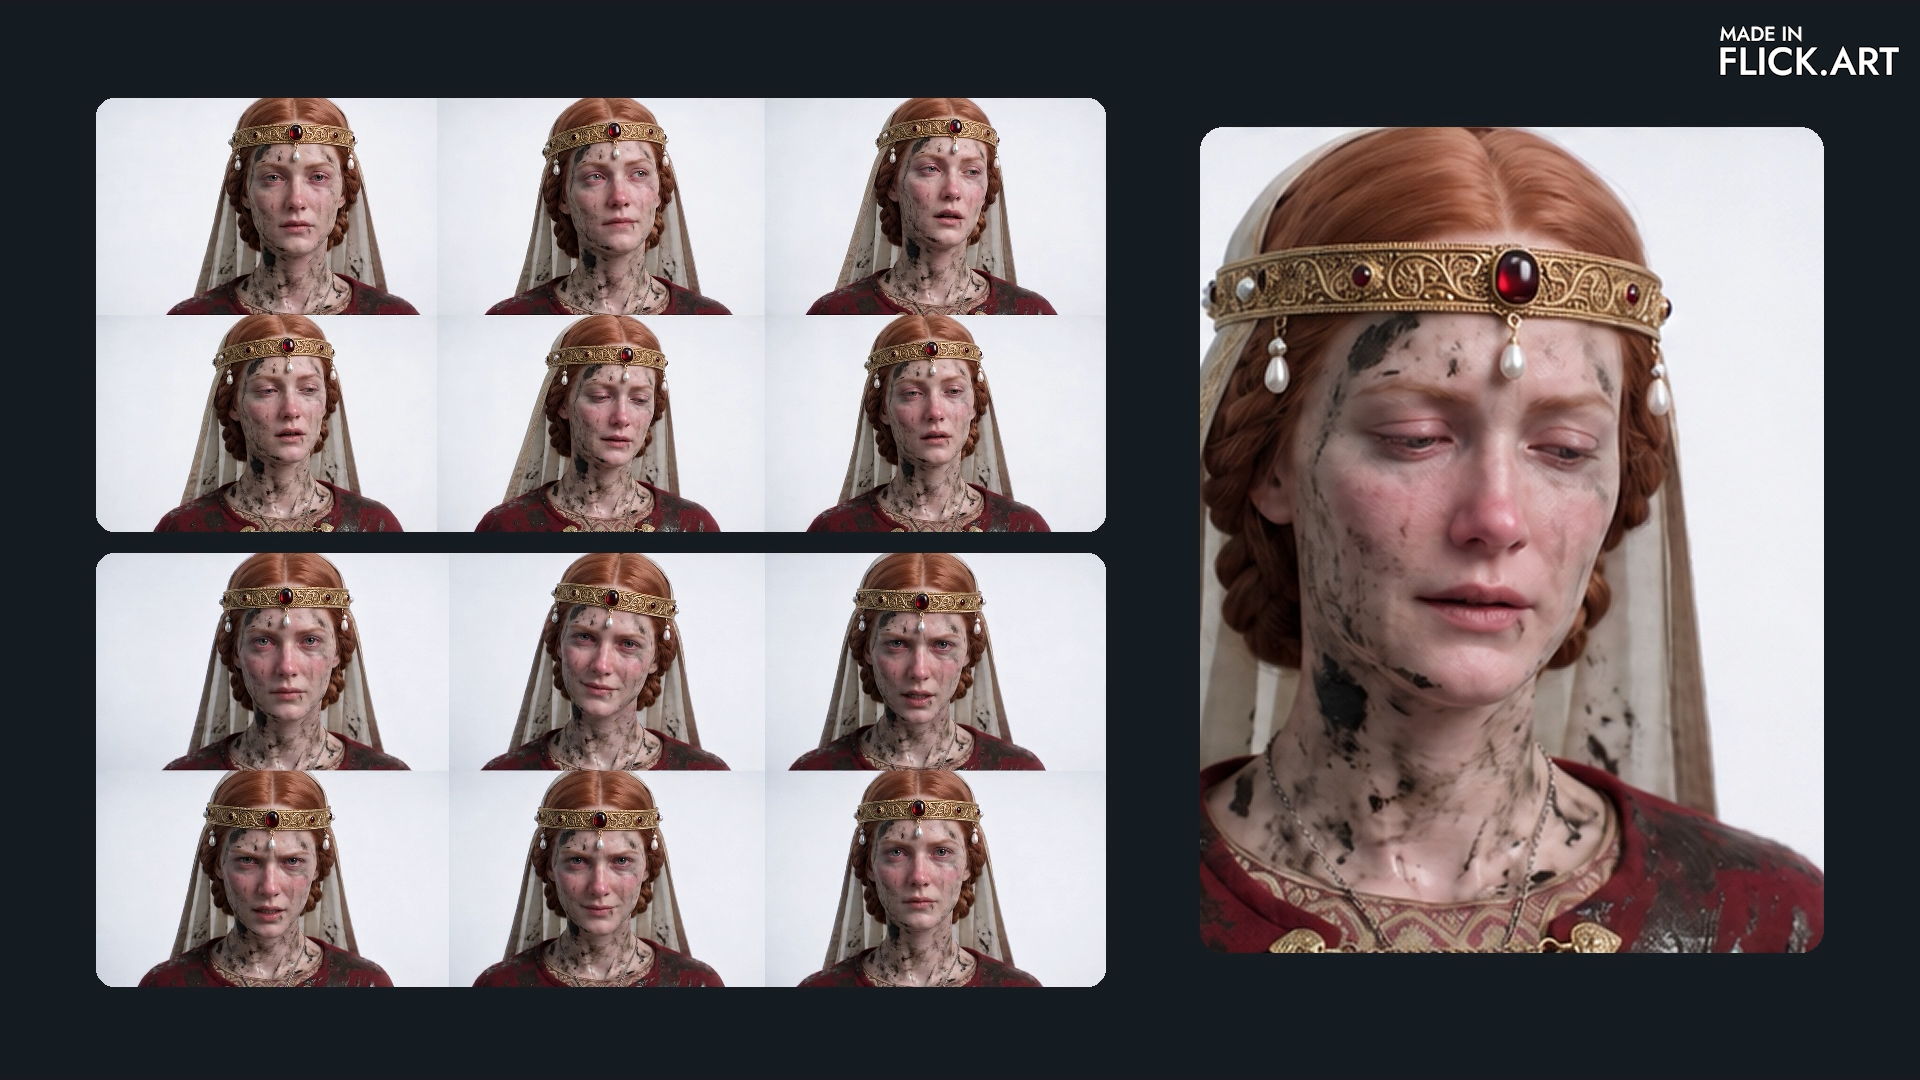
I think we're all tired of those wildly exaggerated AI performances. The problem isn't that AI can't deliver a good performance. It's that we haven't directed it carefully enough.
That starts with long conversations with the agent about the characters, their personalities, their circumstances, and what they want. We work out how they would respond, then translate that into behavior we can see and hear.
If you only describe the emotion in an abstract way, it will often give you a generally sad result— crying, trembling, maybe a heavy expression— but that still may not match the character's actual state.
For this scene, Lady Caerwyn isn't just sad. She is cold, exhausted, grieving, and still trying to keep the song going. That changes everything.
So instead of writing sing sadly, I break the performance into specific behaviour. She can only sing a few words at a time. Her breath interrupts the phrase. She pauses. A tiny restrained sob slips out. Then she tries again with a very small inhale.
I also describe how that emotional state affects the body. Her fingers tremble on the amulet. She tightens her grip slightly, and a shiver travels through her shoulder.
Once the emotion is translated into actions, timing, sound, and physical reactions, Seedance can give a performance that feels specific to her.
6. CHOREOGRAPHY
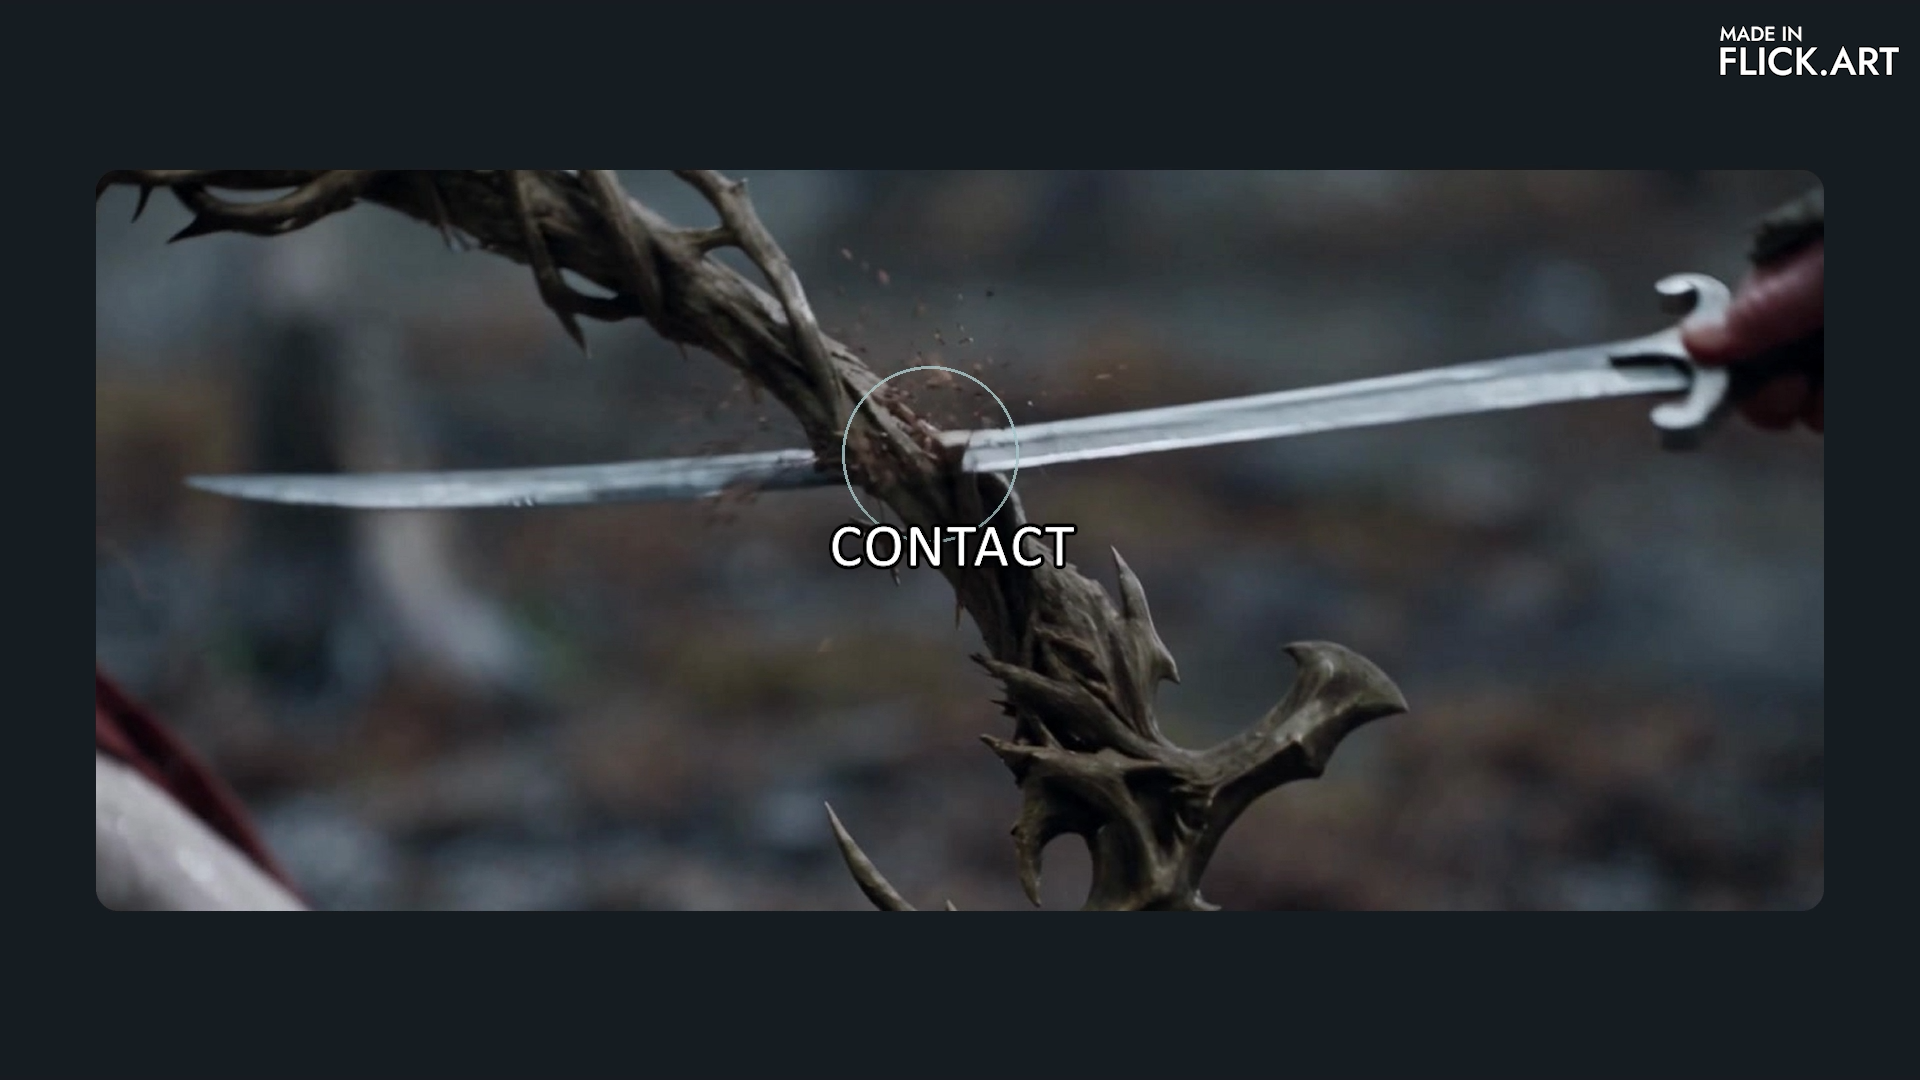
For action scenes, I break each move into contact, force, reaction, and the next movement. I also give those beats a time window.
If I want 3 strikes in 1 second, the agent needs to describe each strike, its target, and the response within that second.
But again, you don't have to write all of that yourself. You can just tell the agent, his attacks are extremely fast. He delivers 3 consecutive strikes in 1 second, so make sure the timing reflects that.
7. ENDING
All the guides I mentioned for making stills look less AI-generated, directing believable performances, and designing action scenes are available on the Flick blog. You'll find the link below.
Just give these documents to your agent and ask it to follow the guidelines when writing your prompts.
These are the choices that helped me make IN ’TWIXT VOWS feel believable, from the environment to a single hesitation.
Thanks for watching. I hope they give you a few ideas for your own film.